BOM
***************
Click for 2024 Block of the Month Game - April
***************
Click for 2024 Block of the Month Game - March - “III”, as in “3”, or “Three”
***************
Click for 2024 Block of the Month Game - February - Confetti Quilt
***************
Click for 2024 Block of the Month - January - red hot Cocoa
***************
Click for 2023 Block of the Month - Row Your Quilt
***************
Click for 2022 Block of the Month - Anything Goes Modern DIY BOM
***************
OLD BOM Information
Every month a different block. Make one or more and you can win them all!
Please send BOMs to Cathy for monthly virtual raffles.
Send about 4 days before the meeting to make sure they arrive on time.
One stamp delivers one block. More postage is needed for more blocks.
May 2021
Let’s try this again. We need more blocks to make the BQE raffle quilt - HELP!
This is a multipurpose assignment in many ways -- skill builder, stash buster, fundraiser and more!
The SFMQG needs to create blocks for a quilt to be raffled at the Broward Quilt Expo scheduled for October. This BOM will be devoted to that task.
We are taking advantage of the free Organic Diamond pattern available on the Modern Quilt Guild website.
Here is the link, but you will need to log in to your MQG account to access it:
This comes with two special requests. Please make two blocks so we have enough for a large quilt.
Mail to CathyW - her address will be in the mail sent to membership.
Anyone willing to assemble the quilt top should email Cathy.
Charlotte has volunteered to Big Stitch Hand Quilt it.
Details:
Fabric: six vibrant solids. This block is fat-quarter and scrap friendly. The longest block edge is 10.5 inches long.
That said, it can be a challenge. The block is two rectangles sewn together. The hardest parts for me were the cutting and nesting the seams to match the identical fabrics in the center slash/spotlight slice. The pattern offers a paper-pieced pattern for half. (I don't paper piece well at all, so I cut to the pattern.) Also, directions for the other half, a single flying goose, are a little spare. I ended up cutting a triangle that was 10.5 inches long and 5.5 inches tall with a 45-degree angle for the sides. For the two small triangles, I cut triangles that are half of a 5.5-inch square in different colors.
The pattern says you will end up with an assembled 10.5-inch square. I didn't. When done, send as is without a final trim. A little more than 10 inches may be needed.

April 2021
Rays block to show in April and deliver in May.
This is an either-or, scrap-friendly block finishing at 8.5 inches with some thinking required. Attachments show a paper-pieced version and a template version. A third option is do-it-yourself. The attachments printed for me with the one-inch size box printing at one-half inch. Please blow it up to one-inch to piece it or use templates. The side triangles on the attachments are not the same size. OR plan a block where the diagonal measures 12 inches corner to opposite corner and add triangles to get to an 8.5-inch square. (This may be the easiest option.) The second block is an extreme variation showing you can piece any of the three main pieces. Colors are the same as the BQE quilt --bright and vibrant solids.


March 2021
BOM to show in March and members mail in April.
Monochromatic Block
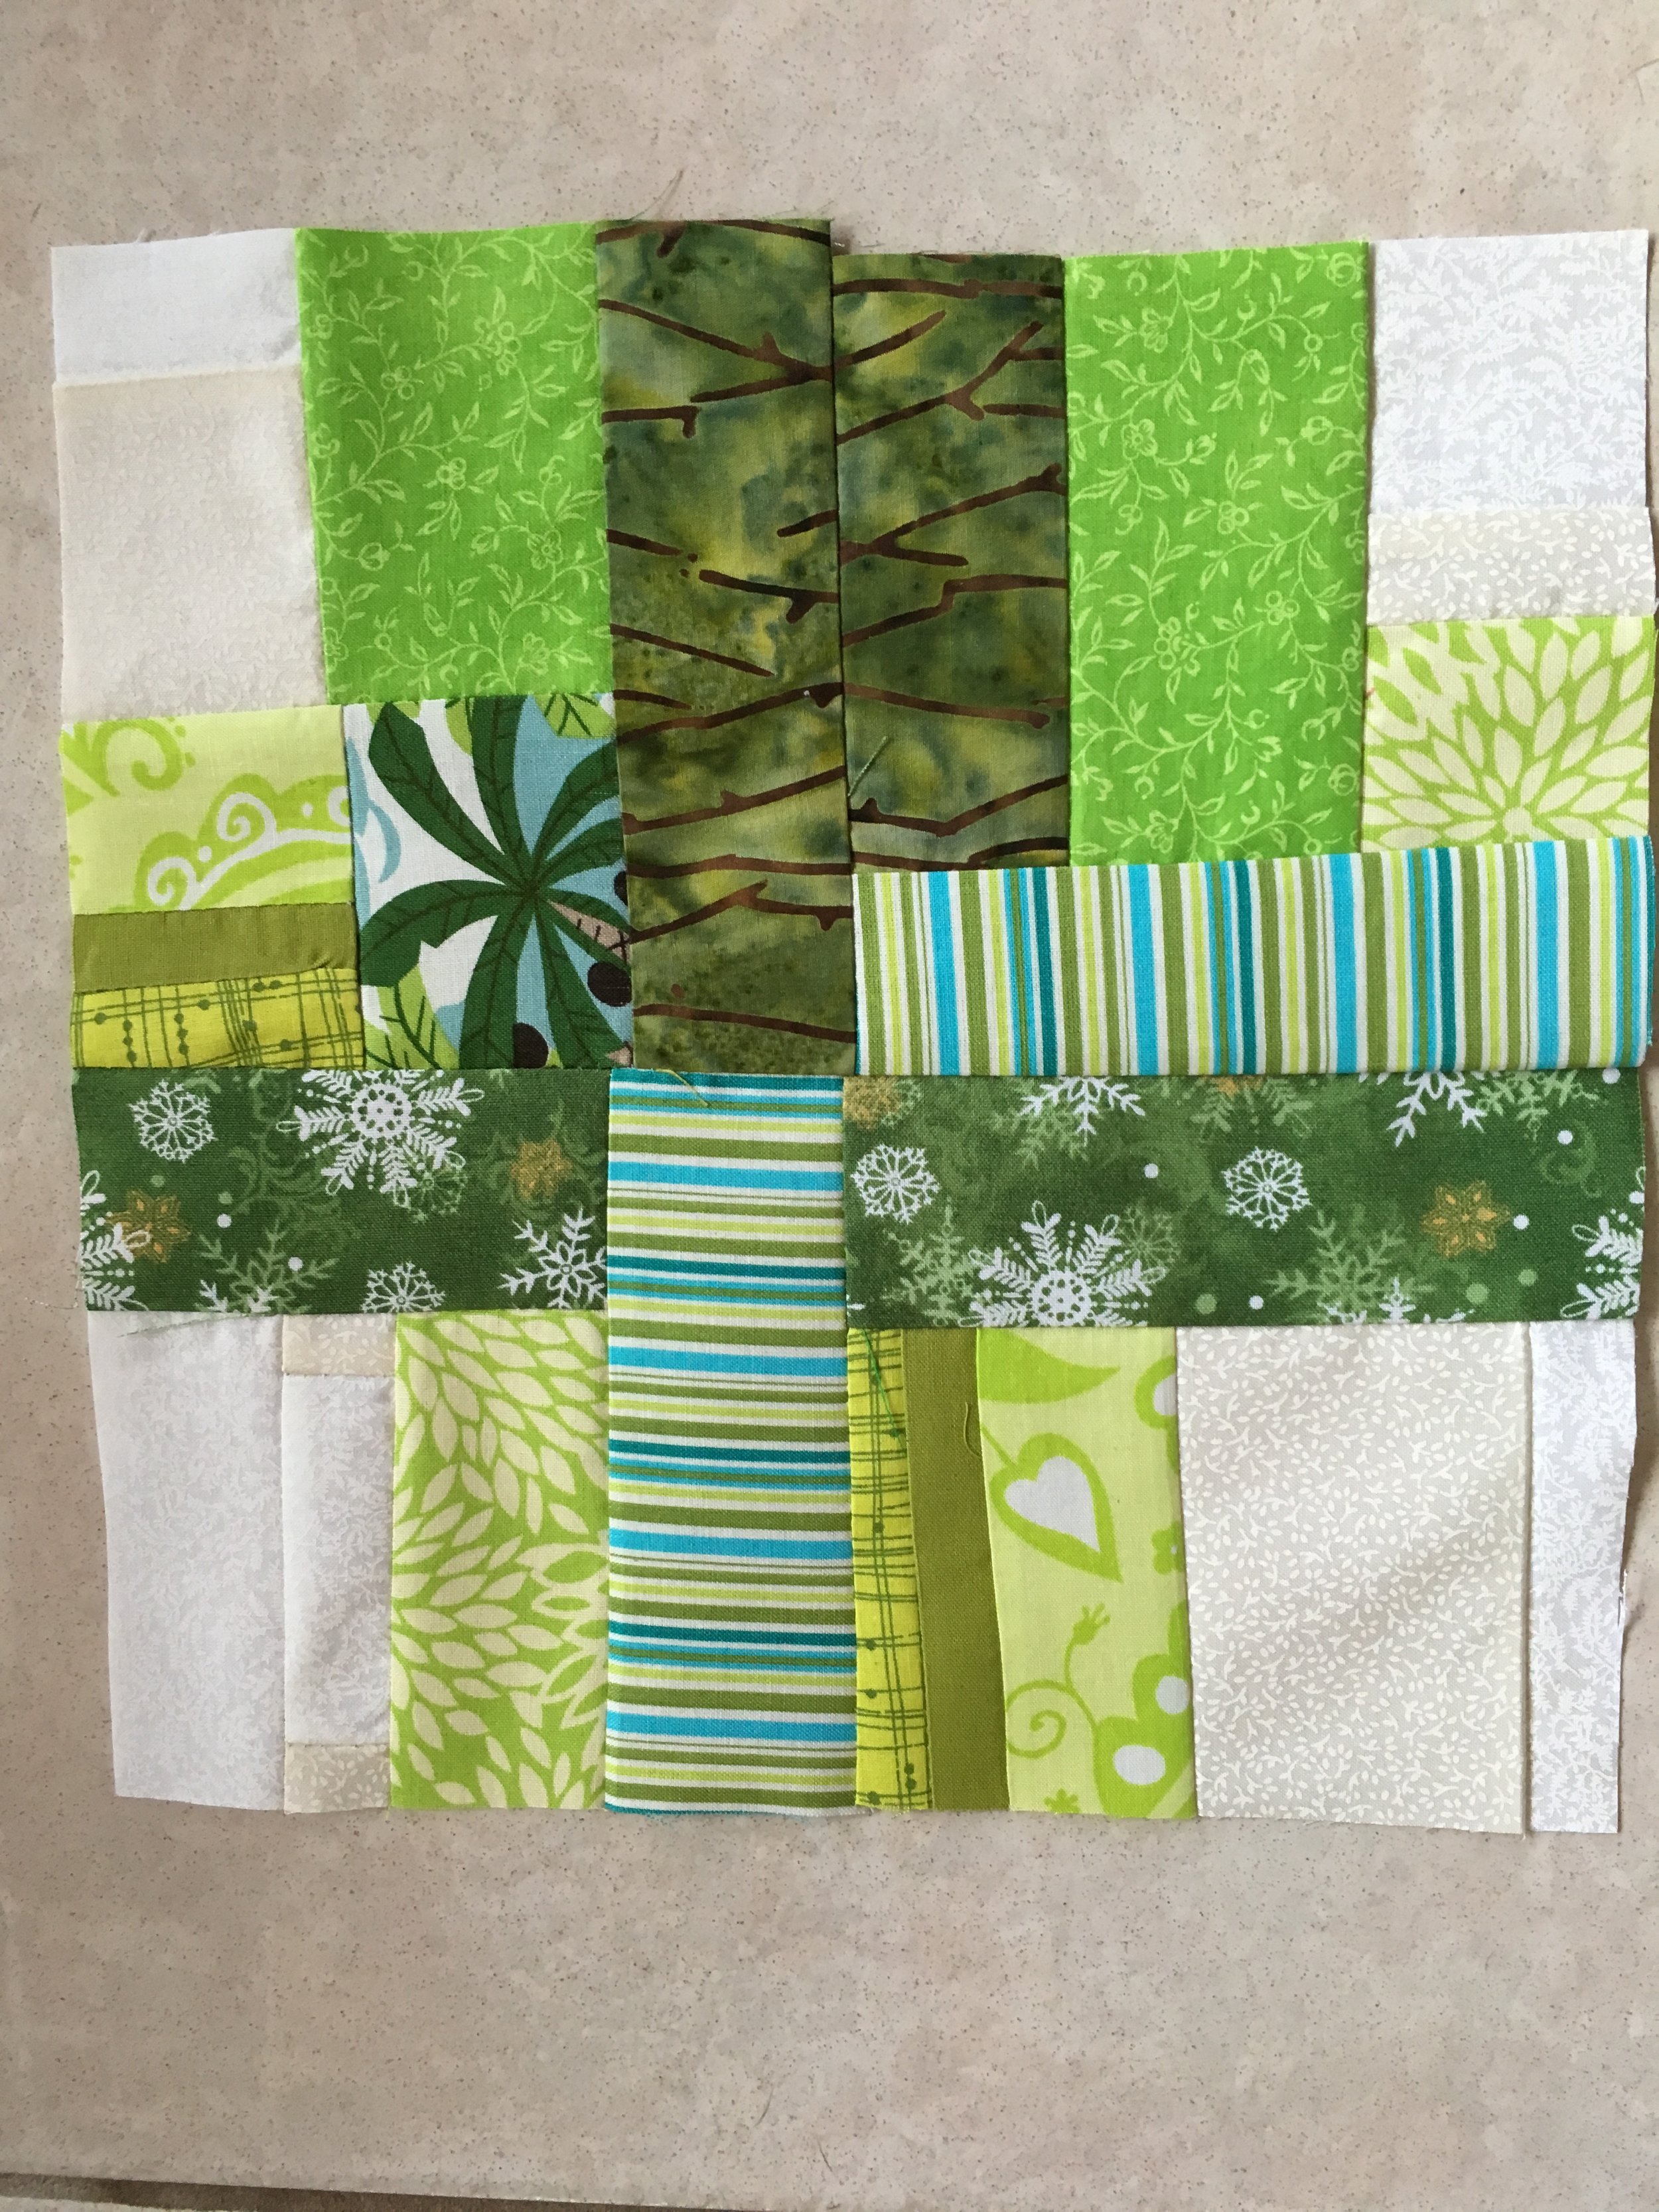
The inspiration for this block came in a quilting email, and I'm extending the monochromatic look to the sides. This block is charm pack and scrap friendly.
Pick a color, any color. Pick 2-5 monochromatic fabrics, including a solid or reads-solid fabric for the edges. In the photo, the white-dominant block uses 5 fabrics (four prints and one solid), and the purple uses 3.
For the center prints, pick 2, 3 or 4 5-inch blocks. With 2, cut one on the diagonal. With 3, cut one on the diagonal, and you will have two leftover triangles. With 4, cut all on the diagonal. Sew 2 half squares for the center square, or use a 5-inch square. For the squares on each side of the center sew one print triangle to a solid triangle, and repeat paying attention to the desired angle so the prints look like a wide V. Add 5-inch solid squares on the outer edge.
You will finish with a long strip measuring about 4.5 inches by 23.5 inches. The width and height are flexible for the raffle winner.


February 2021
BOM to show in February and members mail in March.
This is a multipurpose assignment in many ways -- skill builder, stash buster, fundraiser and more!
The SFMQG needs to create blocks for a quilt to be raffled at the Broward Quilt Expo scheduled for October. This BOM will be devoted to that task.
We are taking advantage of the free Organic Diamond pattern available on the Modern Quilt Guild website.
Here is the link, but you will need to log in to your MQG account to access it:
This comes with two special requests. Please make two blocks so we have enough for a large quilt.
Mail to CathyW - her address will be in the mail sent to membership.
Anyone willing to assemble the quilt top should email Cathy.
Charlotte has volunteered to Big Stitch Hand Quilt it.
Details:
Fabric: six vibrant solids. This block is fat-quarter and scrap friendly. The longest block edge is 10.5 inches long.
That said, it can be a challenge. The block is two rectangles sewn together. The hardest parts for me were the cutting and nesting the seams to match the identical fabrics in the center slash/spotlight slice. The pattern offers a paper-pieced pattern for half. (I don't paper piece well at all, so I cut to the pattern.) Also, directions for the other half, a single flying goose, are a little spare. I ended up cutting a triangle that was 10.5 inches long and 5.5 inches tall with a 45-degree angle for the sides. For the two small triangles, I cut triangles that are half of a 5.5-inch square in different colors.
The pattern says you will end up with an assembled 10.5-inch square. I didn't. When done, send as is without a final trim. A little more than 10 inches may be needed.
This is a SFMQG fundraiser, so please pitch in. Here are two sample blocks and the cover image of the pattern.

January 2021
BOM to show in January and members mail in February.
This block was designed with a column quilt in mind, where blocks are stacked top to bottom to create an interesting design without interlocking seams.
The block is formed by an interior rectangle finished with a frame, which is an easy way to reach a uniform block size.
Fabric:
A: Contrasting solid or reads solid.
B: White, cream or beige.
Cutting:
Fabric A and B: Cut 2 3-inch squares to create 4 half-square triangles.
(Tutorials: Half Square Triangle Quilt Using the Four Seasons Block OR QUILTING BASICS - Making a perfect Half Square Triangle Block).
Fabric A: Cut 2 rectangles 2.5X8.5 inches
Fabric B: 2 square 2.5 inches
(More cutting will be done after the interior rectangle is complete.
Sew now, and cut more later to get the right size on the finished block.)
Interior rectangle:
Make 4 half-square triangles (HSTs) using the 3-inch squares. Trim to 2.5-inch squares.
Checking the block layout for the correct placement, sew two HSTs to two 2.5X8.5 inch rectangles. Starch and press.
Again check the block layout and sew the two rectangles together along the long seam.
Again check the block layout, sew remaining two HSTs to the 2.5-inch Fabric B 2.5-inch squares.
Sew the new small rectangles to top and bottom of the long rectangle. Starch and press.
The long rectangle you have sewn should measure about 4.75X15inches.
Time to add the neutral frame to reach the final block.
Cut two sets of rectangles measuring 2X14.75 inches and 2X8 inches. (Scraps can be used for the longer pieces.) These 4 rectangles are slightly larger than needed to allow for sewing and trimming to the final size: 7X17.25 inches.
My long interior rectangle shifted a bit when adding the frame. Just go with the flow. The frame is slightly larger than needed and will be squared off at the end to the desired size.
December 2020
The Mighty T -- BOM to show in December and members mail in January.
No real inspiration for this one, just winging it. It's pretty simple while offering hidden challenges and scrap friendly.
Pick four solids. Check for contrast between 1 and 2 and between 3 and 4. (I did better on the top than bottom.) The smallest is a 3-inch square. You'll be making 2 half-square triangles and 2 half-rectangle rectangles and add a bunch of strips. See attachments for a photo and a numbered fabric guide.
Cut:
Fabric 1 -- 3-inch square
Fabric 2 -- 3-inch-square and 6.5-X-3-inch strip
Fabric 3 -- 2 strips 9-X-2.75 inches
Fabric 3 and 4 -- 2 9-X-2.5 inch strips
Fabric 4 -- 2 3-X-9 inch strips
Sewing:
Make two half-square triangles with 3-inch squares using Fabrics 1 and 2.
Sew Fabric 2 strip in the middle with angles as shown pointing to corners. Trim the final strip to 2.75 inches.
Stack the 9 X 2.5-inch rectangles and cut in half, leaving a .25-inch margin on the narrow top and bottom rather than cutting corner to corner.
Sew Fabric 3 and 4 triangles to each other. Lay them out first to match the layout to get the angles right and avoid tearing out a seam like I did. Don't worry about the tops and bottoms of Fabric 4 getting close to the top and bottom.
Sew Fabric 3 strips to the half-rectangle rectangles.
If you want some wiggle room when trimming, cut 9.25 inches instead of 9 inches and Fabric 3 and 4.
Square should finish at 10.75 to 11 inches, and don't sweat the final size. Done is better than perfect.
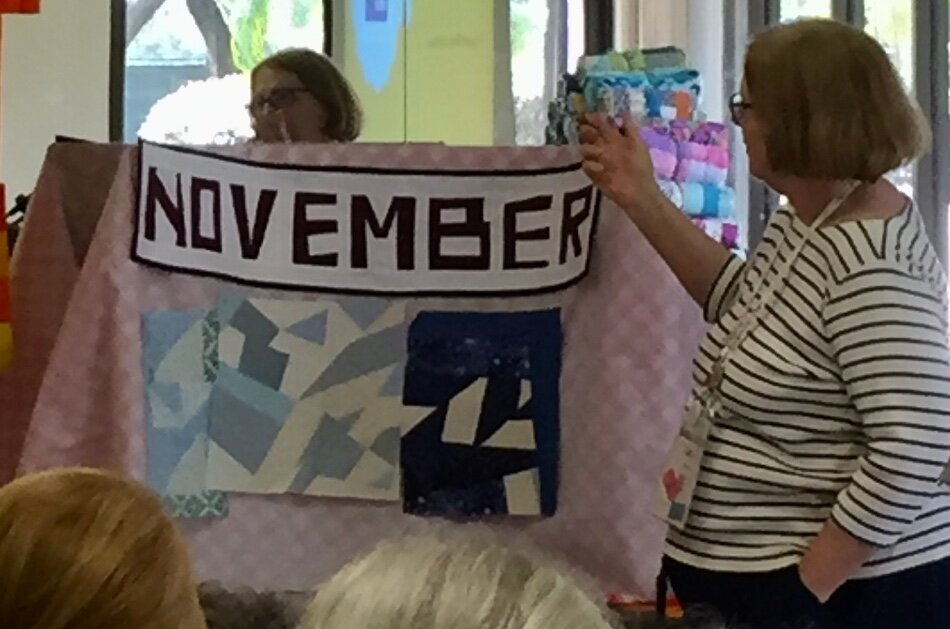
November 2020
I realized none of my blocks have been red, white and blue, so it's time! Throw together 5 2.5-by-10.5-inch strips to make a 10.5-inch square of red, white and/or blue solids -- your choice of internal strip design. I actually cut mine about 11-inches long so I could trim the block down to 10.5 inches.
For anyone who thinks they're gonna be jammed during the holidays, there's still an easy way to participate -- send a 10.5-inch-by-10.5-inch piece of solid red, white or blue. Those squares will make the design more interesting.
Please mail before Dec 14th 2020 to: Cathy Wilson (address sent in meeting email)
October 2020
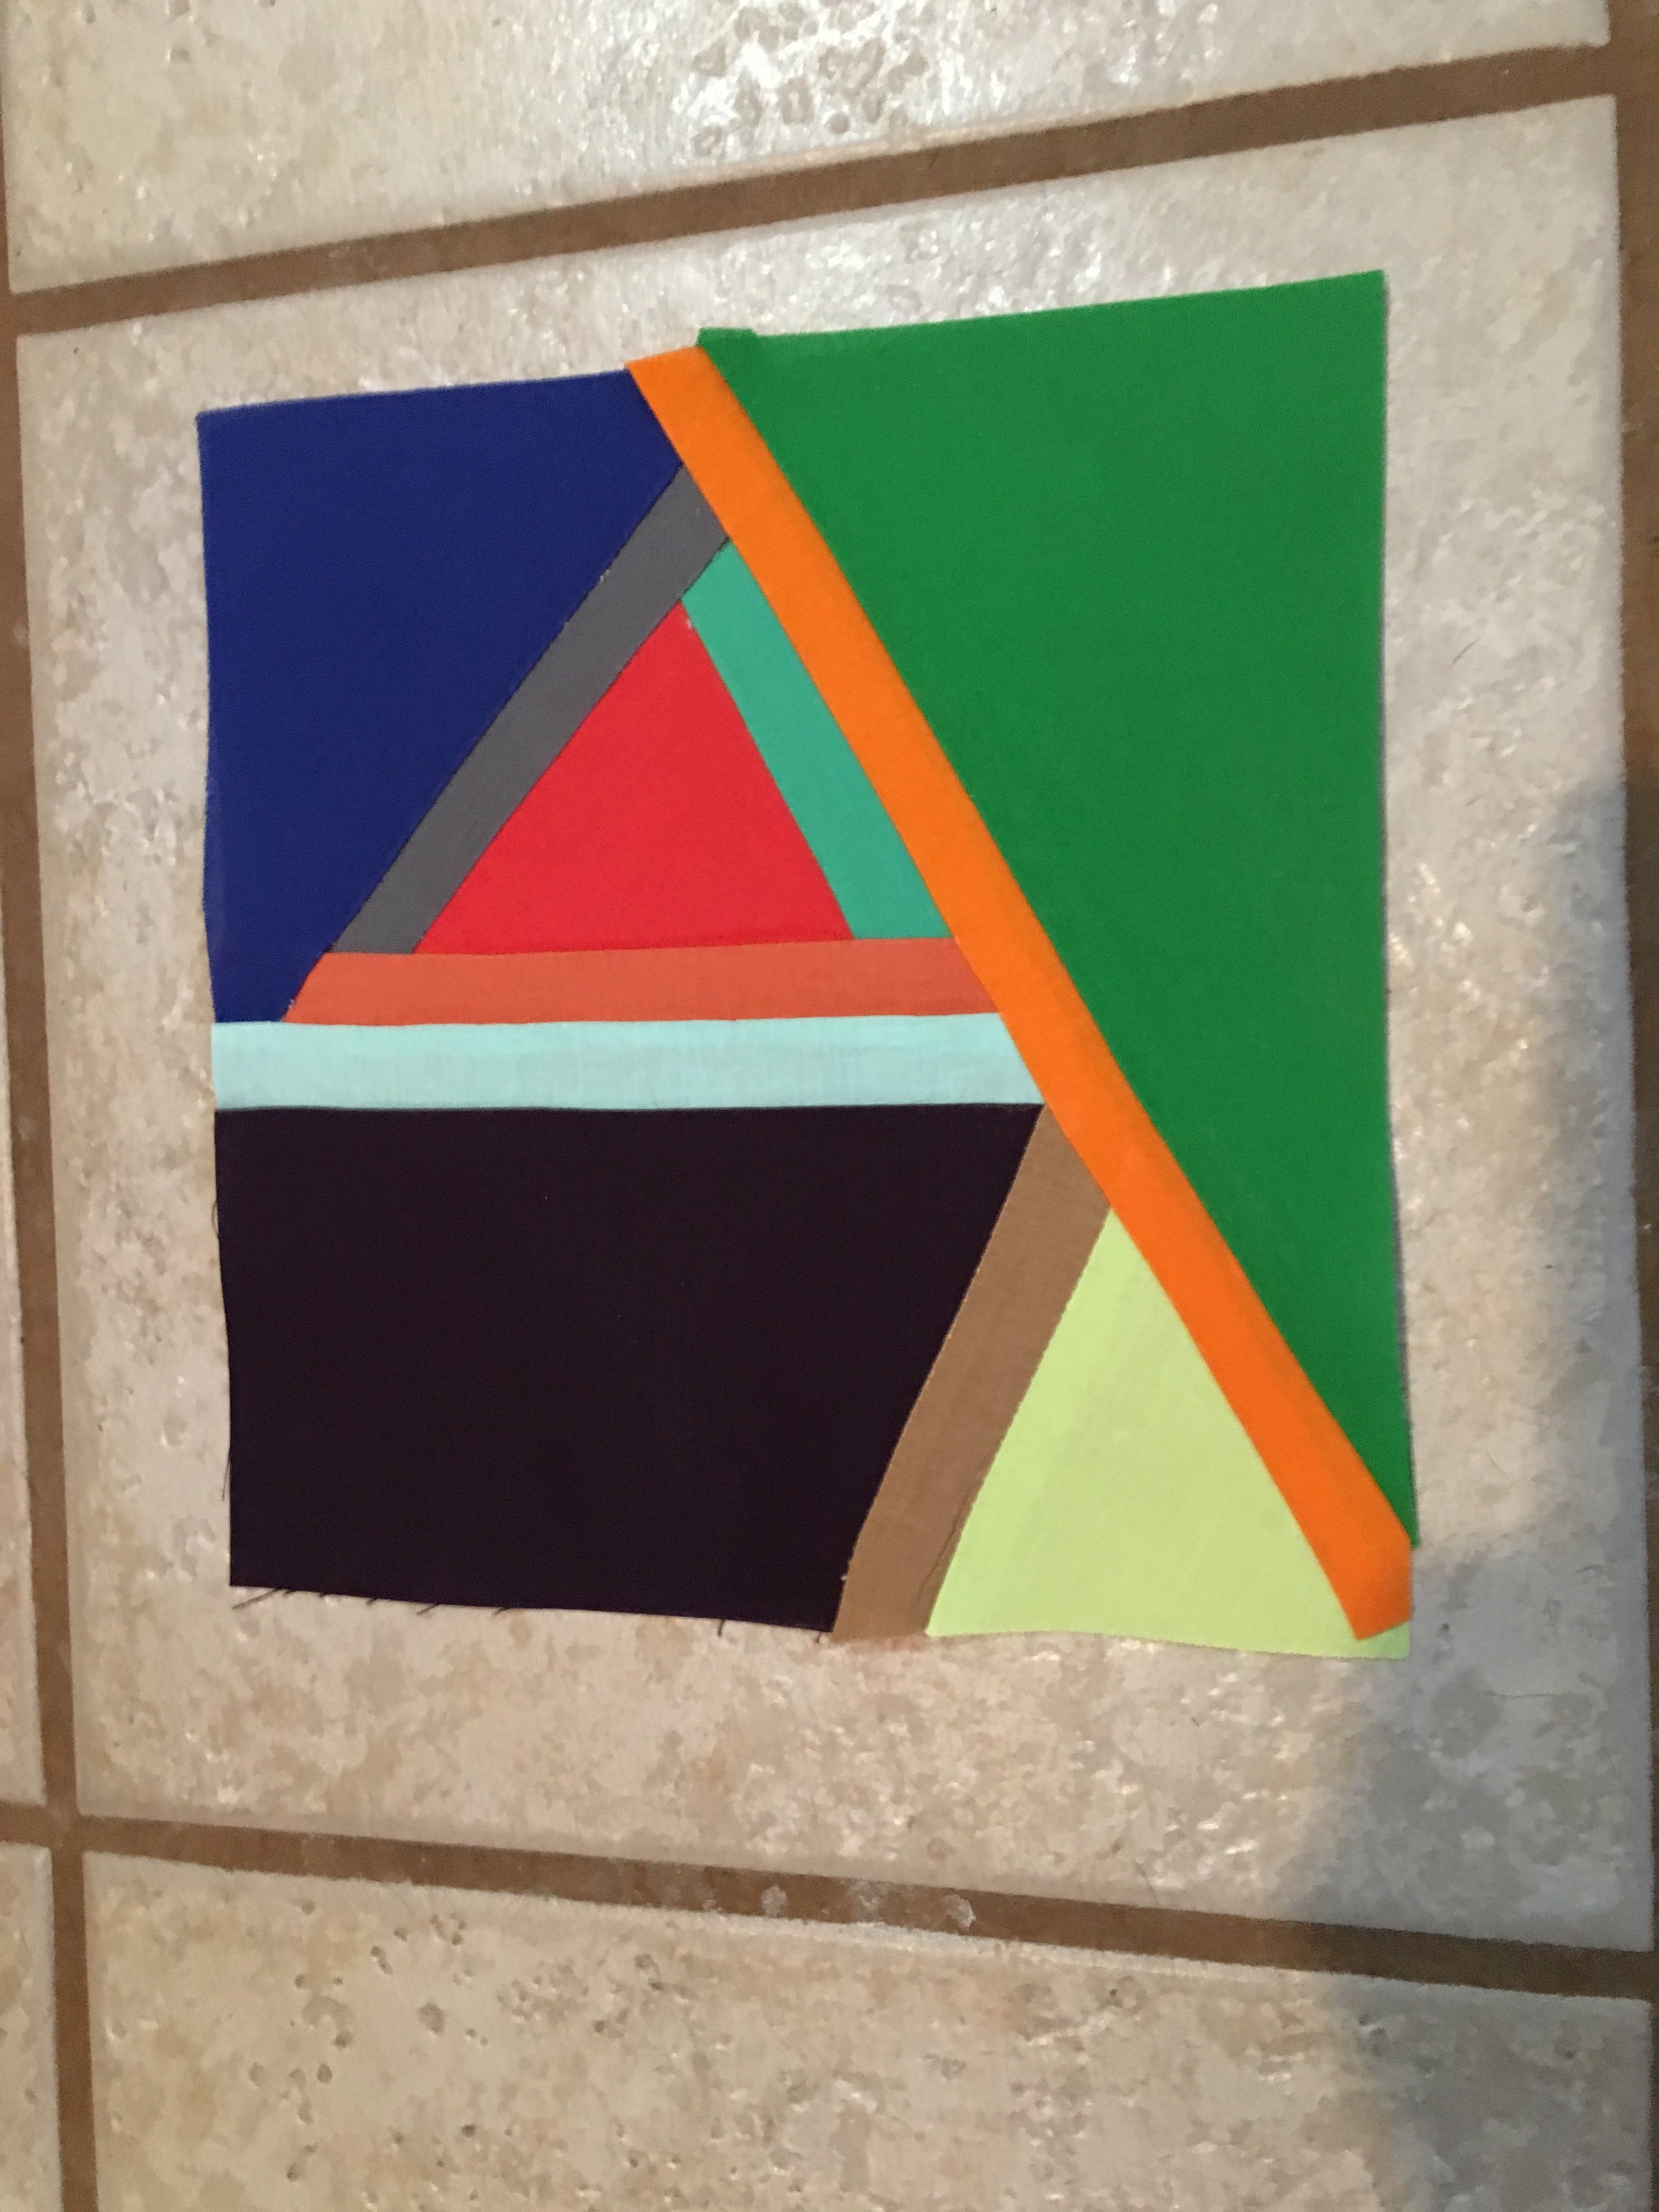
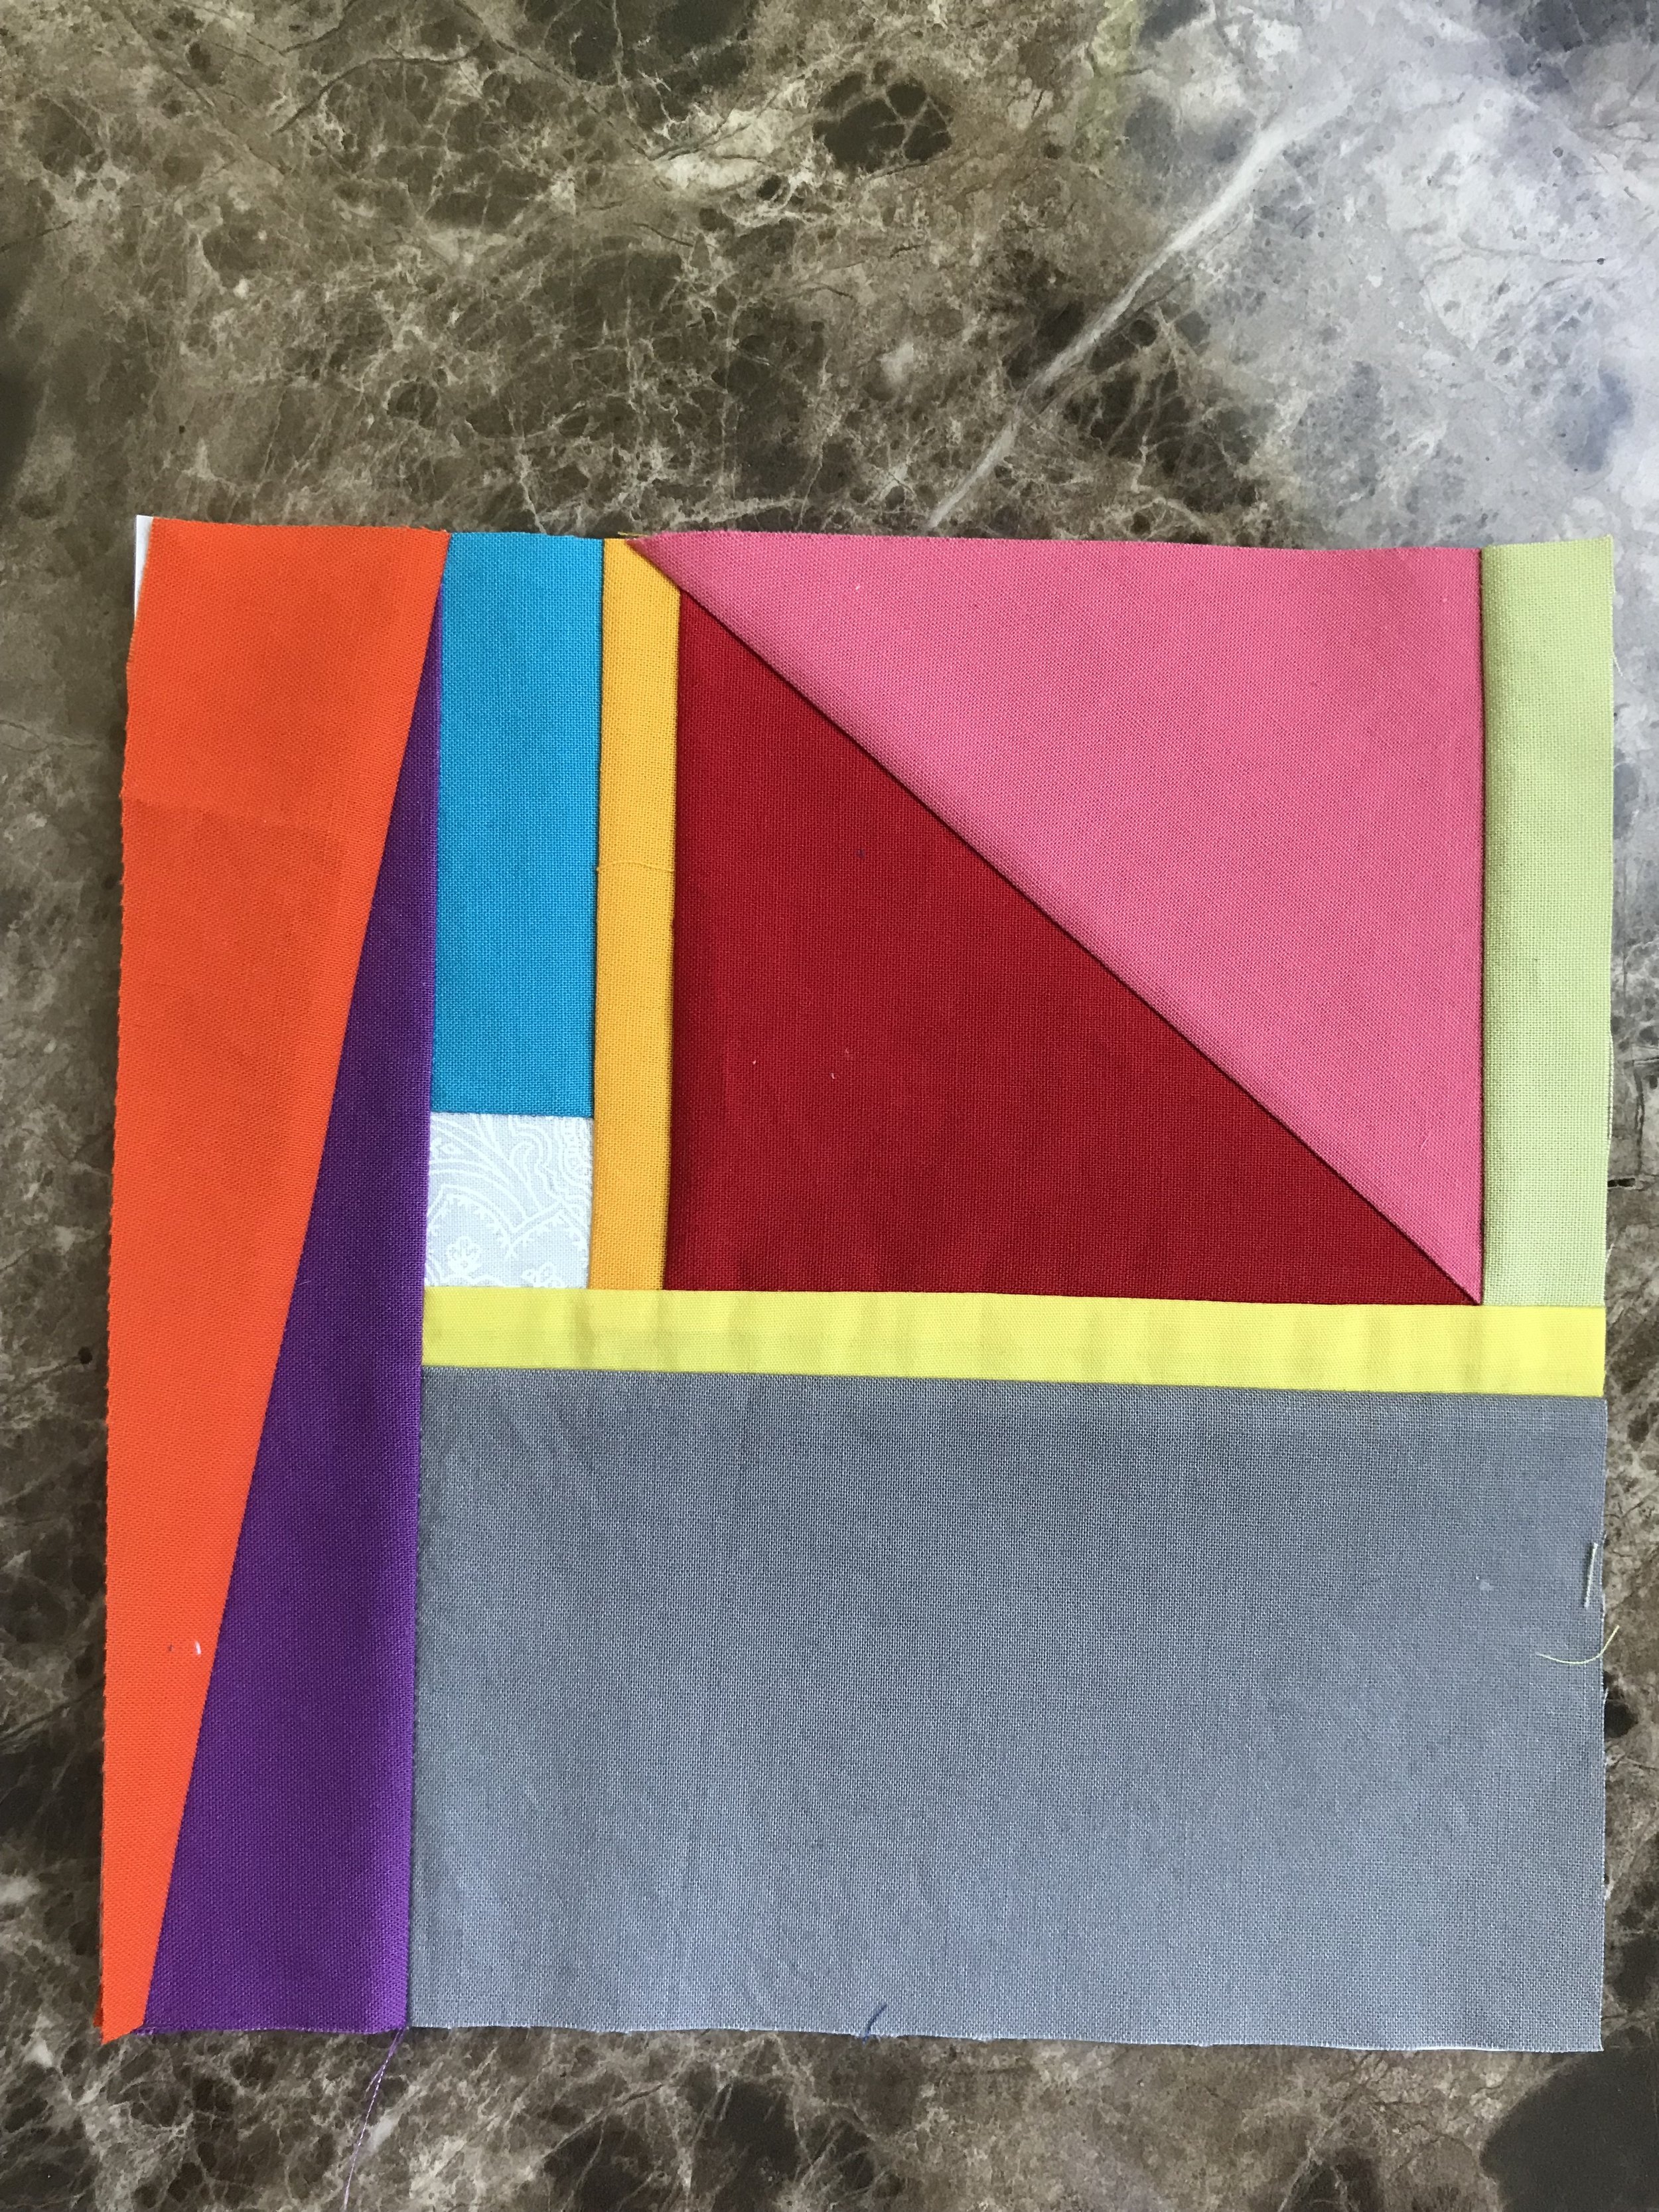
For the October block of the month design, we're basing our work on the Urban Sunsets block shown here. Offered by quilter Christine Barnes as a workshop. She has given permission to the SFMQG to work on an equivalent based on her design and wants to see what we come up with.
The block is scrap friendly and finishes at a 12.5-inch square for delivery. Anyone who took Nicole's tiny piecing workshop can apply those lessons as well.
Block colors: cream, burnt orange, coastal blue print, batik or solid
Frame colors: light and dark gray OR ombre gray
Skinny strips: black or reads-black print
The interior block finishes at 6.5 inches. To be on the safe side, with the angled insets, I cut generous 8-inch lengths to leave enough room to trim down to the final 6.5 inches.
Interior 6.5-by-6.5-inch square:
Pick three 8-inch strips in cream, burnt orange or coastal blues that you think will play well together. You can use all three, only two or just one color and any number of prints. Strips should be at most 4.5 inches wide. Pick your black OR reads-black fabric, and cut 2 8-inch strips 3/4-inch wide or less if you are comfortable with tiny piecing. Sew one 8-inch color strip to the black, preferably at an angle referring to the Urban Sunsets link. Add a second color fabric, a second black strip at a different and a third color fabric. By now, you should have a block that can trim down to 6.5-by-6.5 inches. Press. Starch helps stabilize the fabric. Trim.
Hints:
* Be adventurous with the color print choices.
* A single color print strip can be pieced, so even more scraps are in play.
* Don't stress about the angles. They don't need to match each other. Skip them if you want.
Gray border:
Two options
1. Treat it like a log cabin, which would require 5 pieces of fabric.
2. Sew shorter strip on top and bottom, sew longer strips on side.
I picked the second option using a width-of-fabric strip that's 3.5-inches wide or a little wider. I sewed light gray on top and cut to match the interior block, same with dark gray on the bottom. Then I added the long dark gray strip on the left and the light gray strip on the right. Trim the block the 12.5 inches square.
Send before Nov 12th to Cathy Wilson. An email was sent to members with her address.

September 2020
Here is a link to this month's block for delivery when complete.
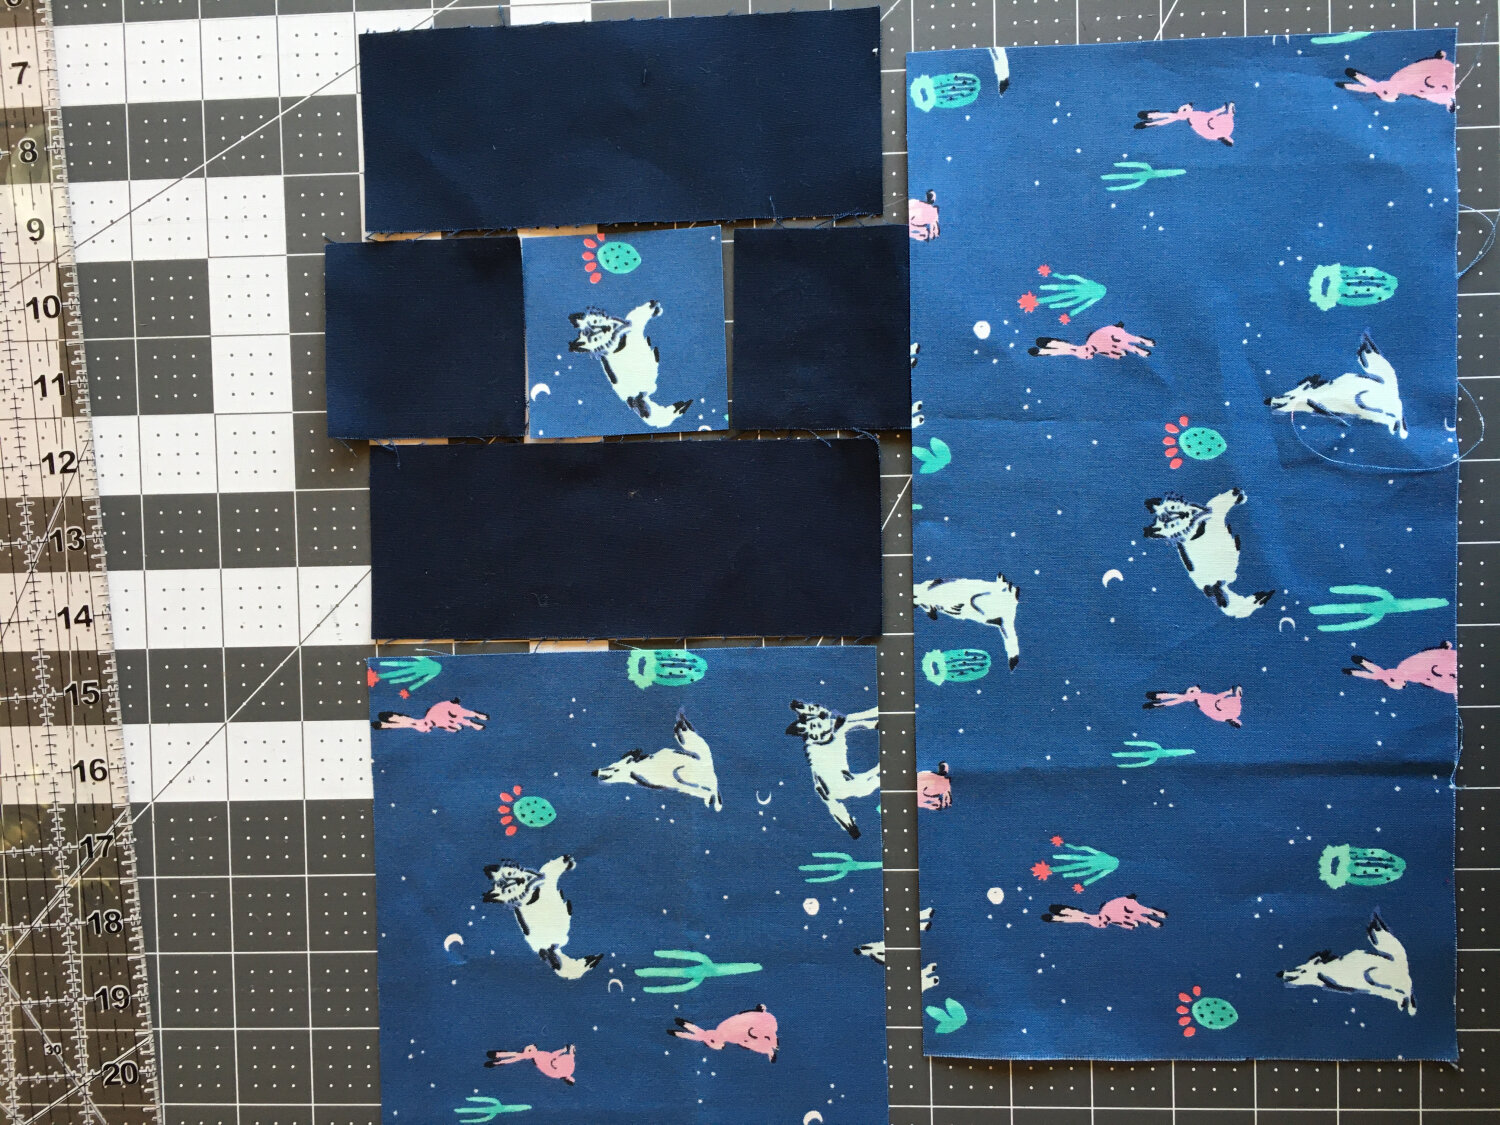
Pick two solids, one color and a neutral gray, black or white. Cut four rectangles in each solid measuring 3-inches-by-5.5 inches for a total of eight rectangles. At the top of the first photo, you'll see a layout note. Sew top two rectangles, middle four and bottom two. Add the two strips to the middle, being careful to nest/match the middle seams. Pinning helps on these final seams. Iron, and you have a 10.5-inch square.


As you can see from the link and photos, there is an assortment of layout options with or without sashing to make a beautiful quilt.
Please mail to me by Oct. 13 to get your spot in the drawing at the Oct. 17 meeting. Address was emailed to members.
Cathy
August 2020 - Fieldcrossing Quilt
This is a link to a free 23-block quilt pattern called the Fieldcrossing Quilt.
The photo shows finished blocks. Follow the cutting instructions to make the entire quilt.
To make one for the block of the month, you will need:
1 4.5-inch solid or "reads solid" square
2 5-inch print squares where two sets of triangles will be the same OR 4 print triangles cut from 5-inch squares to make each triangle different
1 5-inch white square
All solid fabrics is an option as well. The only requirement is to finish with white triangles on the ends for future assembly by the winner.
Each block consists of the central solid square, which touches four print triangles, and two white triangles to finish.
The pattern shows an easy assembly system with six seams.
July 2020 - Diagonal Nine Patch
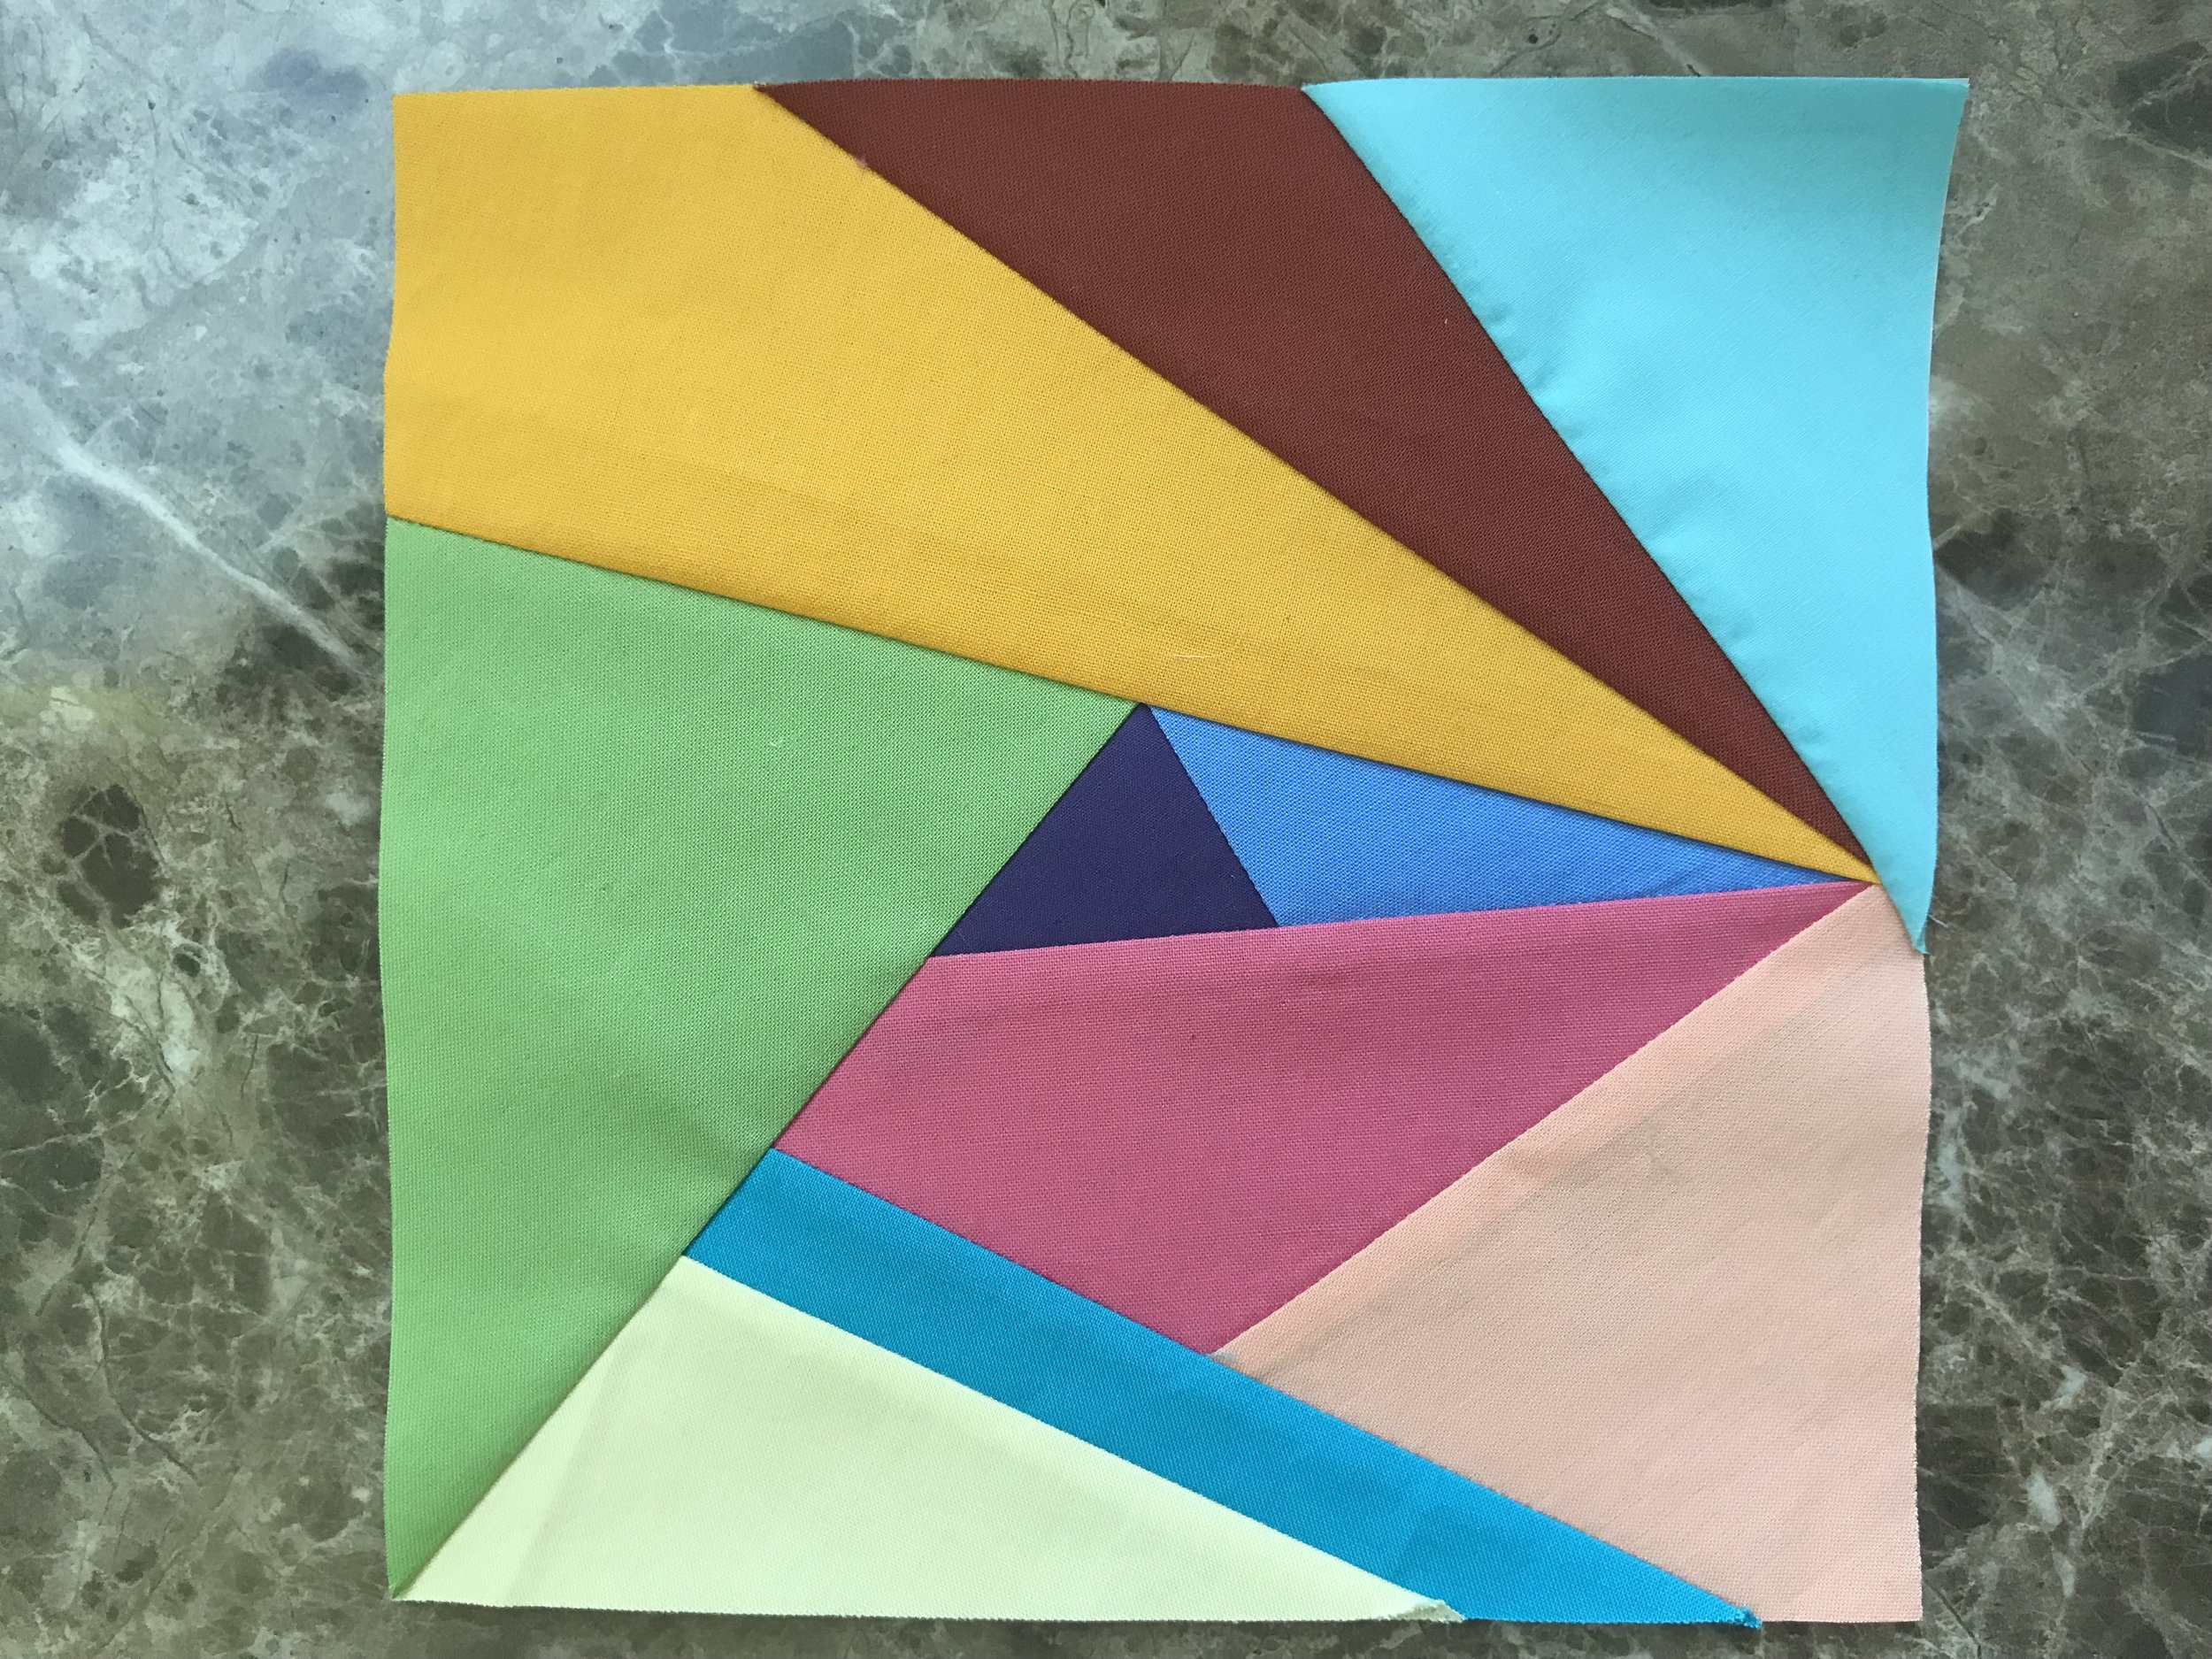
This block was inspired by and adapted from a work found on Pinterest by American abstract painter Frederick Hammersley. If you have a moment, you'll see many of his geometric paintings are quilt blocks in disguise.
Block: 9 patch
Fabric: 4 solids on a late summer-fall theme. This is charm-pack friendly if you have multiples in the pack.
Size: Start with 5-inch squares. My finished block was a 13.25-inch square
Color 1: three 5-inch blocks
Color 2: two 5-inch blocks
Color 3: two 5-inch blocks
Color 4: three 5-inch blocks
For the three half-square triangles forming the diagonal, cut one square of each color in half diagonally. Sew 1 and 3, 1 and 4, and 2 and 4. (When finished, you will have a triangle leftover in #2 and #3 fabrics. Set aside to avoid confusion.)
Trim the 6 remaining solid squares to 4.75 inches.
Lay out the squares and half-square triangles according to the 1-4 color scheme in the attachment. Try to finish at one sitting, which doesn't take long, to keep track of everything. Sew columns of three, and sew them together. My final block trimmed at 13.25 inches.
Cathy


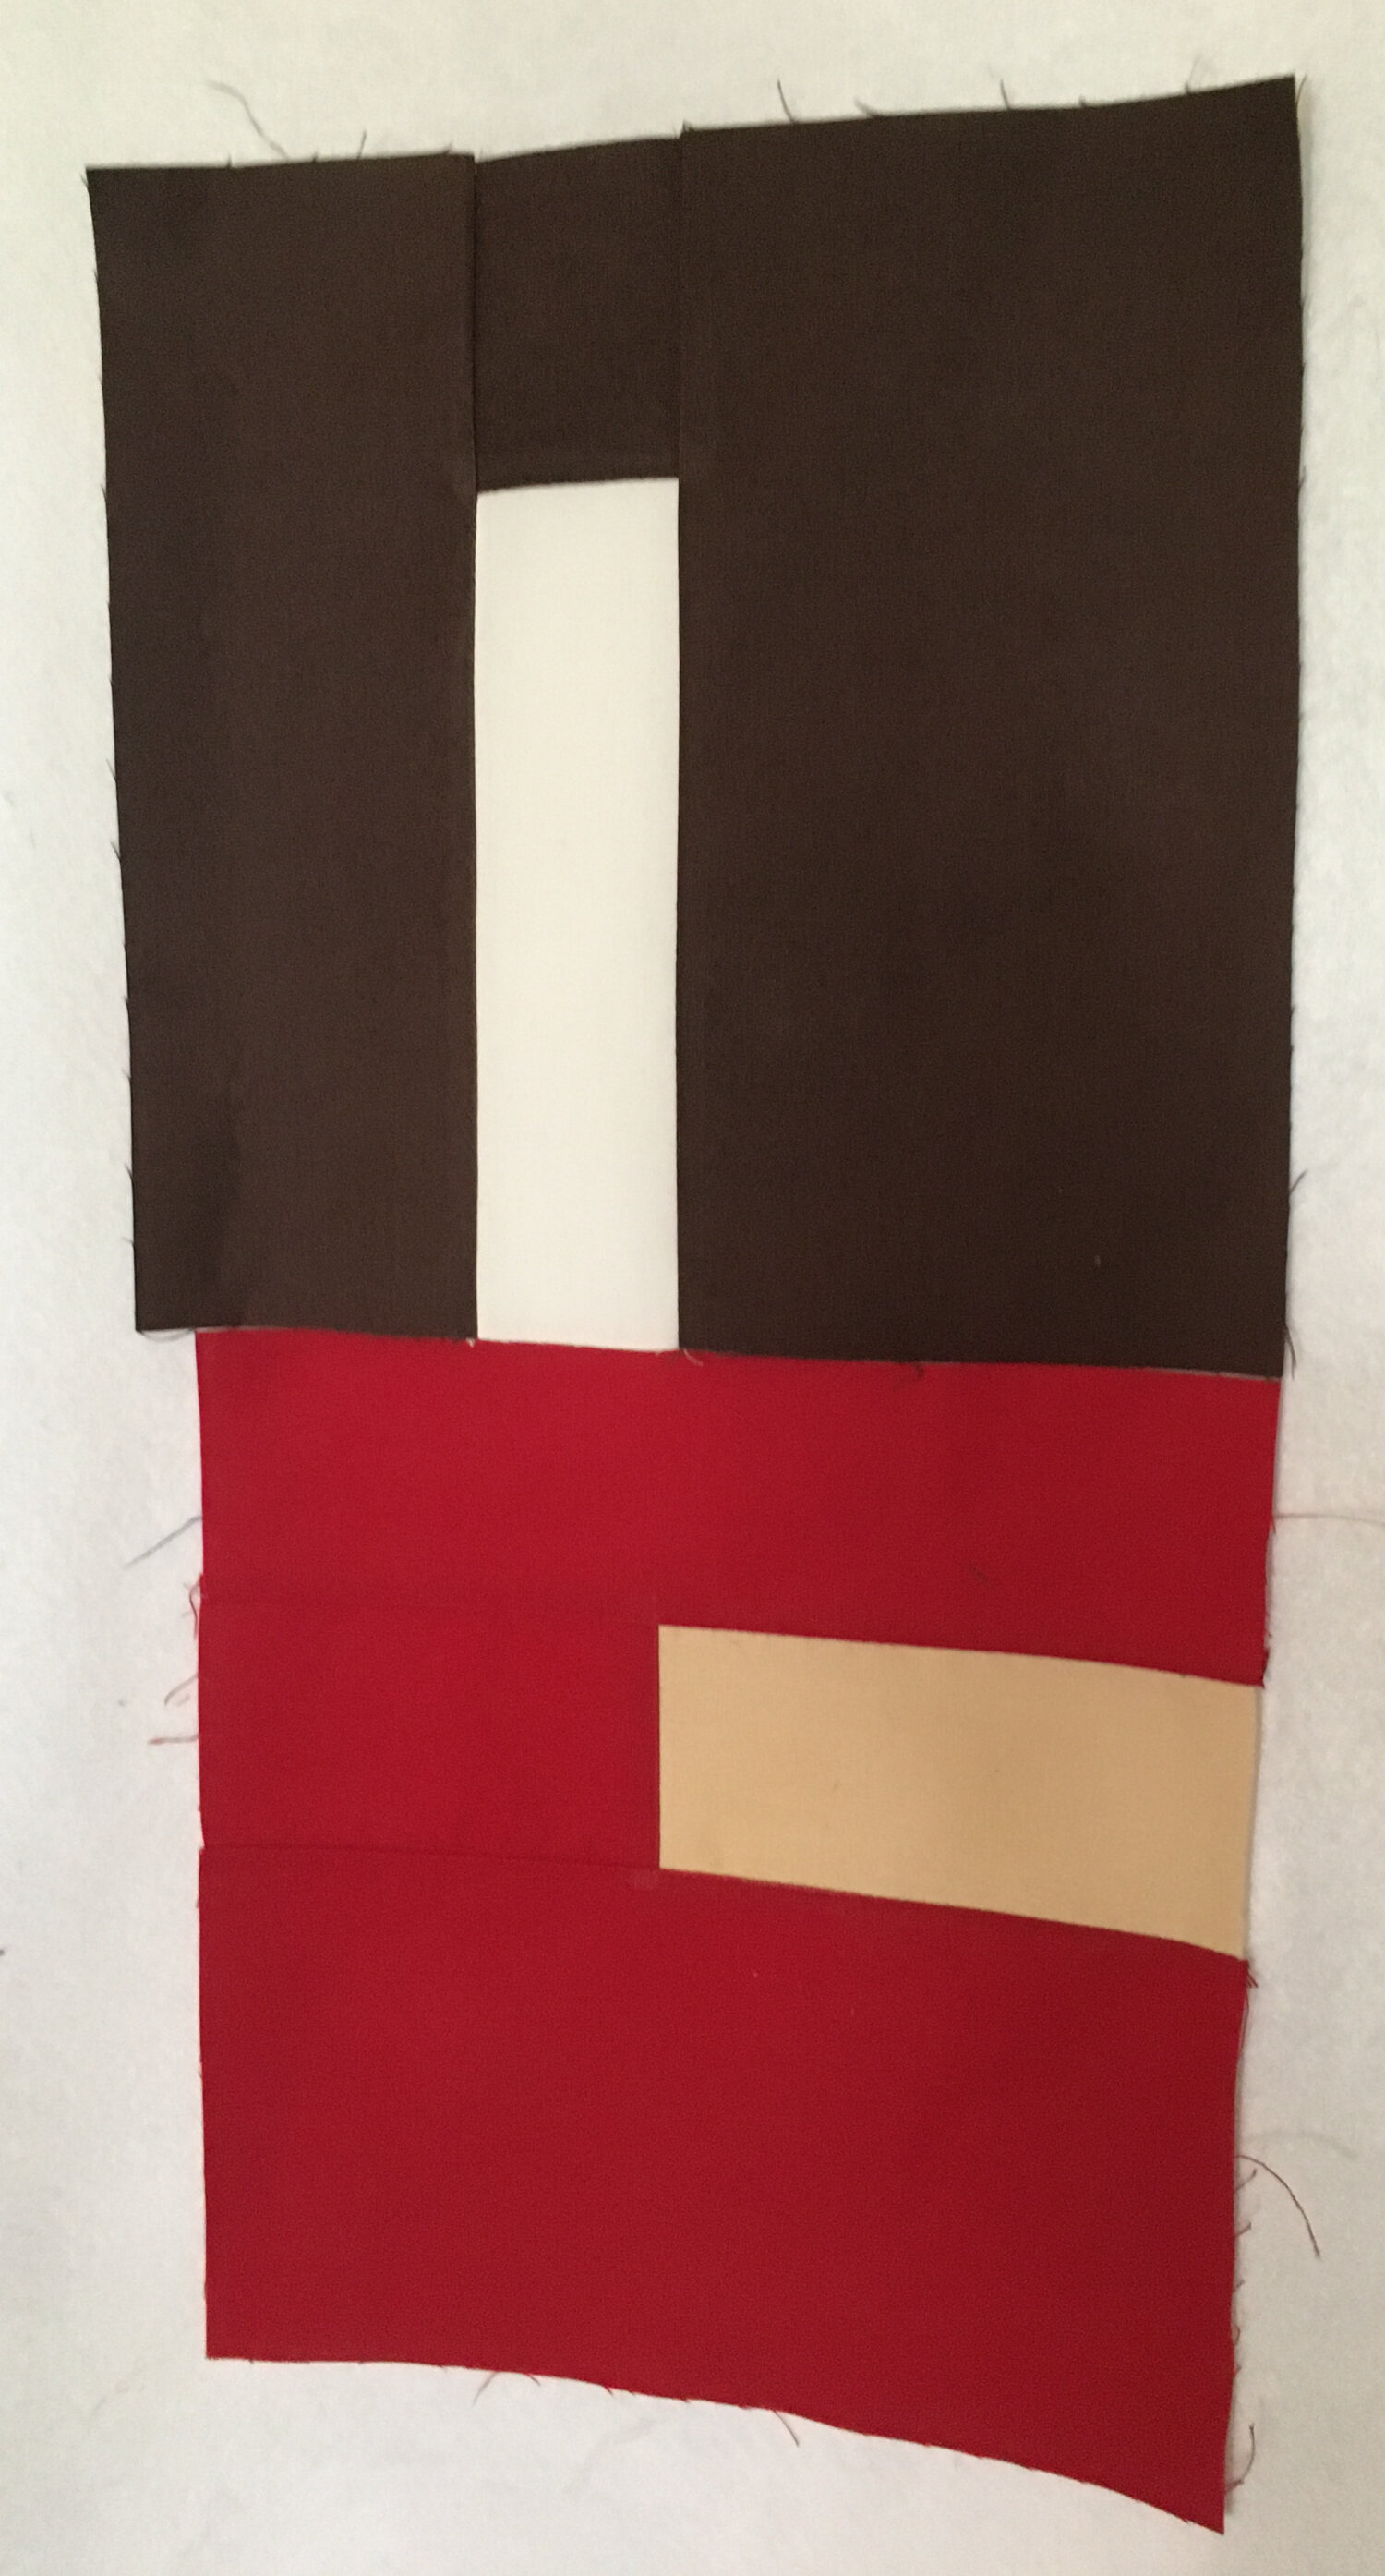
June 2020 - Red Hot Cocoa
June block of the month. It's called red hot cocoa for the colors: red, white-cream, beige and brown. Pick two for each block. Deliver an 8.5-inch square that looks like a C. You'll need three strips. Easy widths to cut are 2.5, 2.5 and 4.5 inches. The middle strip is two colors of any width, with two sides of one of the colors. No need to center the middle strip. In fact, off-center makes for a better design. Photos show a finished version and two sample blocks.
By Cathy

May 2020
If you haven’t guessed by now, I love blocks. My Pinterest Quilt Blocks folder has a current 404 pins. If I stopped pinning now, I’d be pretty close to 100 if I tried them all, a little younger when you exclude duplicates. My latest fancy is a big window – asymmetrical. The new block is easy, fast and asymmetrical. It’s also fat-quarter, fat-eighth and scrap friendly. I was torn over the fabric, so two options are on the design wall: spring-summer floral or modern-contemporary. Color choice is all yours, just try for contrast between the two fabrics. I’m hoping there is enough of each variation to split the drawing in two. Of course, you double your chances if you make one of each or two of one. Sorry, I lost track of the inspiration. These blocks to be delivered at a 12.5-inch square are so quick it would be easy to keep going and make a bed quilt. As you can tell from the photos, the real fun comes with assembly because the fake nine-patch block can be turned and placed in four locations.
Cutting:
Floral-modern-contemporary
1 -- 12.5-by-6.5 inch
1 – 6.5-by-6.5 inch
1 – 2.5-by-2.5 inch
Solid-reads solid
2 – 6.5-by-2.5 inch
2—2.5-by-2.5 inch
Sewing:
Assemble the fake nine-patch by sewing a solid-print-solid three-patch. Add the 6.5-by-2.5 inch solid on each side. Add the 6.5-by-6.5 inch print. Add the 12.5-by-6.5 inch print. If your fabric is directional, keep track when cutting and sewing. Your block is done. Hopefully show these at the June meeting. Cathy
Click on picture to make it larger.


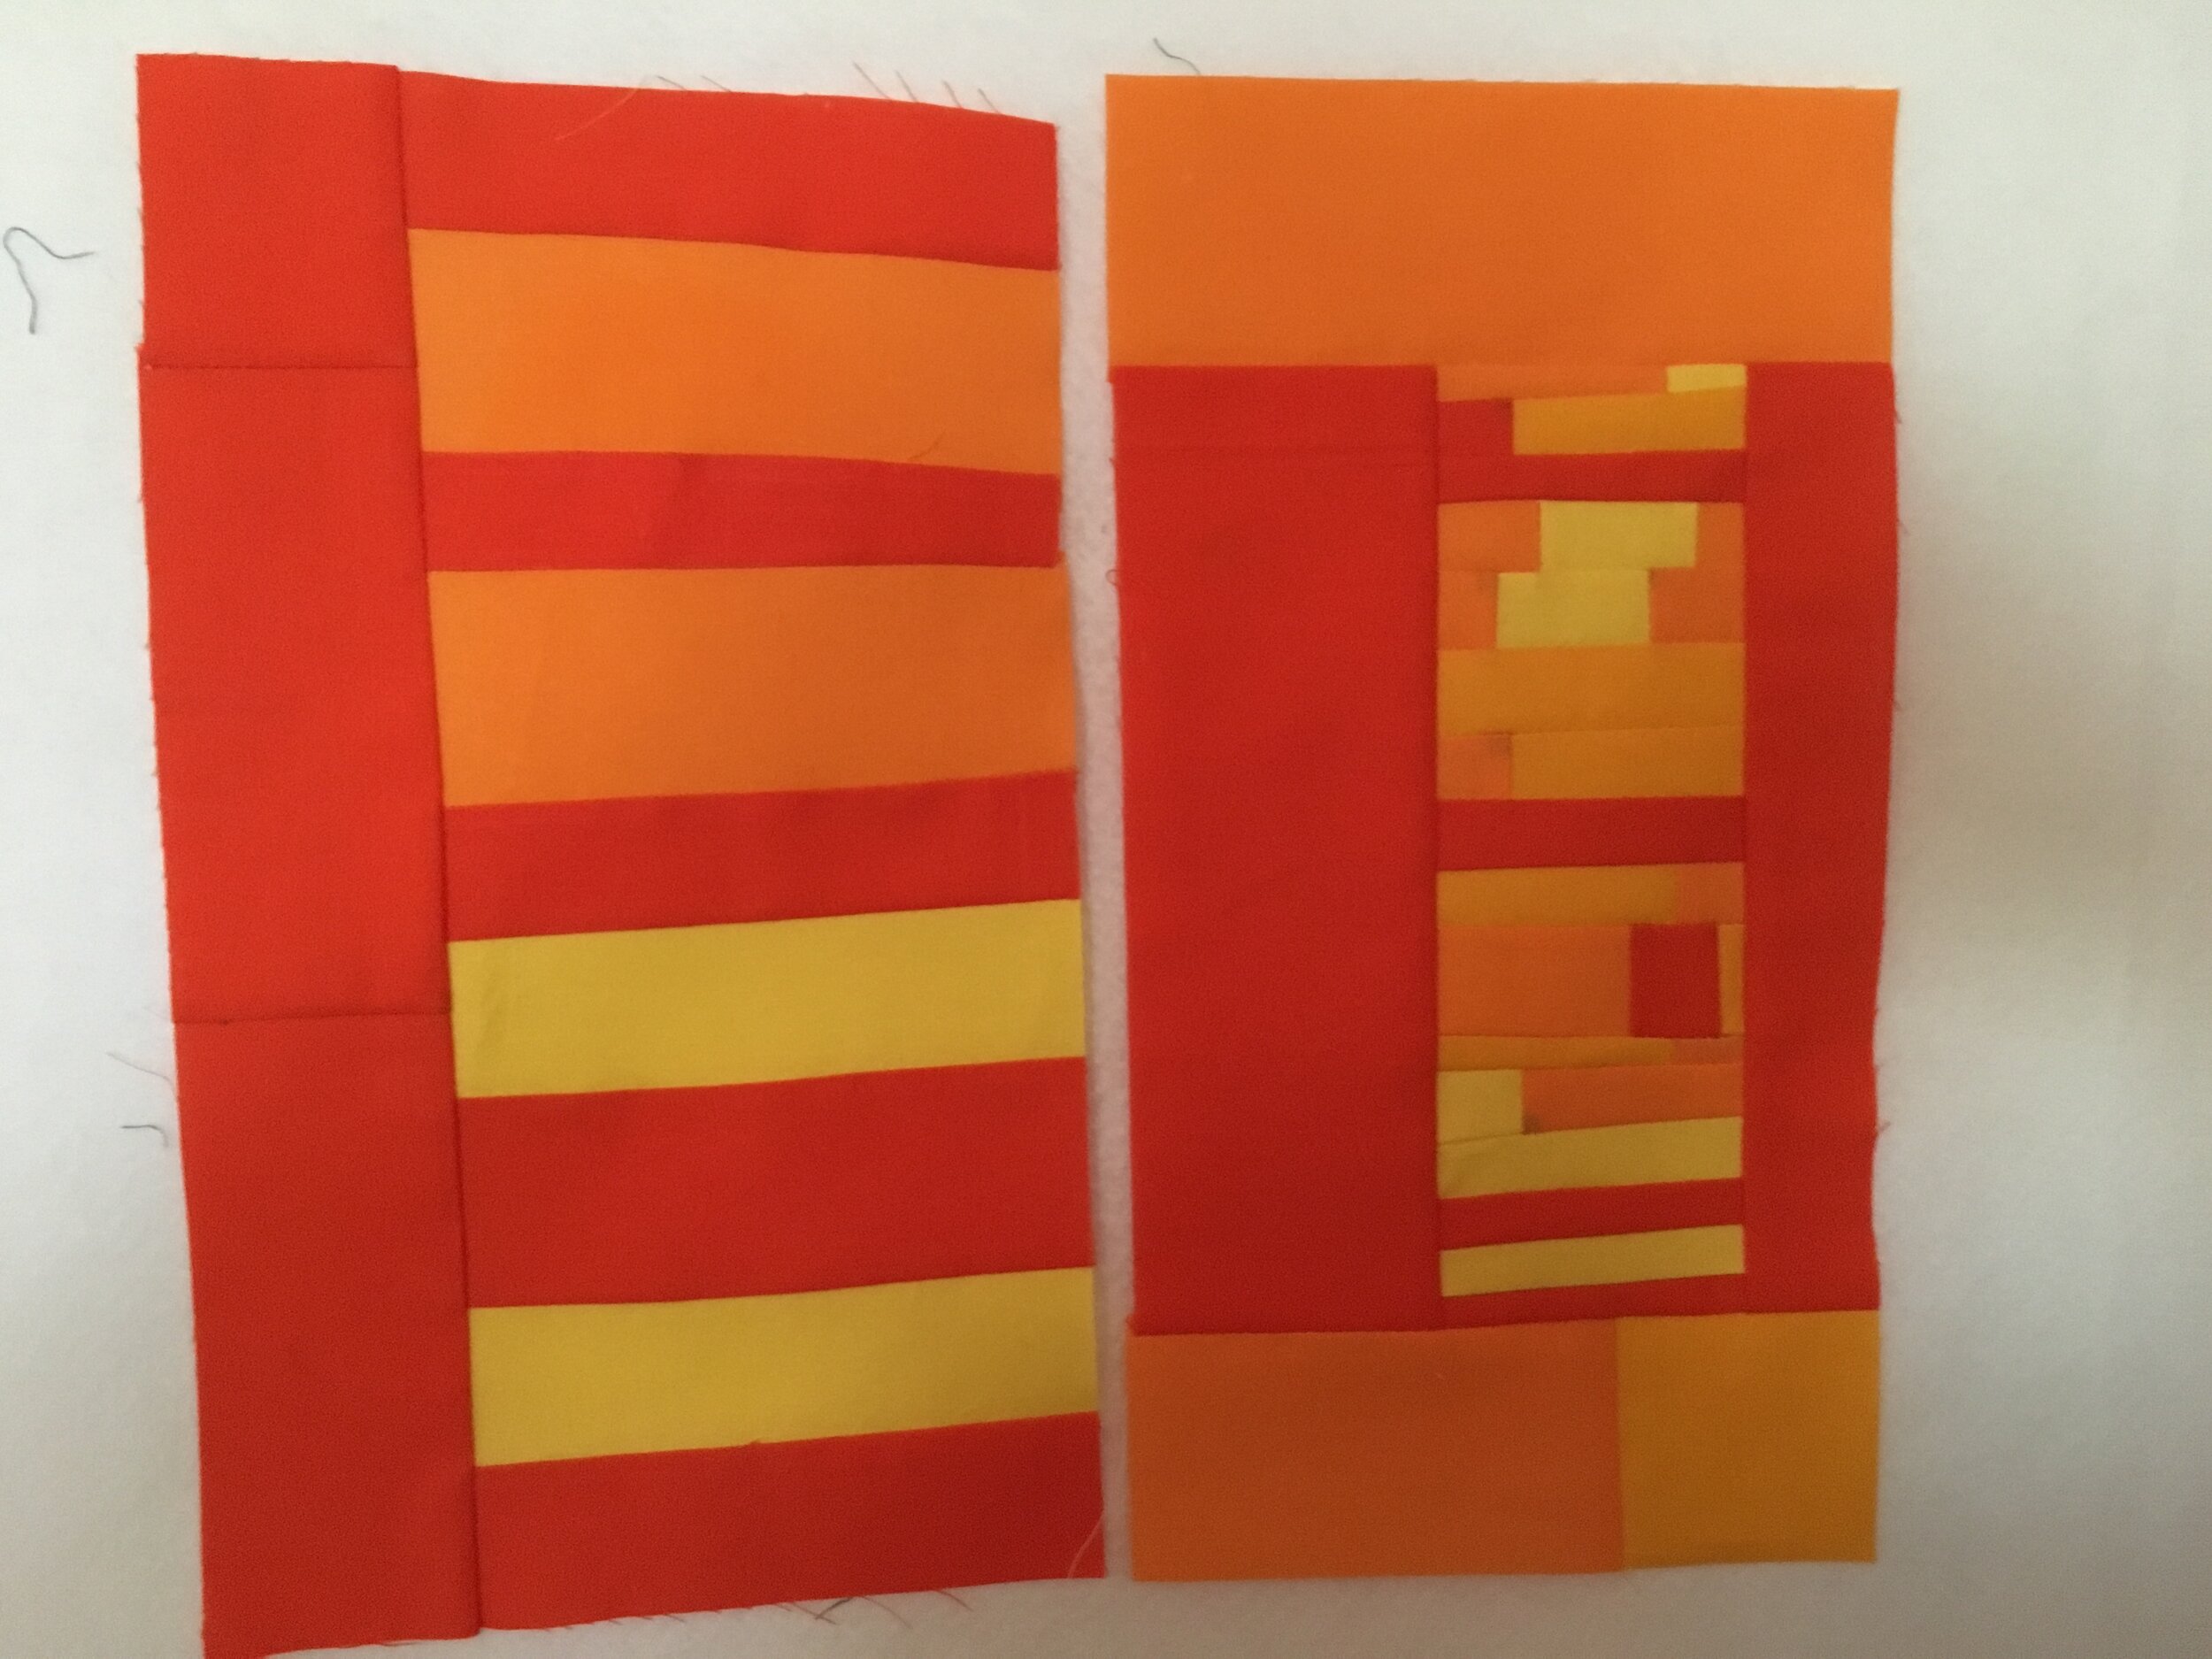
April 2020
Here's an improv block to try. The concept is based on the solid colors that show through a prism. Sew any number of contrasting stripes together. A single stripe segment can be straight or wavy and multiple colors. My striped sections finish at 2.75 to 3.5 inches deep. Add gray on each side. Size is not really a factor. My finished blocks in the attached photos measure 12.75-by-11 inches and 14.75-by-10.25 inches, basically large rectangles. Sew and bring to the next meeting, whenever that may be, or mail to me at 11847 Green Oak Drive, Davie, FL 33330.
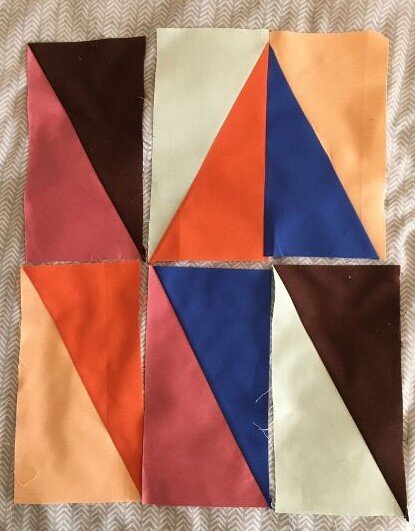
March 2020
Block should be due at the April but that has been cancelled at this time - bring to the ???next??? 2020 meeting.
This is the year COVID-19 is keeping us apart on National Quilting Day. But the SFMQG is keeping up with its BOM because -- well, we have that much extra sewing time on our hands. Sew and bring to the next meeting, whenever that may be, or mail to me at 11847 Green Oak Drive, Davie, FL 33330.
This is another simple block. The fun comes at assembly time. Start with 2 5-by-10-inch solid rectangles. Slash diagonally in half. Sew one of each together. Be sure to leave a thin tail on each end before sewing to get rid of the waste in advance. (See photo.) Bring these two new rectangles, measuring about 9-inches long, to the meeting. Another photo shows some of the fun assembly options. The inspiration photo comes from 2018 Quiltcon.


February 2020
Block was due at the March 2020 meeting which has been cancelled - bring to ???next??? one.
We needed a month with an E in it to introduce this block. So here's the block that brings it own name along with it. It's a two-color block in the shape of an E.
Pick two high-contrast solids and shoot for a 9-inch-by-12-inch block. You can think of it as 5 parallel rectangles with alternating colors, 3 of one color, 2 of the other. Sew the stack of 5 rectangles. and add a vertical strip in the same color as the 3 strips.
Uneven dimensions and wonky blocks are fine as you can see from the QuiltCon quilt. For those who want an easy uniform block, cut 3 rectangles measuring 2.75-by-6 inches plus 1 rectangle measuring 3.25-by-12.75 inches. In the second color, cut 2 rectangles of 2.75-by-6 inches.
The pictures pull together the concept, which looks a little messy in the written word. The layout offers amazing options.
As always, have fun.
By Cathy

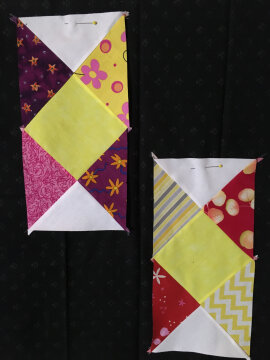
January 2020
Block is due at the February 2020 meeting.
This four-patch block is either the Colorado quilt block or one-fourth of the Colorado quilt block. Our version is charm pack and scrap friendly. You'll need 2 fabrics measuring 5-by-10 inches or 2 charm pack pieces in two fabrics -- one is white or cream, the other is your choice.
Start with 4 5-inch squares. Sew four half-square triangles by making a sandwich of two sets of the 5-inch squares. Sew 1/4-inch on both sides of a center diagonal line. Here is a half-square triangle or HST tutorial.
Follow the illustrations for the layout, and keep your iron handy.. There are 6 seams in all, so fabric selection, sewing and ironing can easily by done in 30 minutes.
And FYI, HSTs are not my BFF. I have never seen a tip I couldn't chop off. This block comes out looking like a hook. It doesn't matter to me whether the non-pointed half tilts left or right. The traditional version of four blocks shows a pinwheel center, which is not at all essential. This is asymmetrical and modern. Everything works!
Here's a Missouri Star Quilt Co. tutorial by Jenny Doan on the Colorado block:
As always, have fun.
By Cathy

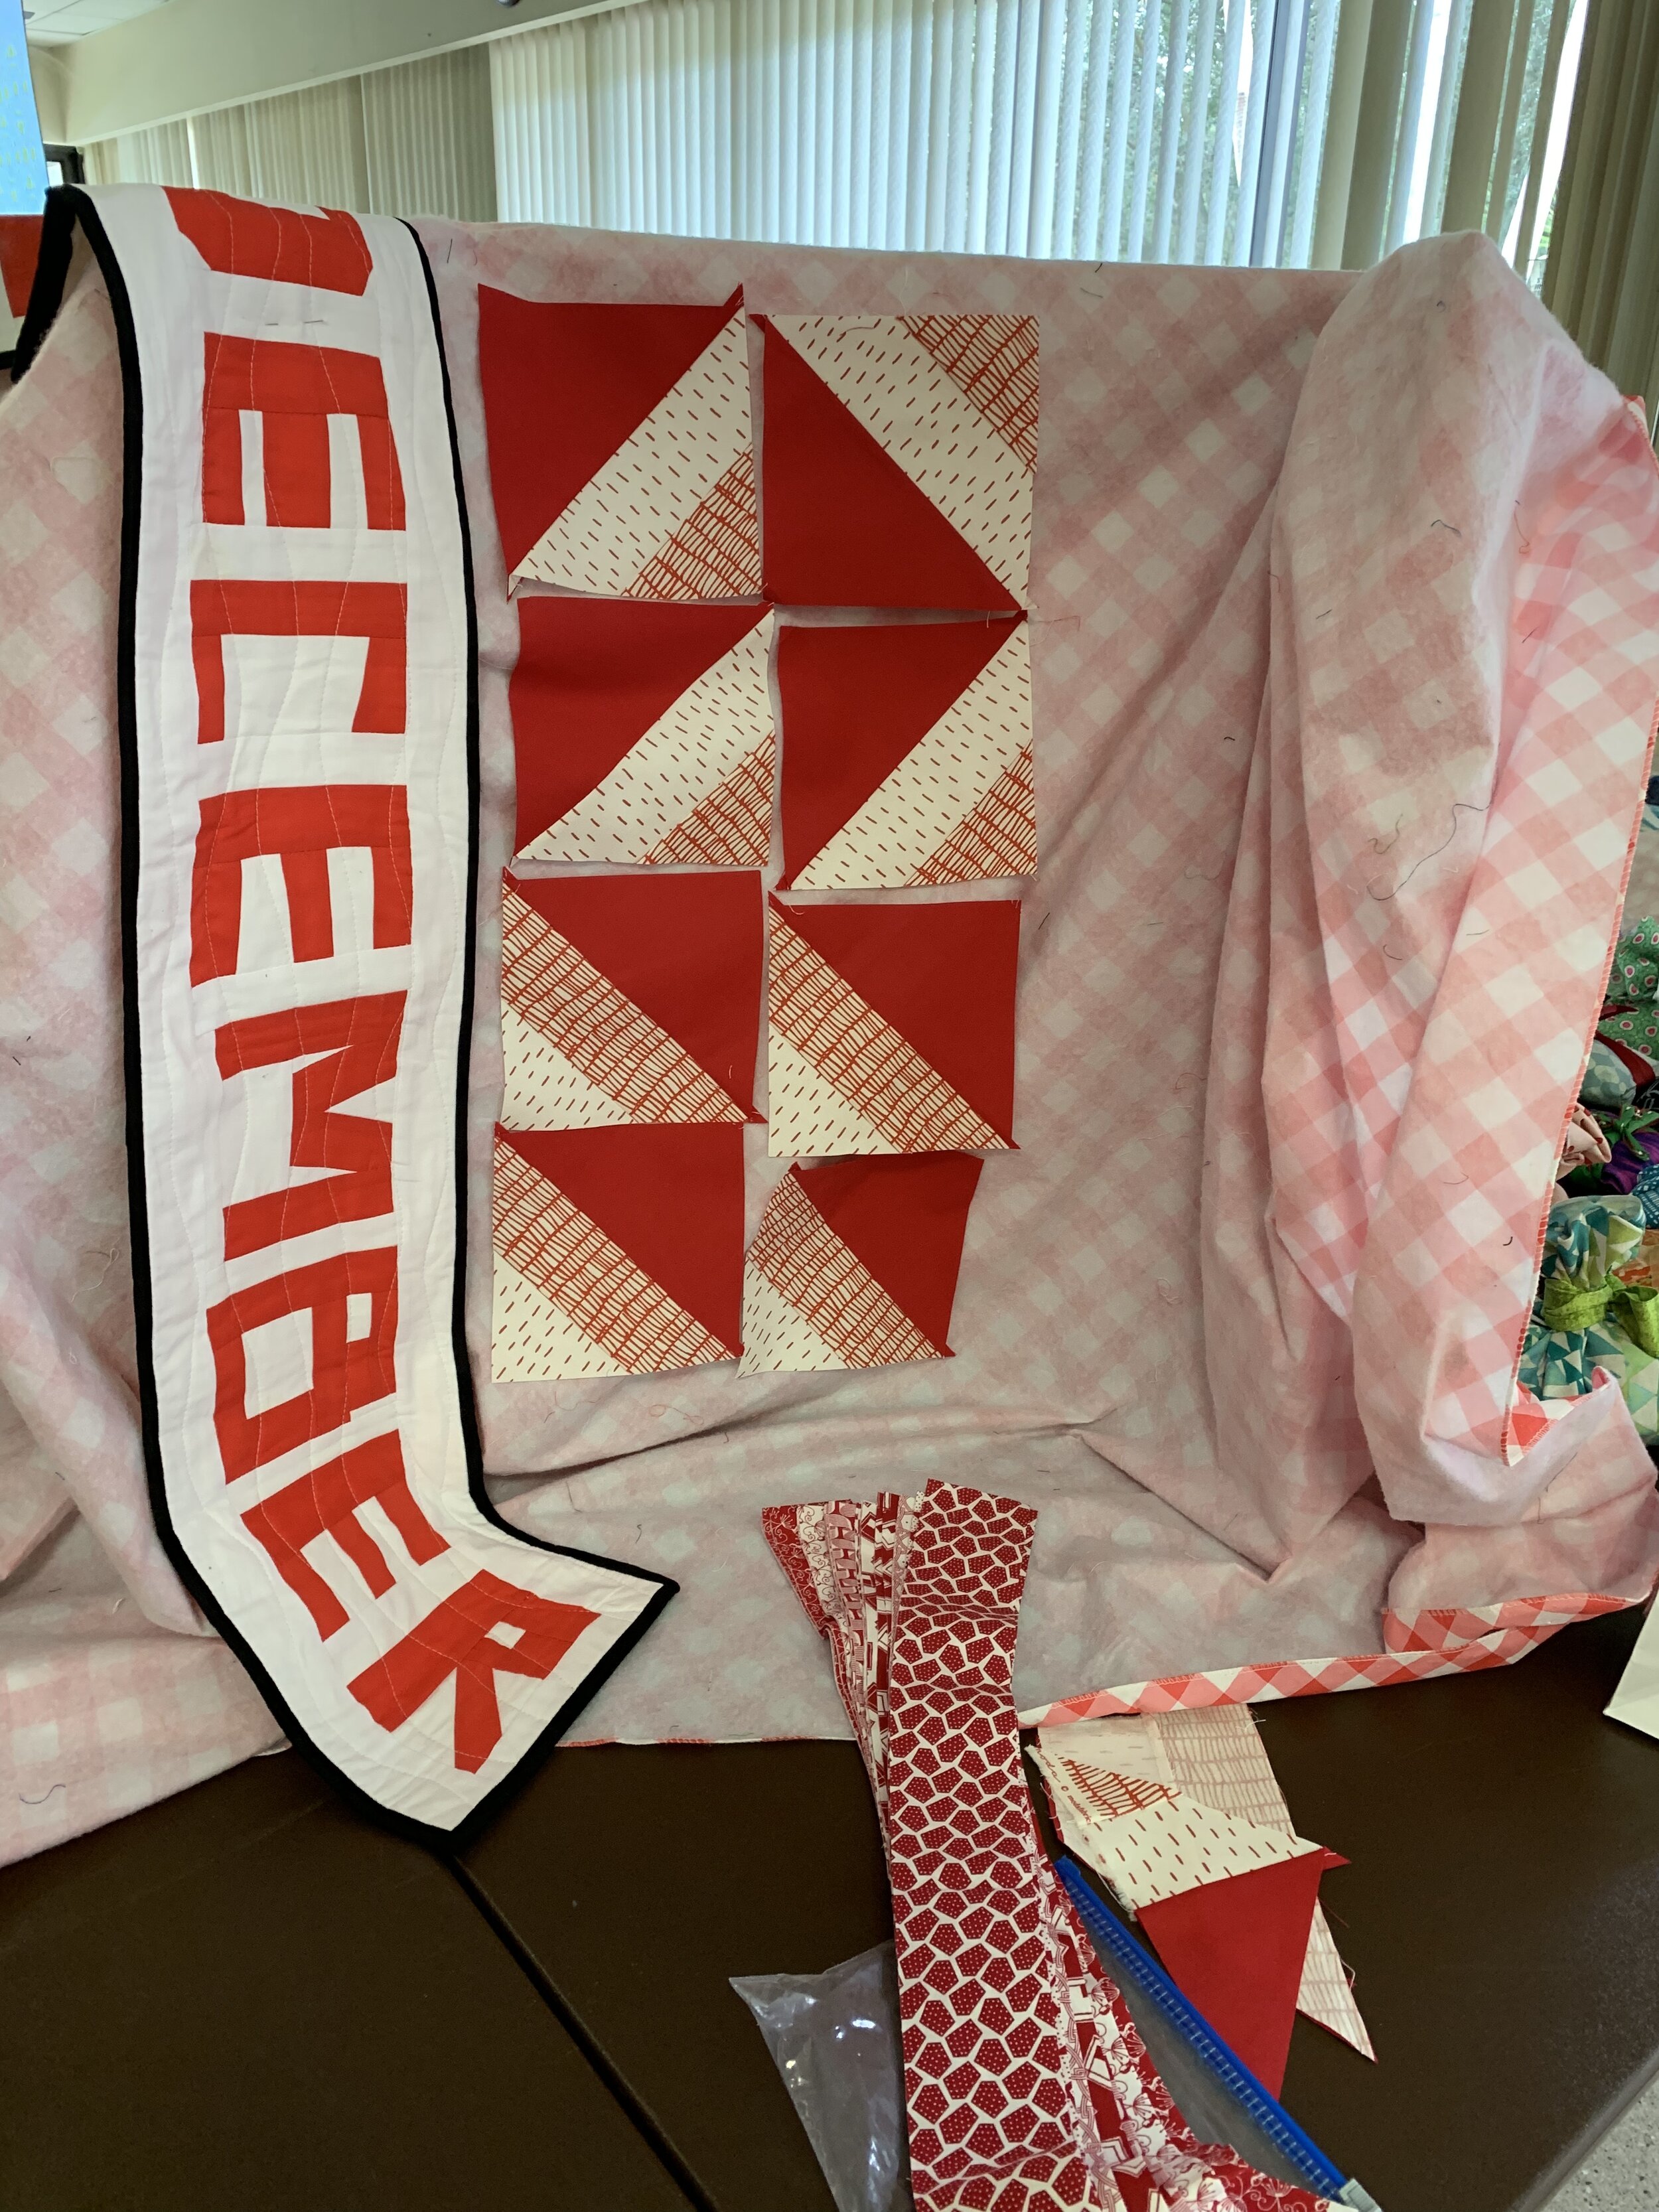
December 2019
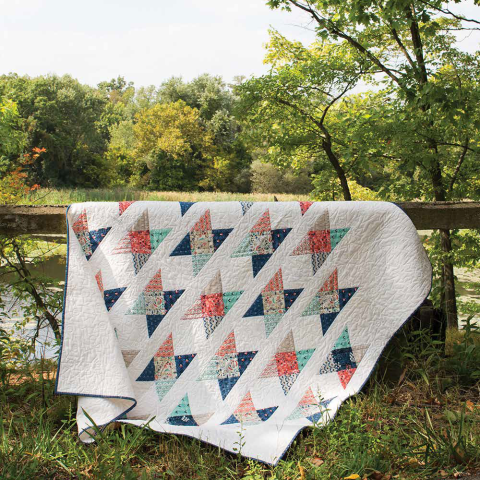
The December presentation due in January 2020 is back to the big easy -- only 3 seams -- with plenty of instructions and guidance. We're using an episode of Angela Walters' Midnight Quilt Show called Scrappy on Point Triangle Quilt. She pretends to be sewing at night when everyone's asleep and noshing on chocolate and popcorn with wine. There are plenty of episodes to check out. For this, we're using this tutorial.
Let's try a traditional red-and-white color scheme, and you'll need 3 fabrics. They can be all solids, all red-and-white prints, or a mix. My sample has a solid and two prints.
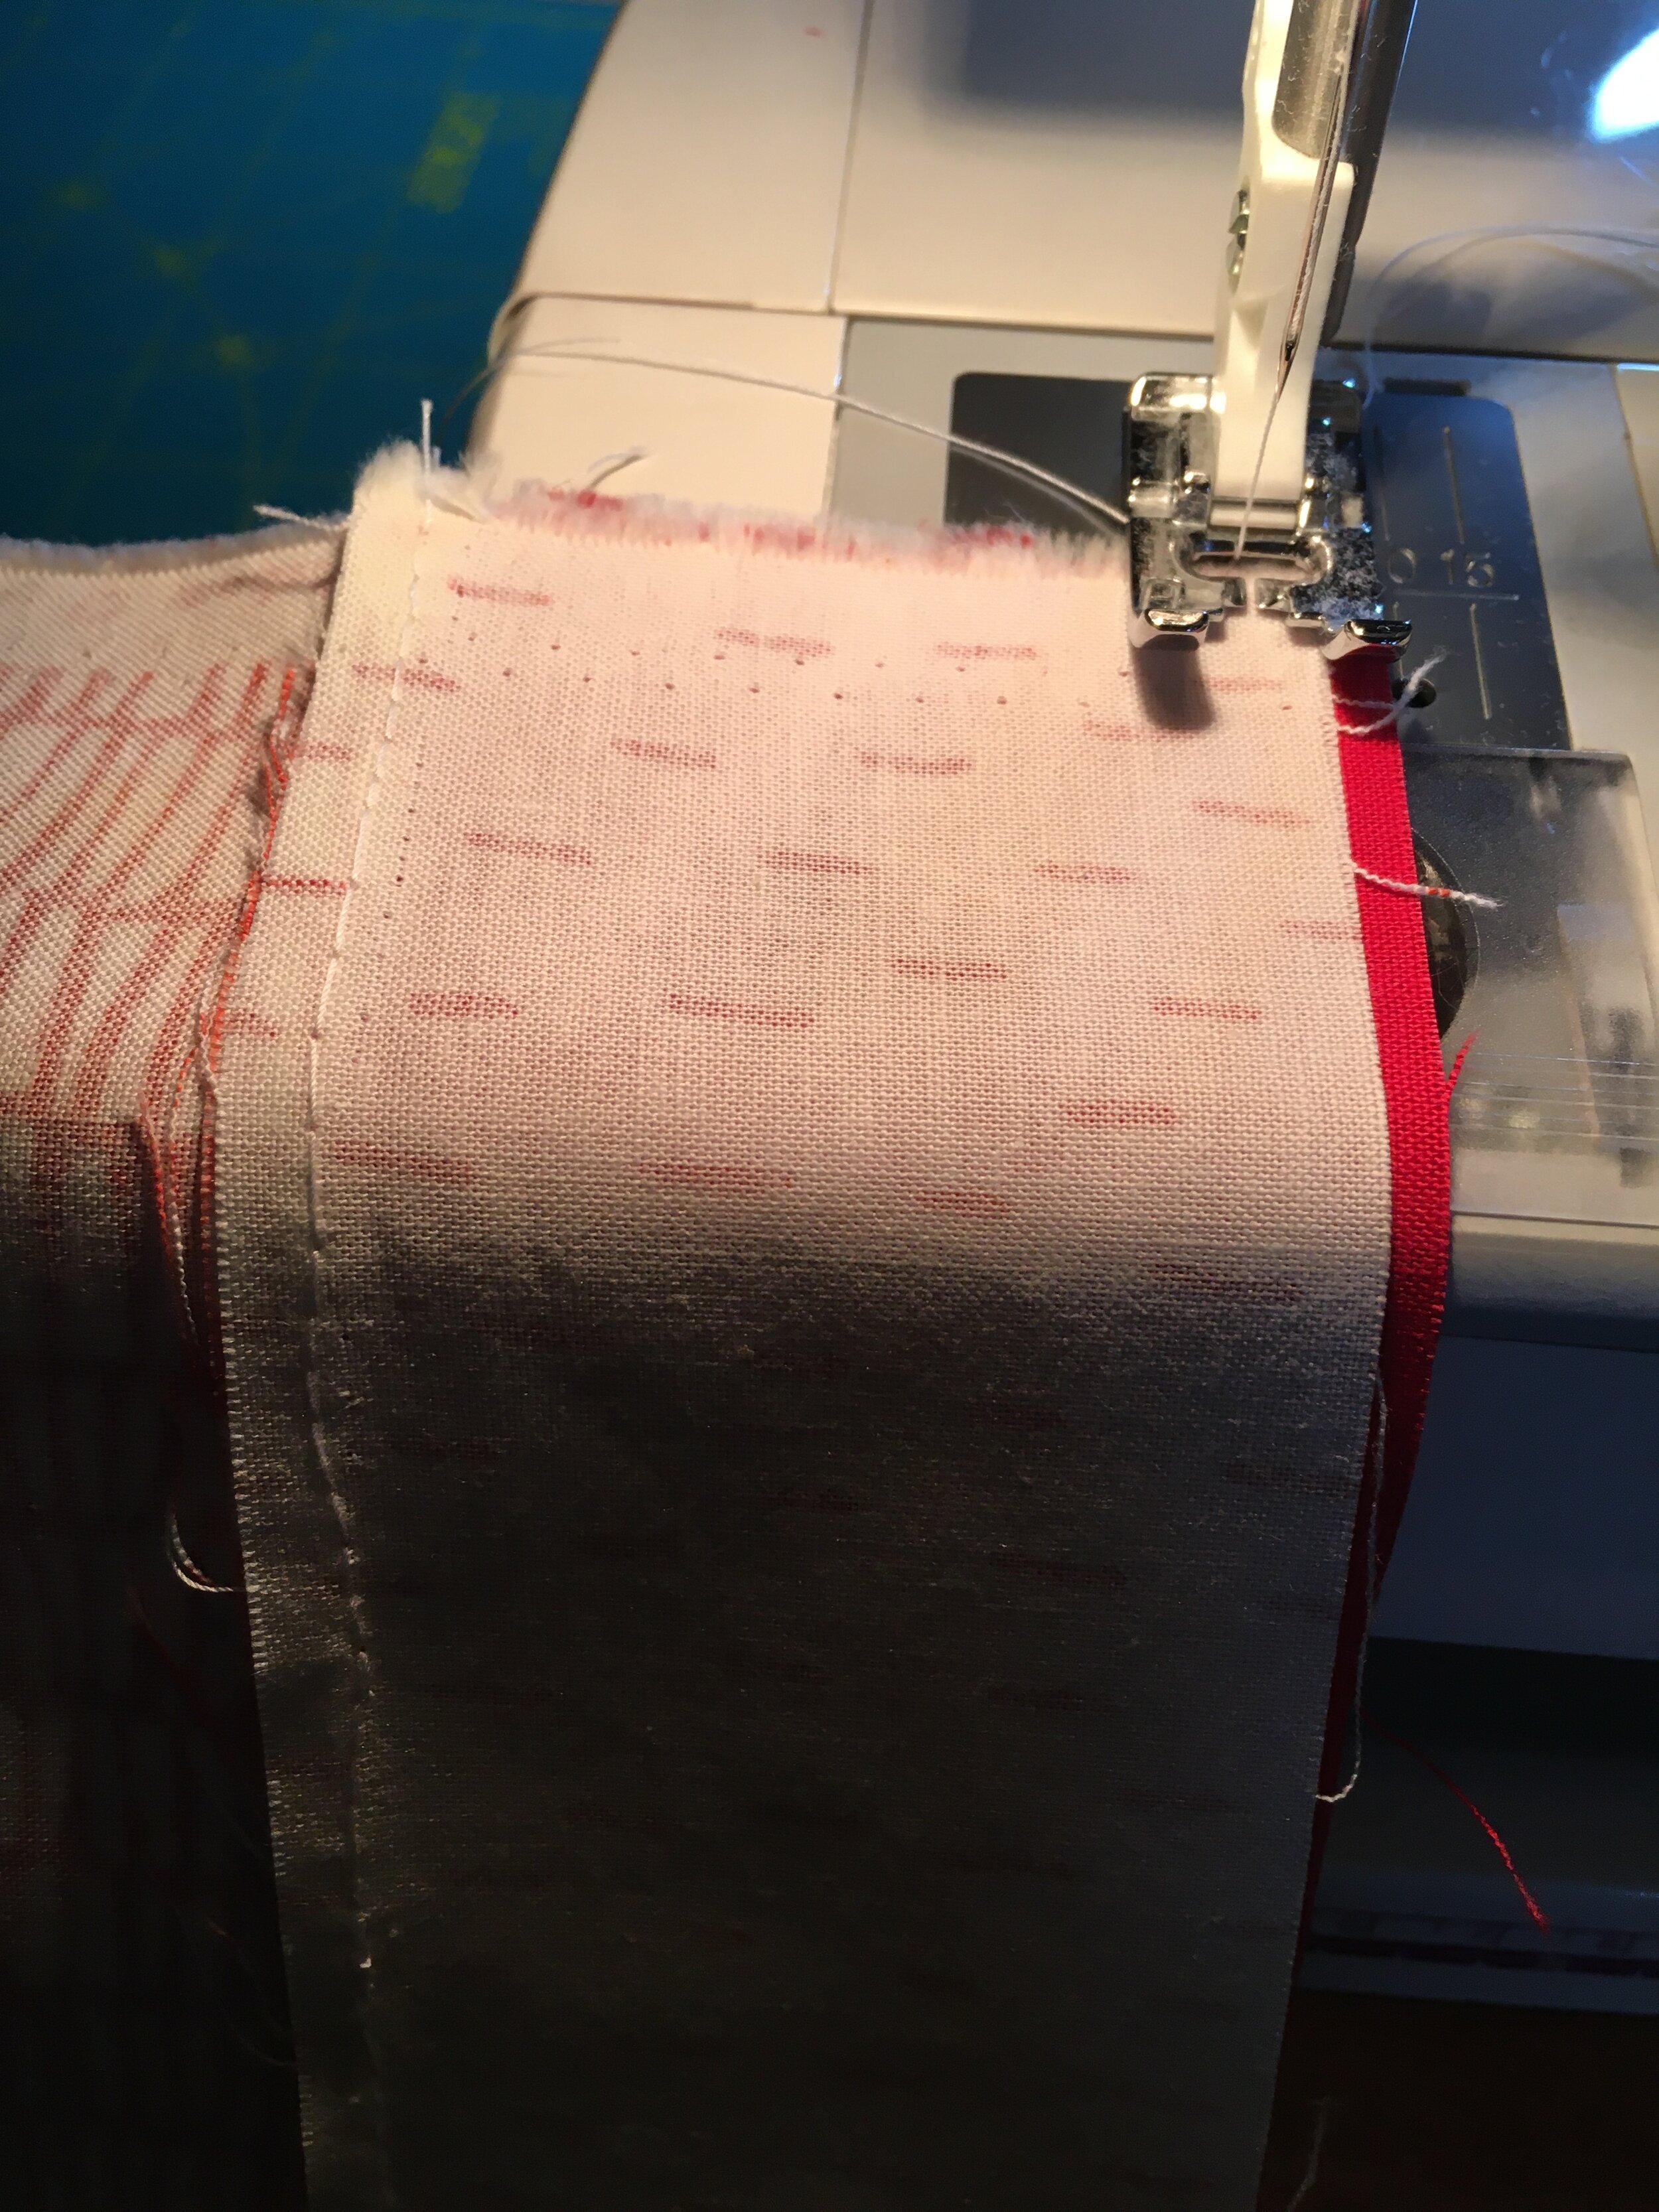
Cut WOF, or width of fabric, two 2.5-inch strips and one 4.75-inch strip . One thing this illustrates is the variation in widths of fabric. My Kona solids were easily 44 inches. My cute prints were 42,. In the end, it makes no difference. Sew the 2.5-inch strips together, add the 4.75-inch strip, and sew a sleeve. (I used 4.75-inches in case my seams were a little less than straight, then trimmed off the excess when the sleeve was done.)
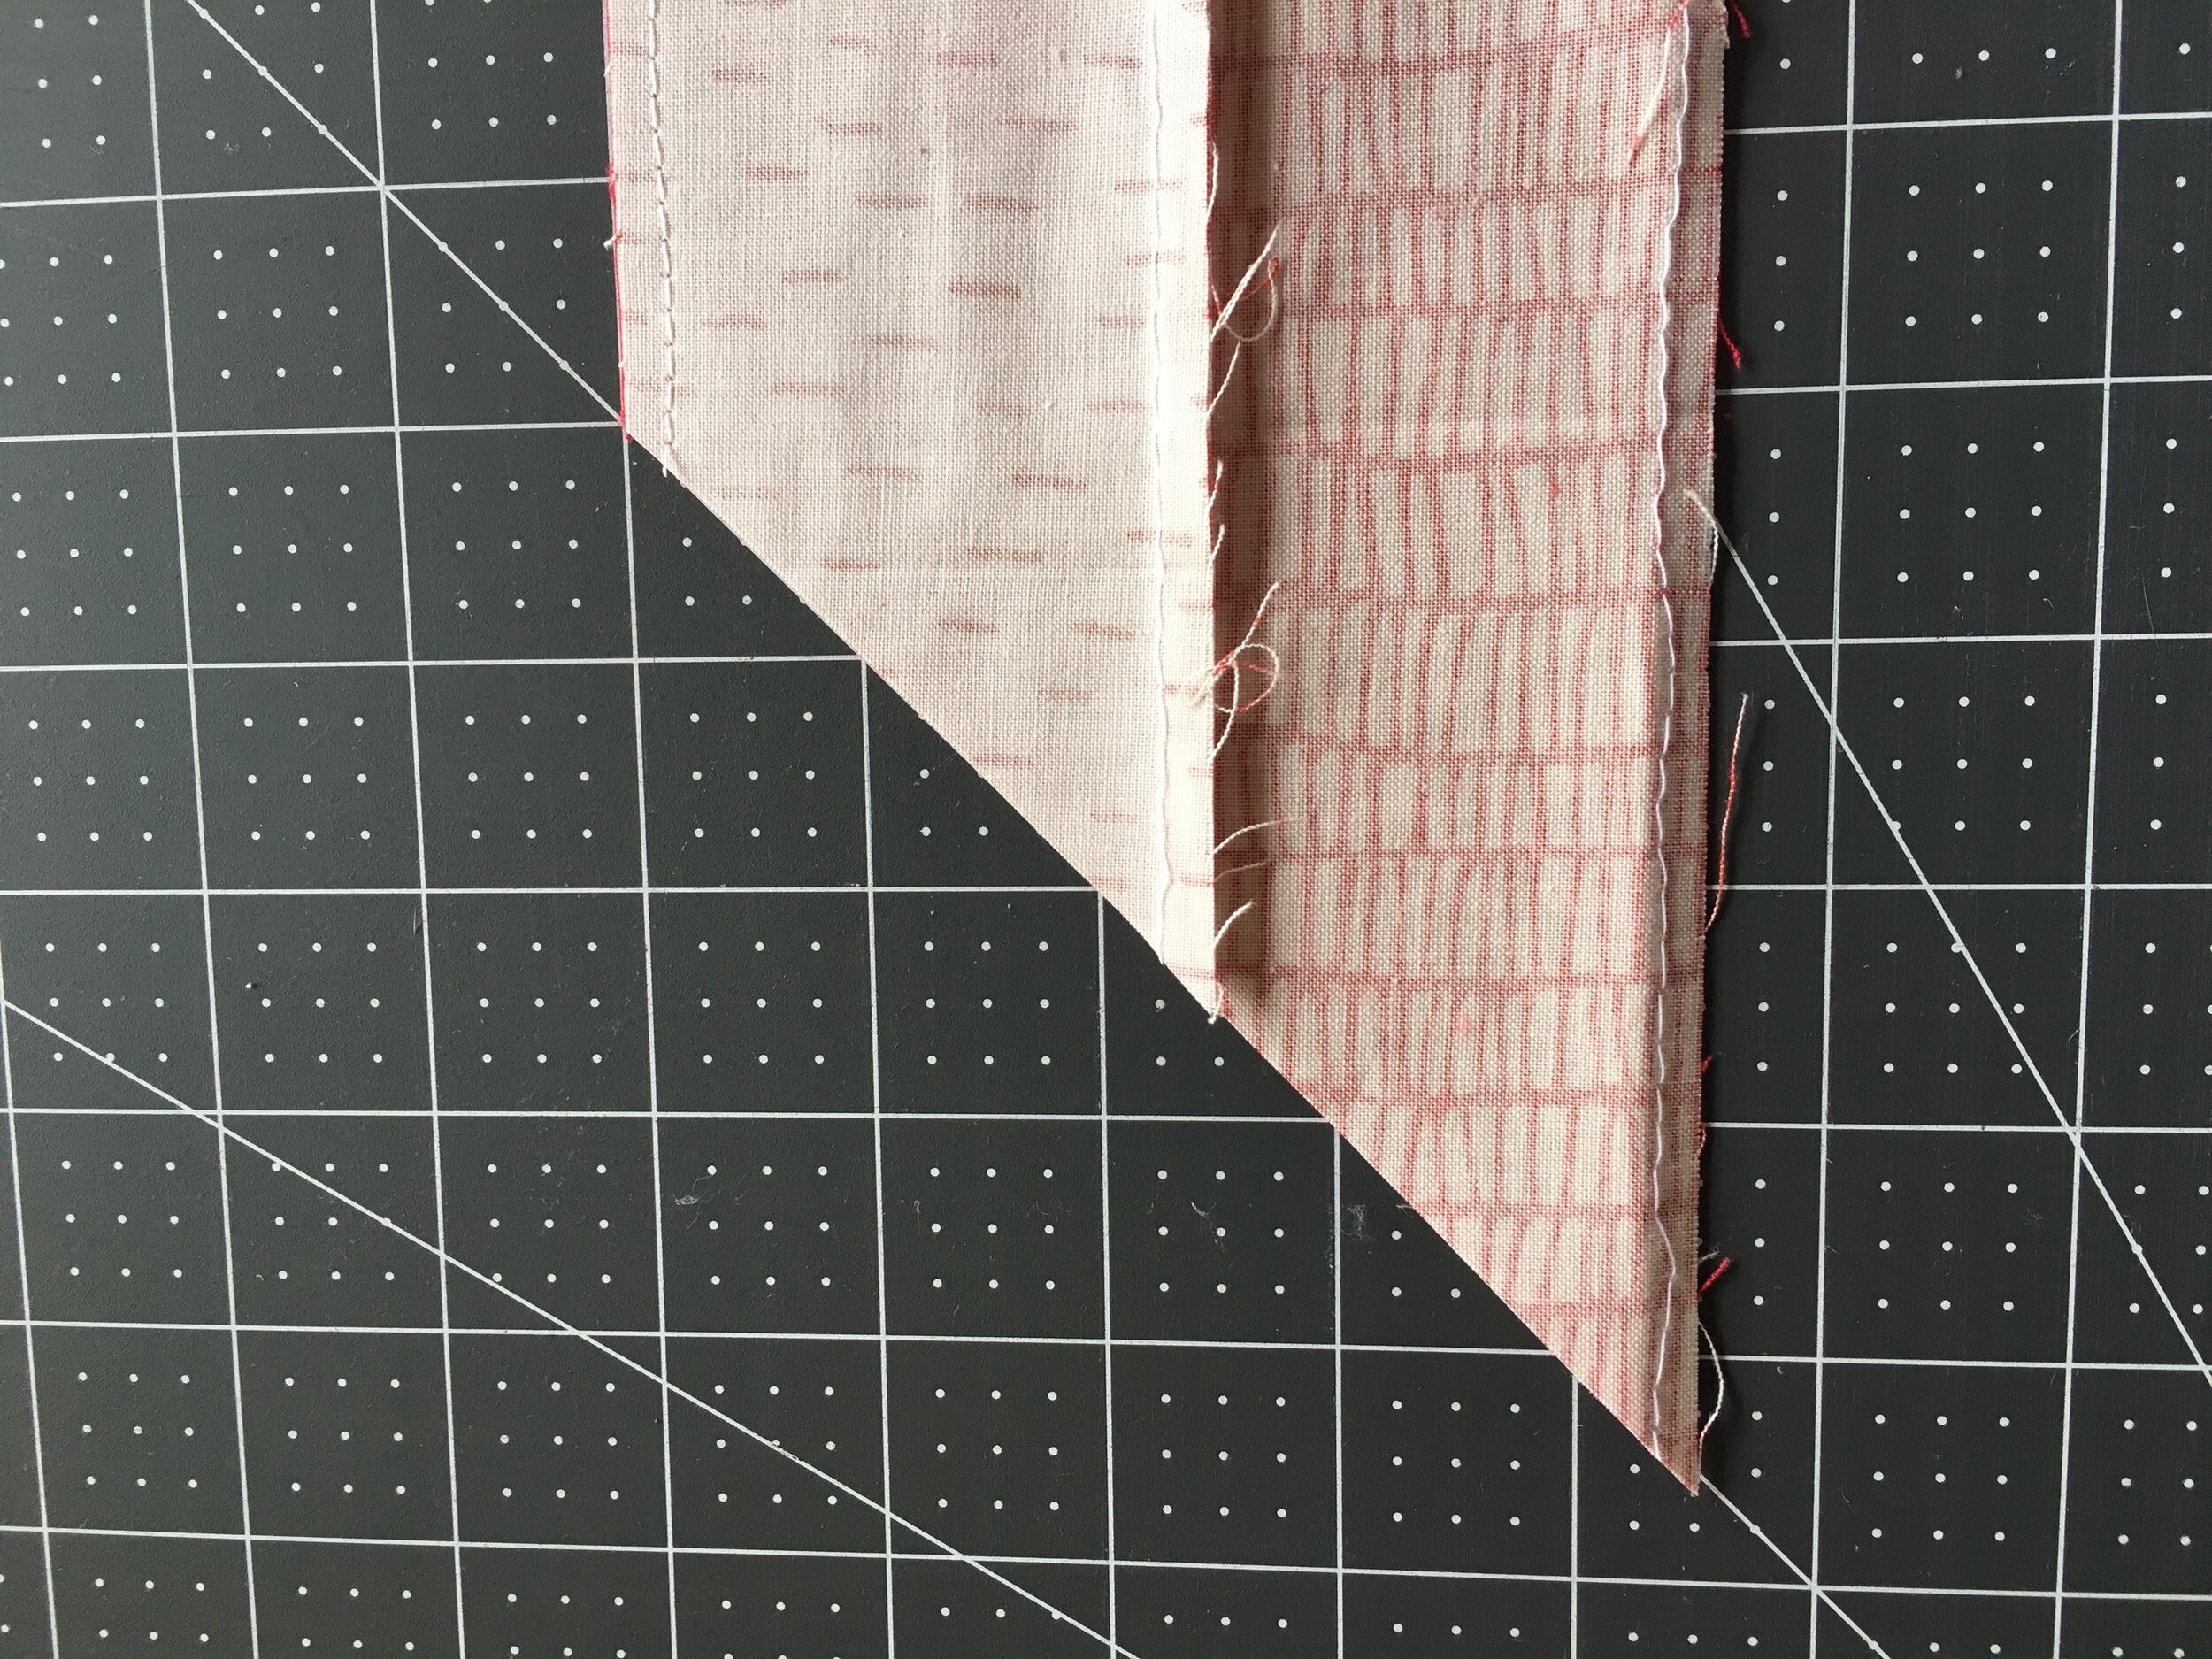
Next is the most crucial part -- cutting on a 45-degree angle. I don't have a 45-degree triangle template, but my cutting board has a 45-degree line. If you're still looking for the angle, you can create your own paper template as the guide. Cut one waste piece, cut a 45-degree angle, and cut another 45-degree angle to create a big folded triangle. Your triangles should finish with 2 stitches on one corner, which you open to reveal squares measuring about 6 inches.
An art quilter told me this was the pattern she used for her first quilt, so how hard can it be. I went crazy and used a black-and-white version for one side of a runner. I hope you find this as easy and enjoyable as I did. Check out the photos.
By Cathy


November 2019
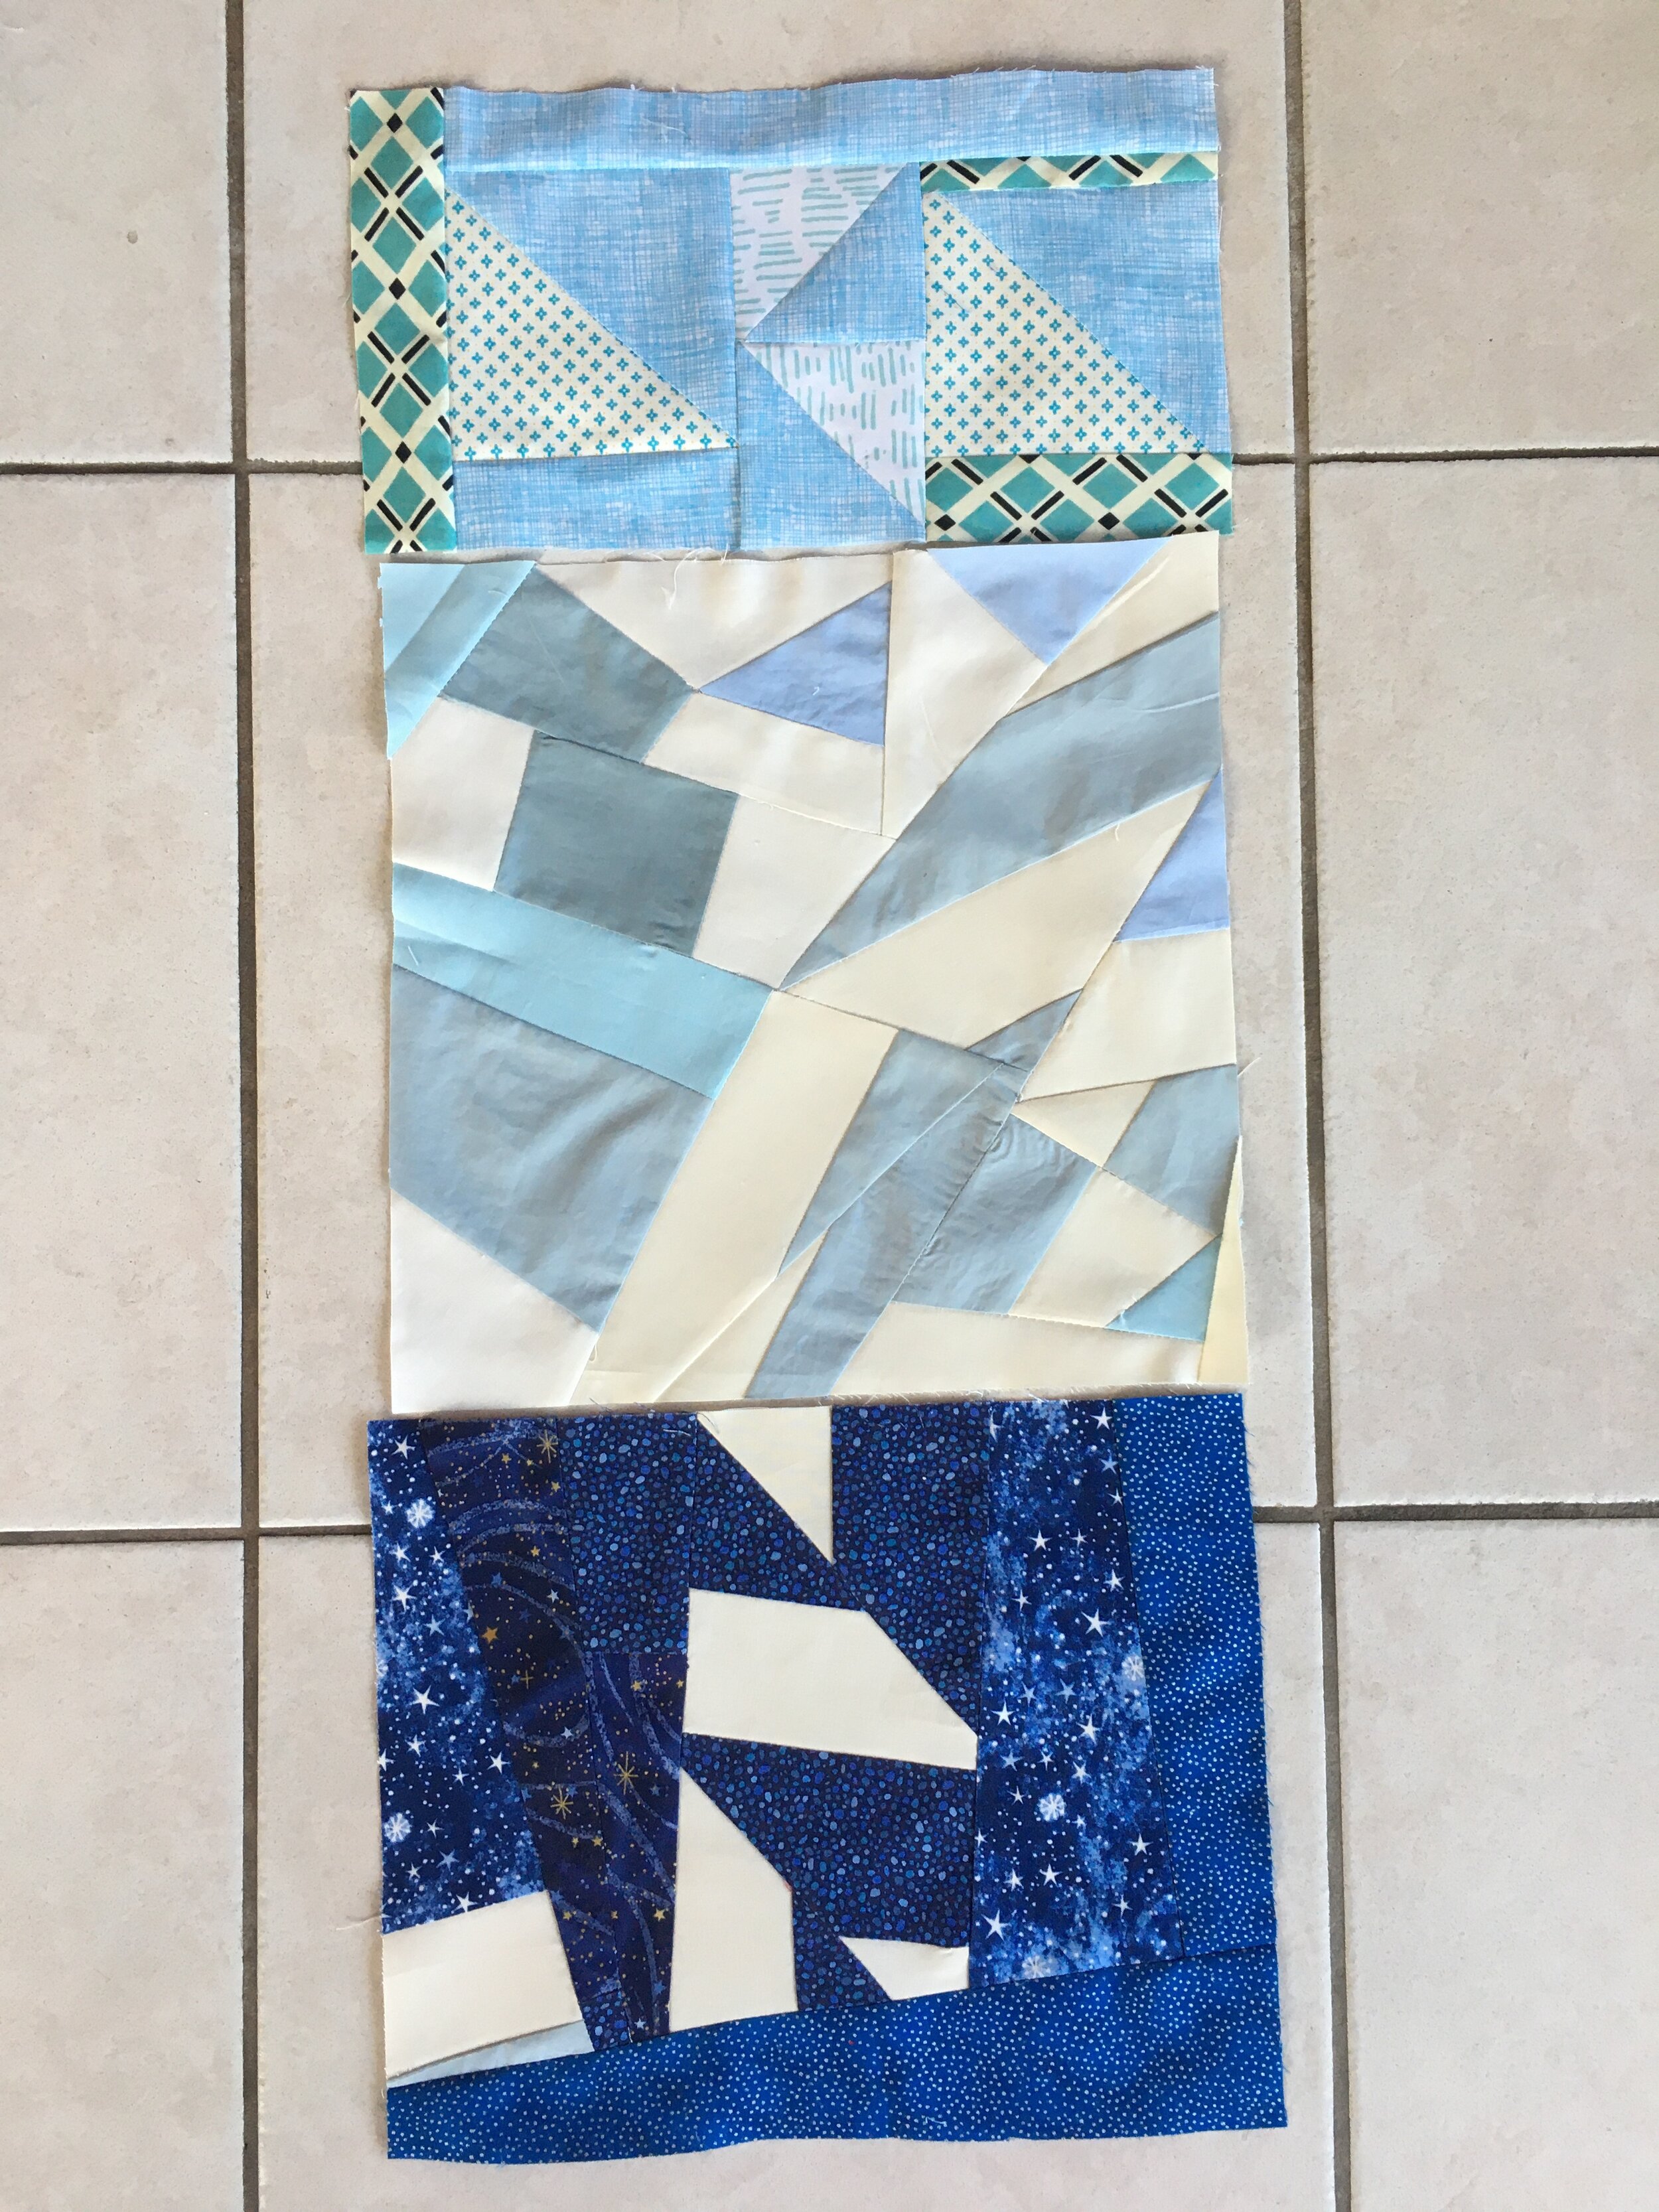
Introducing in November for delivery in December, it’s icy! This is meant to be an experiment in triangles and other shapes that fit. The inspiration was ice in all its forms -- glacial, frost, cube, crystal—whatever inspires. Some blocks are photos are below. For triangles, it can be something as simple as half-square triangles or flying geese. For fabric, anything that reads icy or frost -- white, blue, gray, wintry prints. For dimensions, shoot for 12.5 inches on one side, then 4.5, 6.5, 8.5 or 12.5 inches on the other. By Cathy


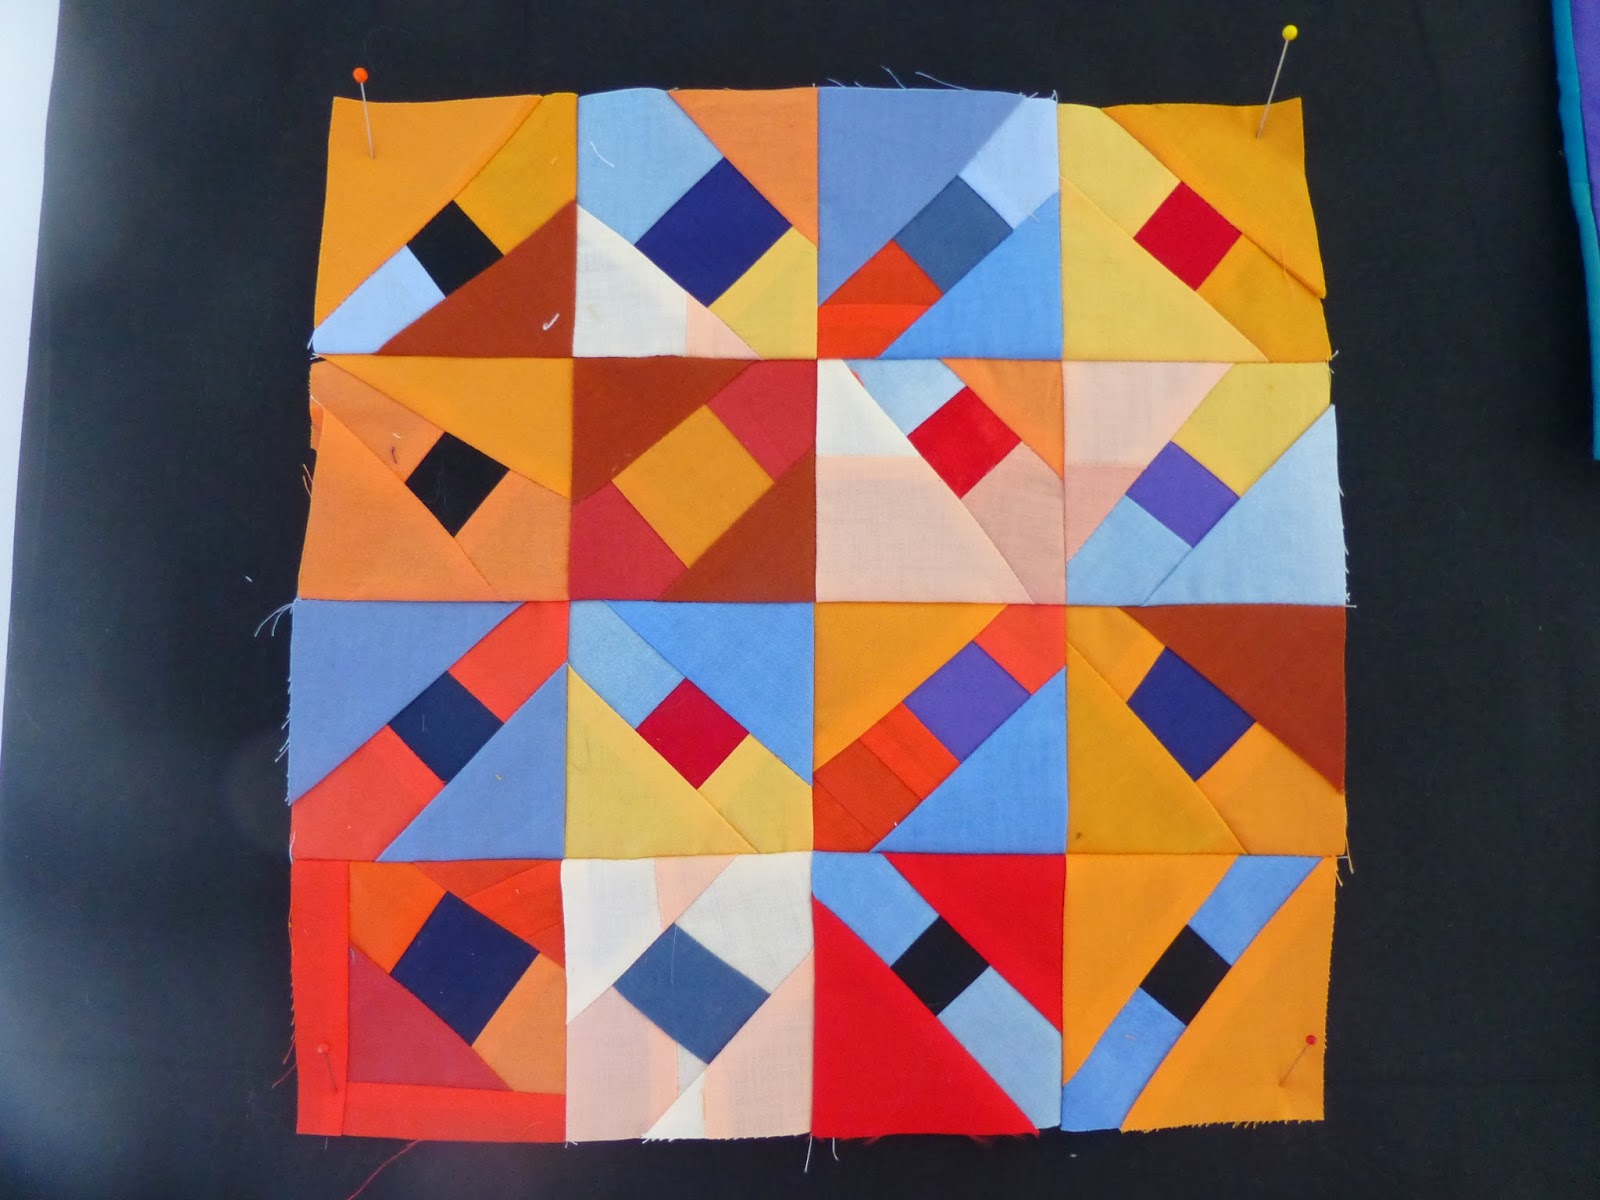
October 2019
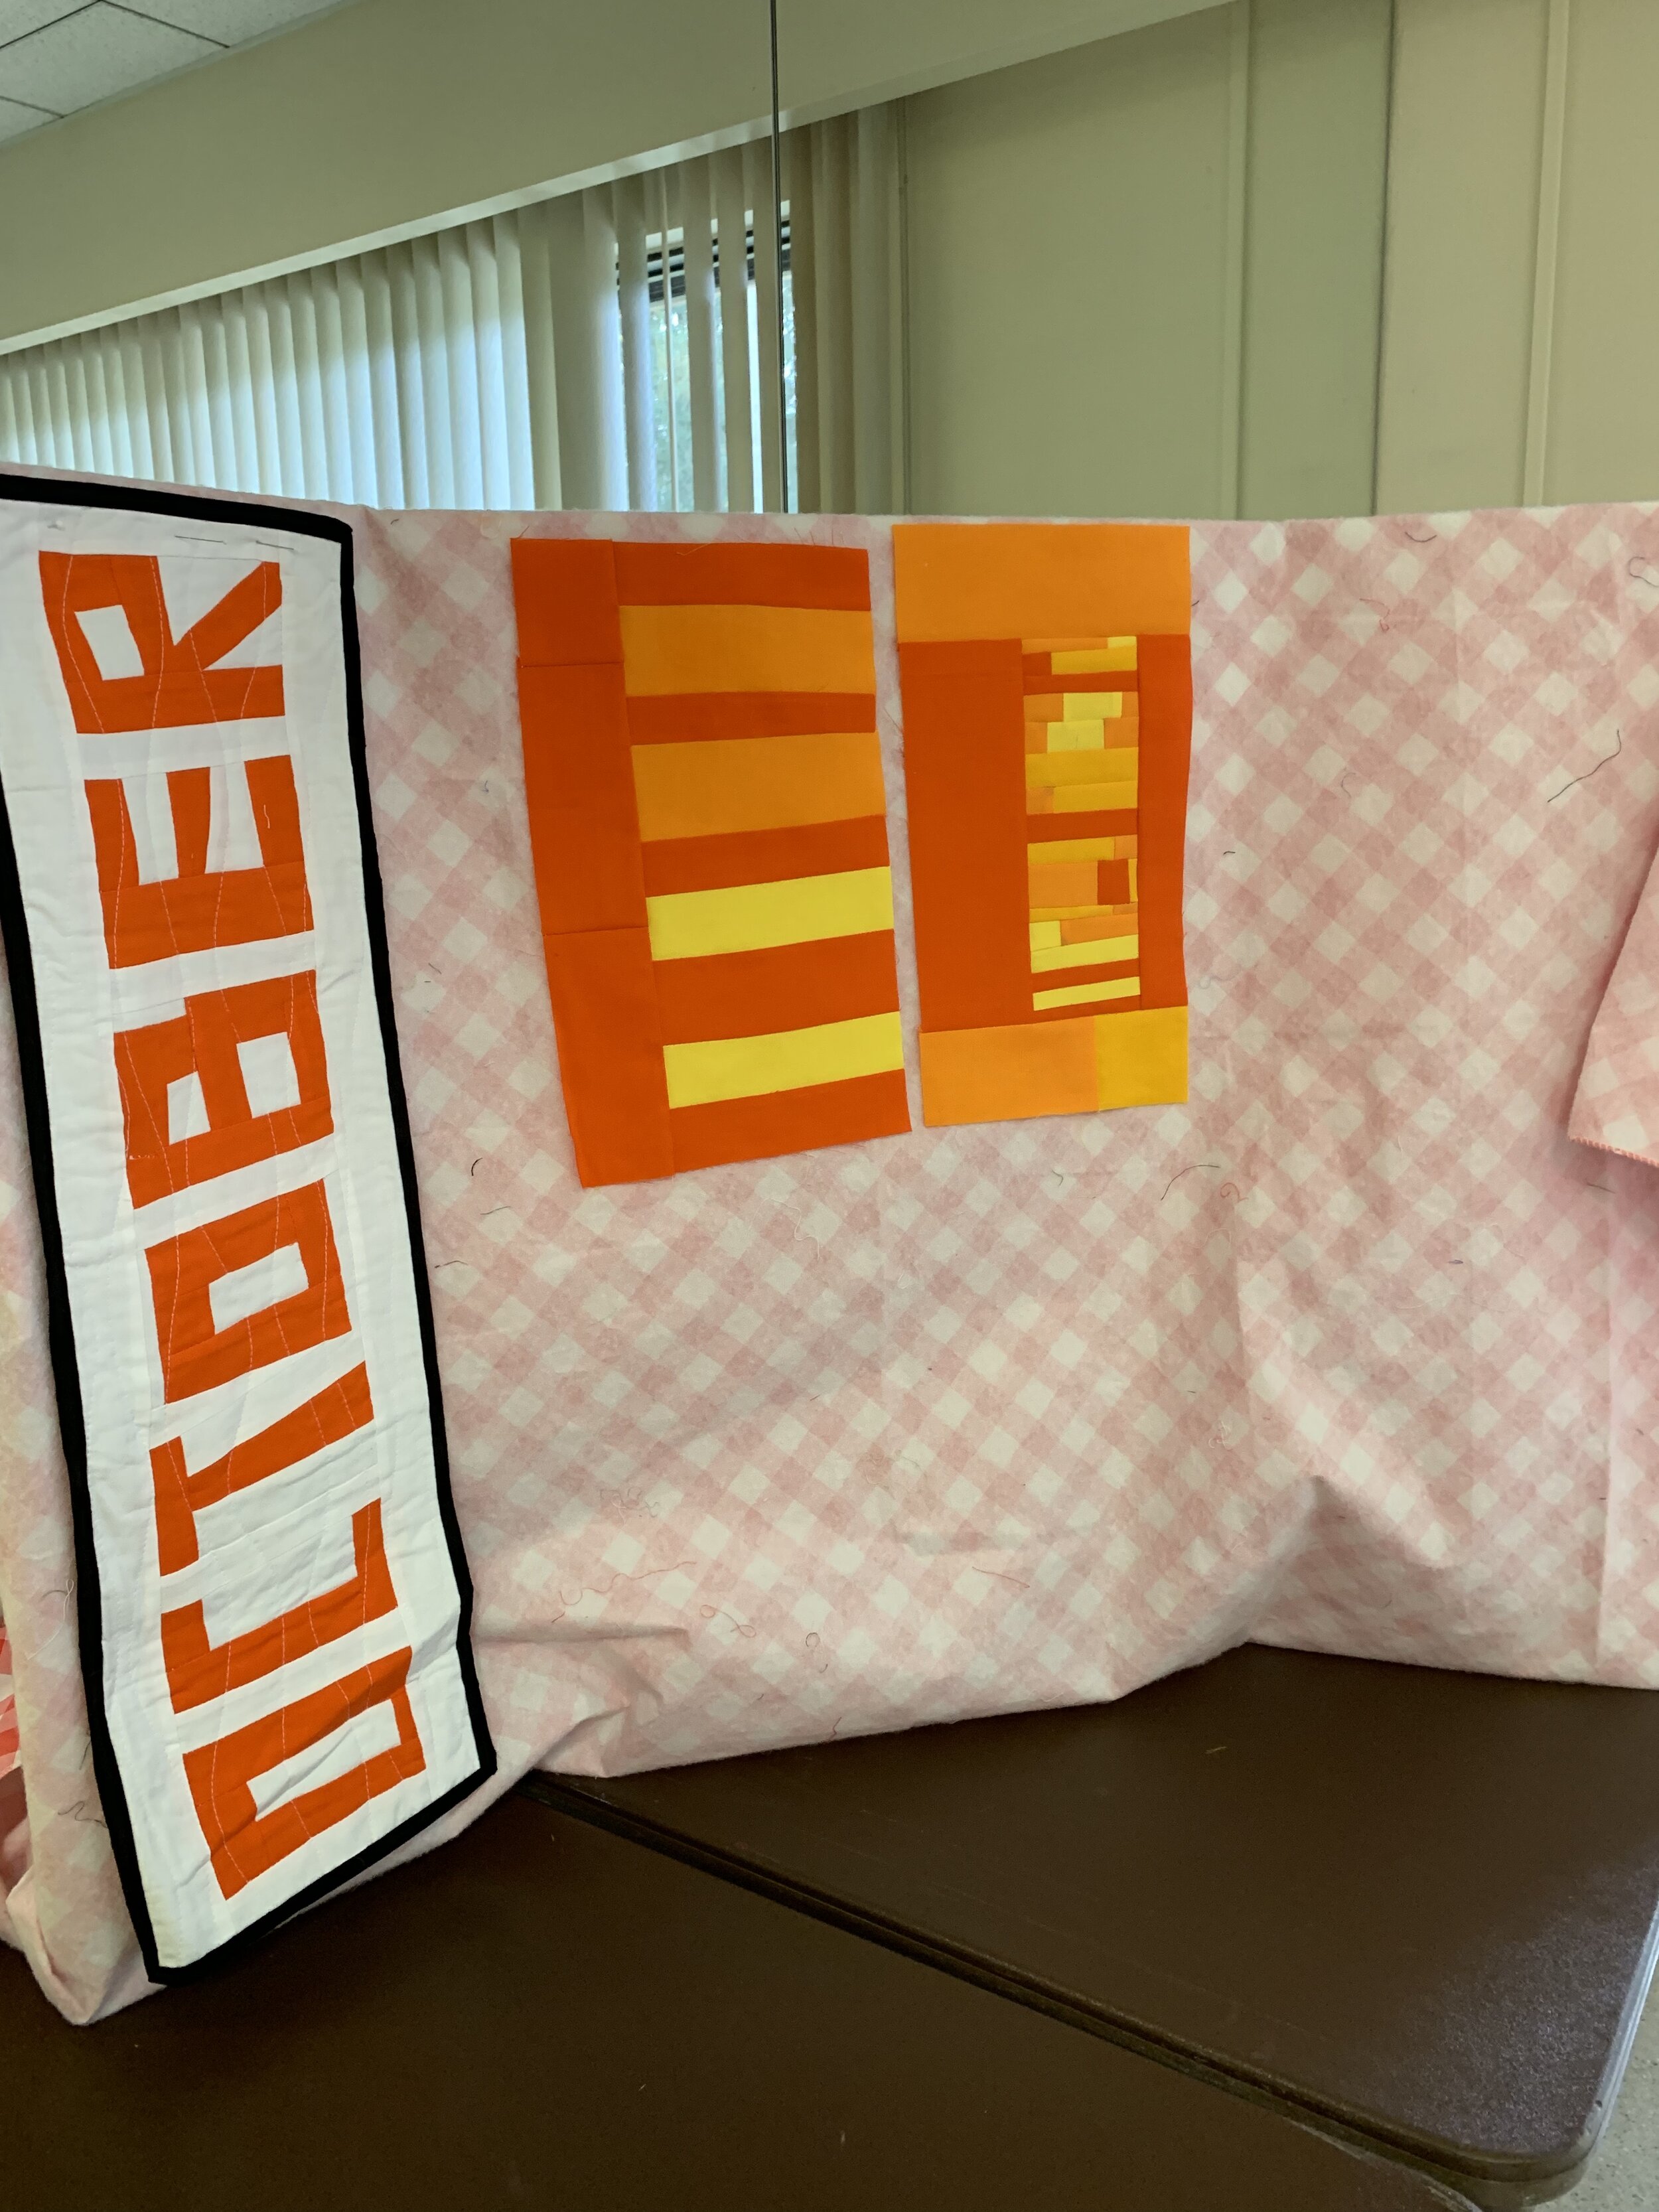
Introducing in October for delivery in November, it's Mostly Monotone Month. The fabric is yellow to orange solids. The block is a rectangle of at least 6.5X12.5 inches. If you're inspired, you can stretch it to 6.5” X 18.5”.
The block design is up to you with a focus on the year in review. If you had a favorite 2019 BOM, make another in the yellow-orange color range. If you want to apply something learned at BQE or one of the SFMQG workshops, go ahead. Anything from Tara Faughnan to Rayna Gilman, tiny piecing to liberated houses. The photo shows a modified Tara block and a Rayna-tiny combo. If you enjoyed making any block ever, try it in these colors! Make it straight, wonky or improv. Throw in one of Patti's curves. There are no rejects! By Cathy
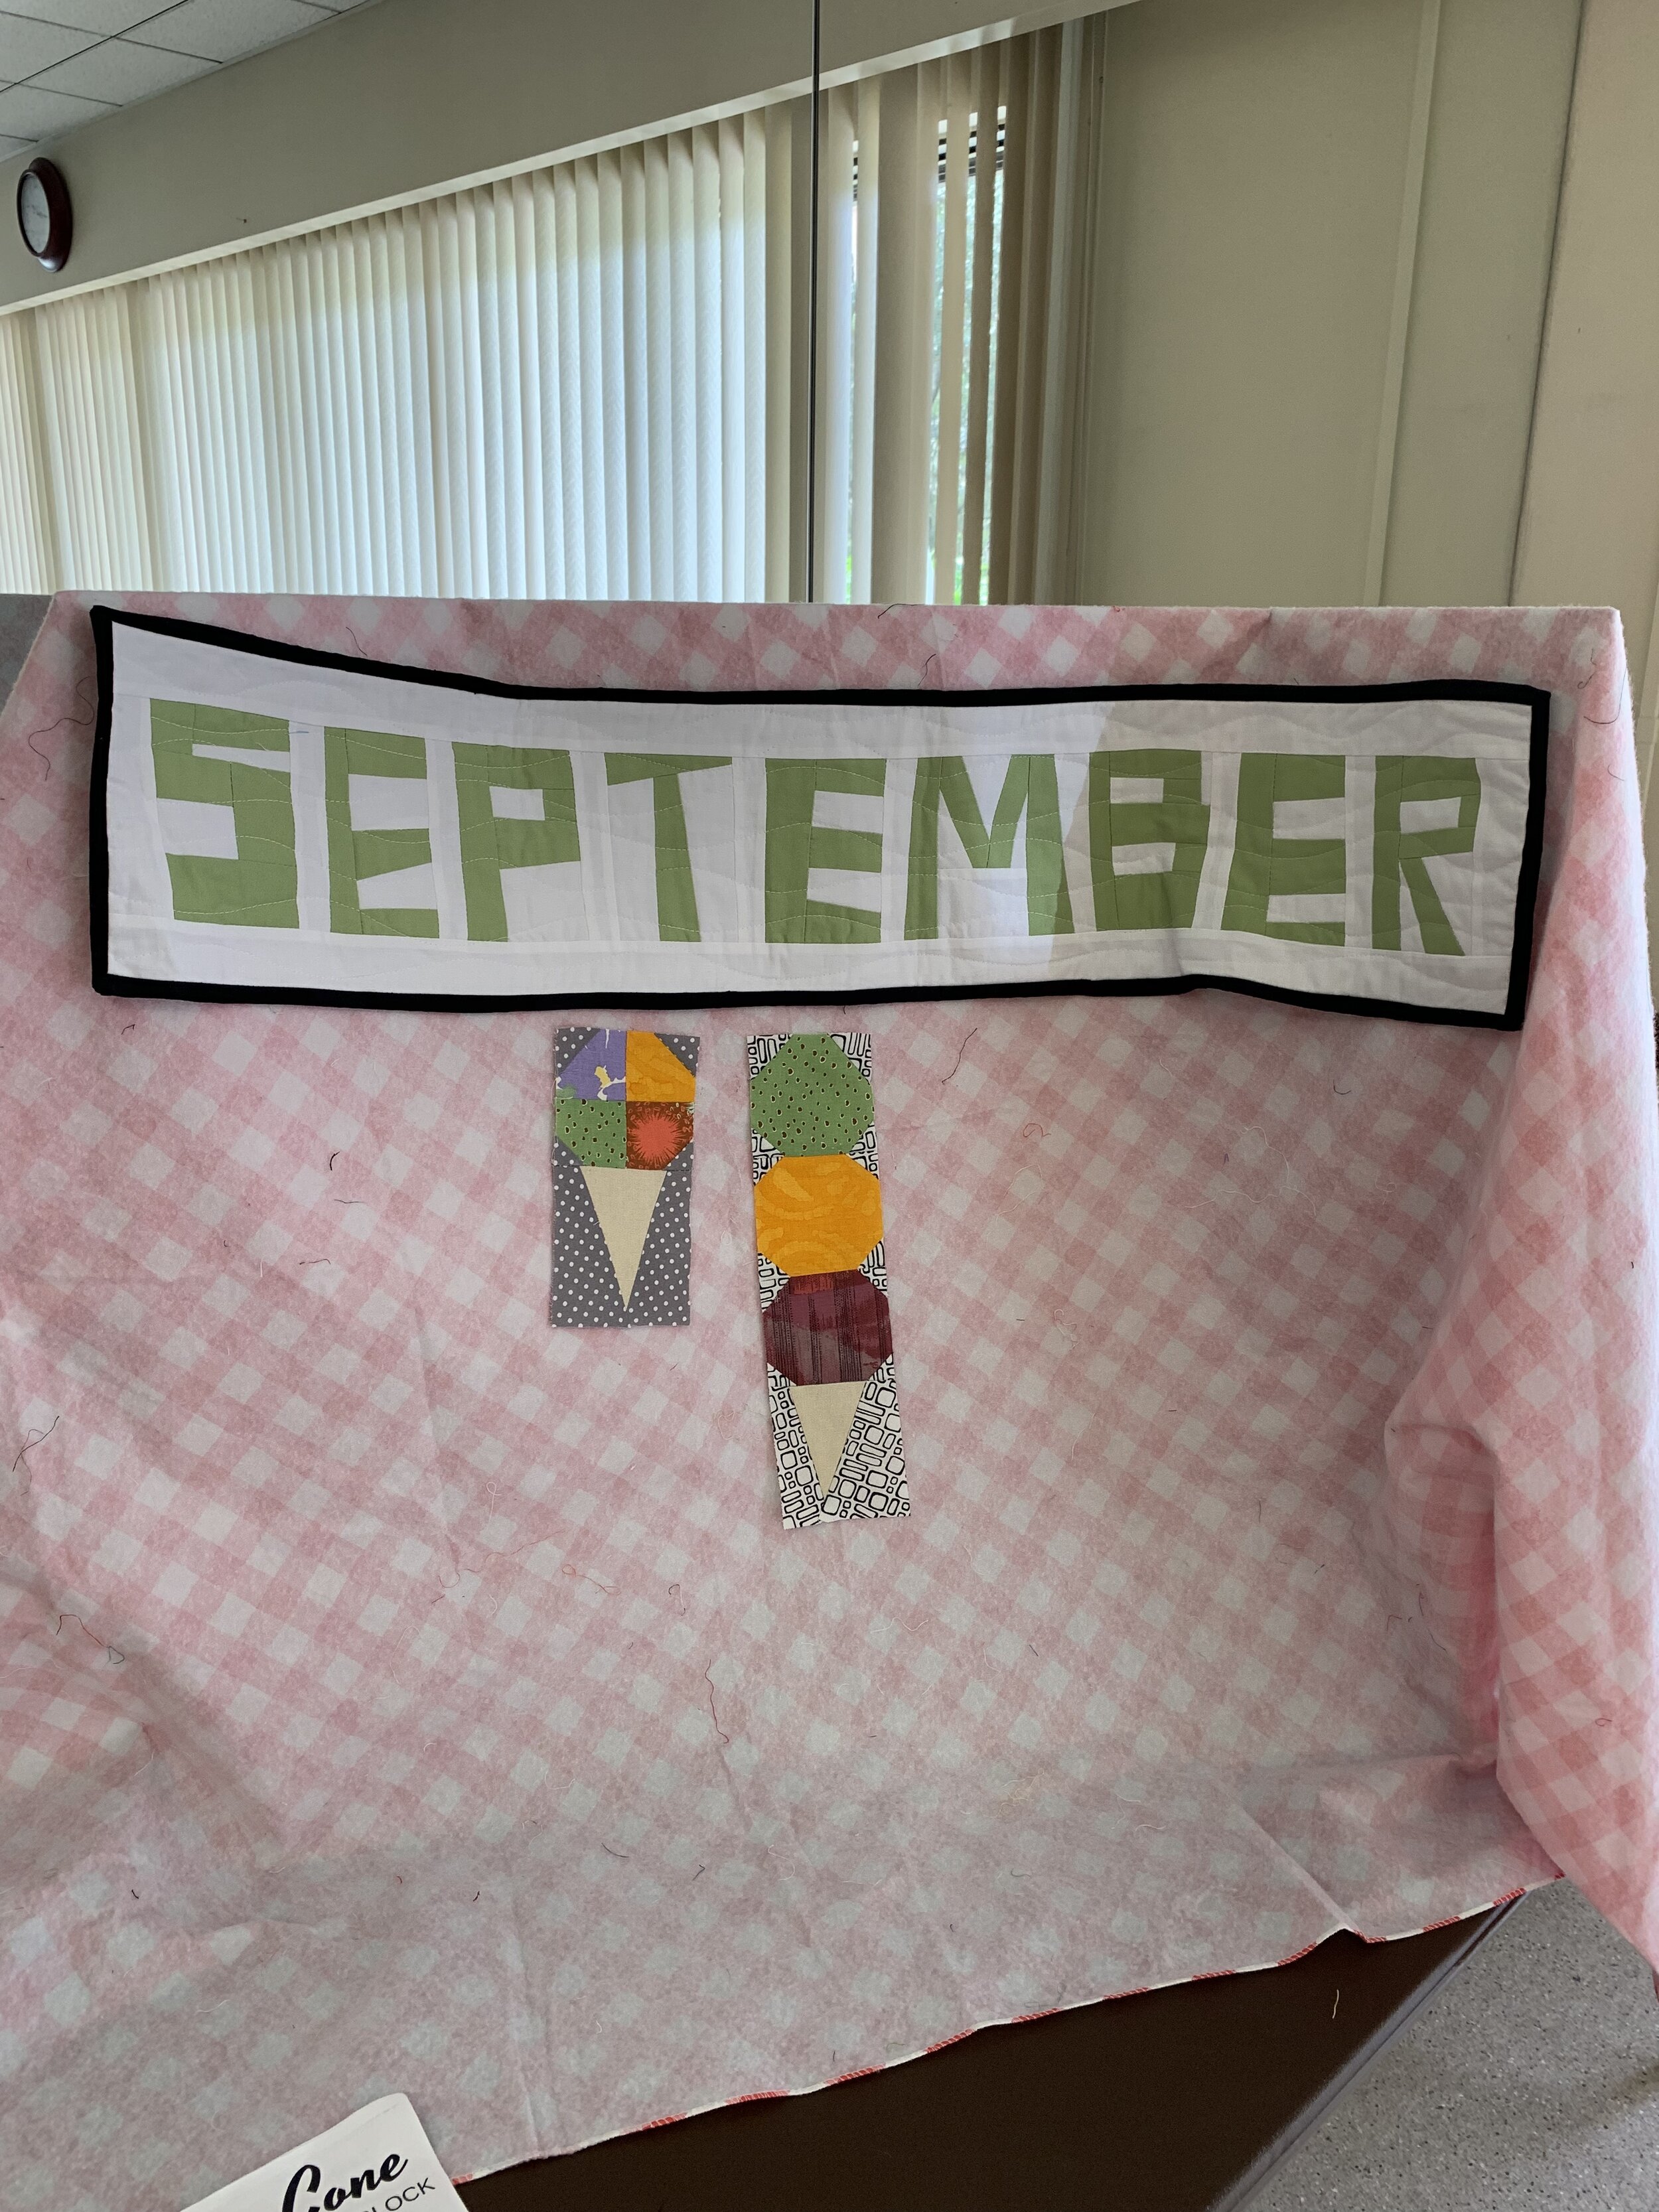
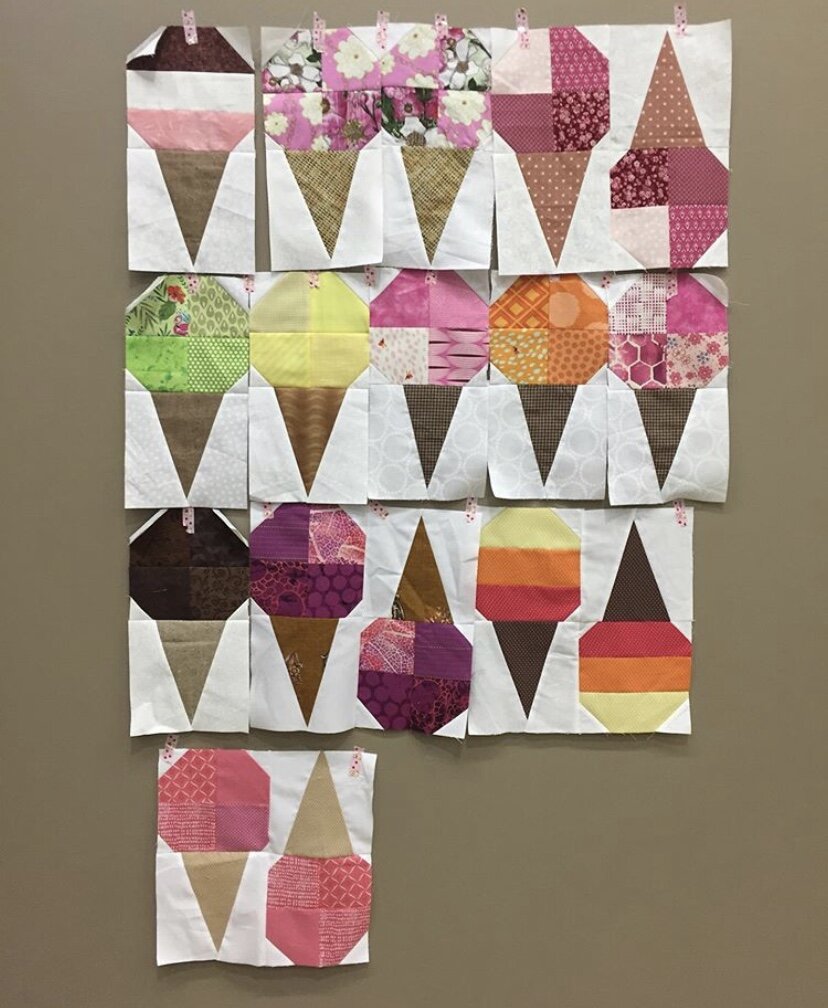
September 2019
It seems like summer will never end, so ice cream is appropriate. For delivery in October, here's a free ice cream cone block pattern from the Sewing Loft:
The pattern offers 6X6 and 12X12-inch blocks, which are really two cones sewn together. A double-cone block is optional. Singles are fine, plus there is plenty of room for improvisation. From the photo, you can see I made one-half of the pattern block at 3.5 inches by 7 inches, which can easily be trimmed to 6.5 inches. On the improv side, I made a triple-scoop cone that's 3.5X12.5 inches.
This is a scrap-friendly design with 2-inch squares used for ice cream in the 6-inch pattern. Since ice cream comes in so many flavors, the ice cream color variations are endless. I had a print that looked to me like mint chocolate chip. The cone is flexible as well. Just shoot for a modern neutral background. Get your licks in!
By Cathy

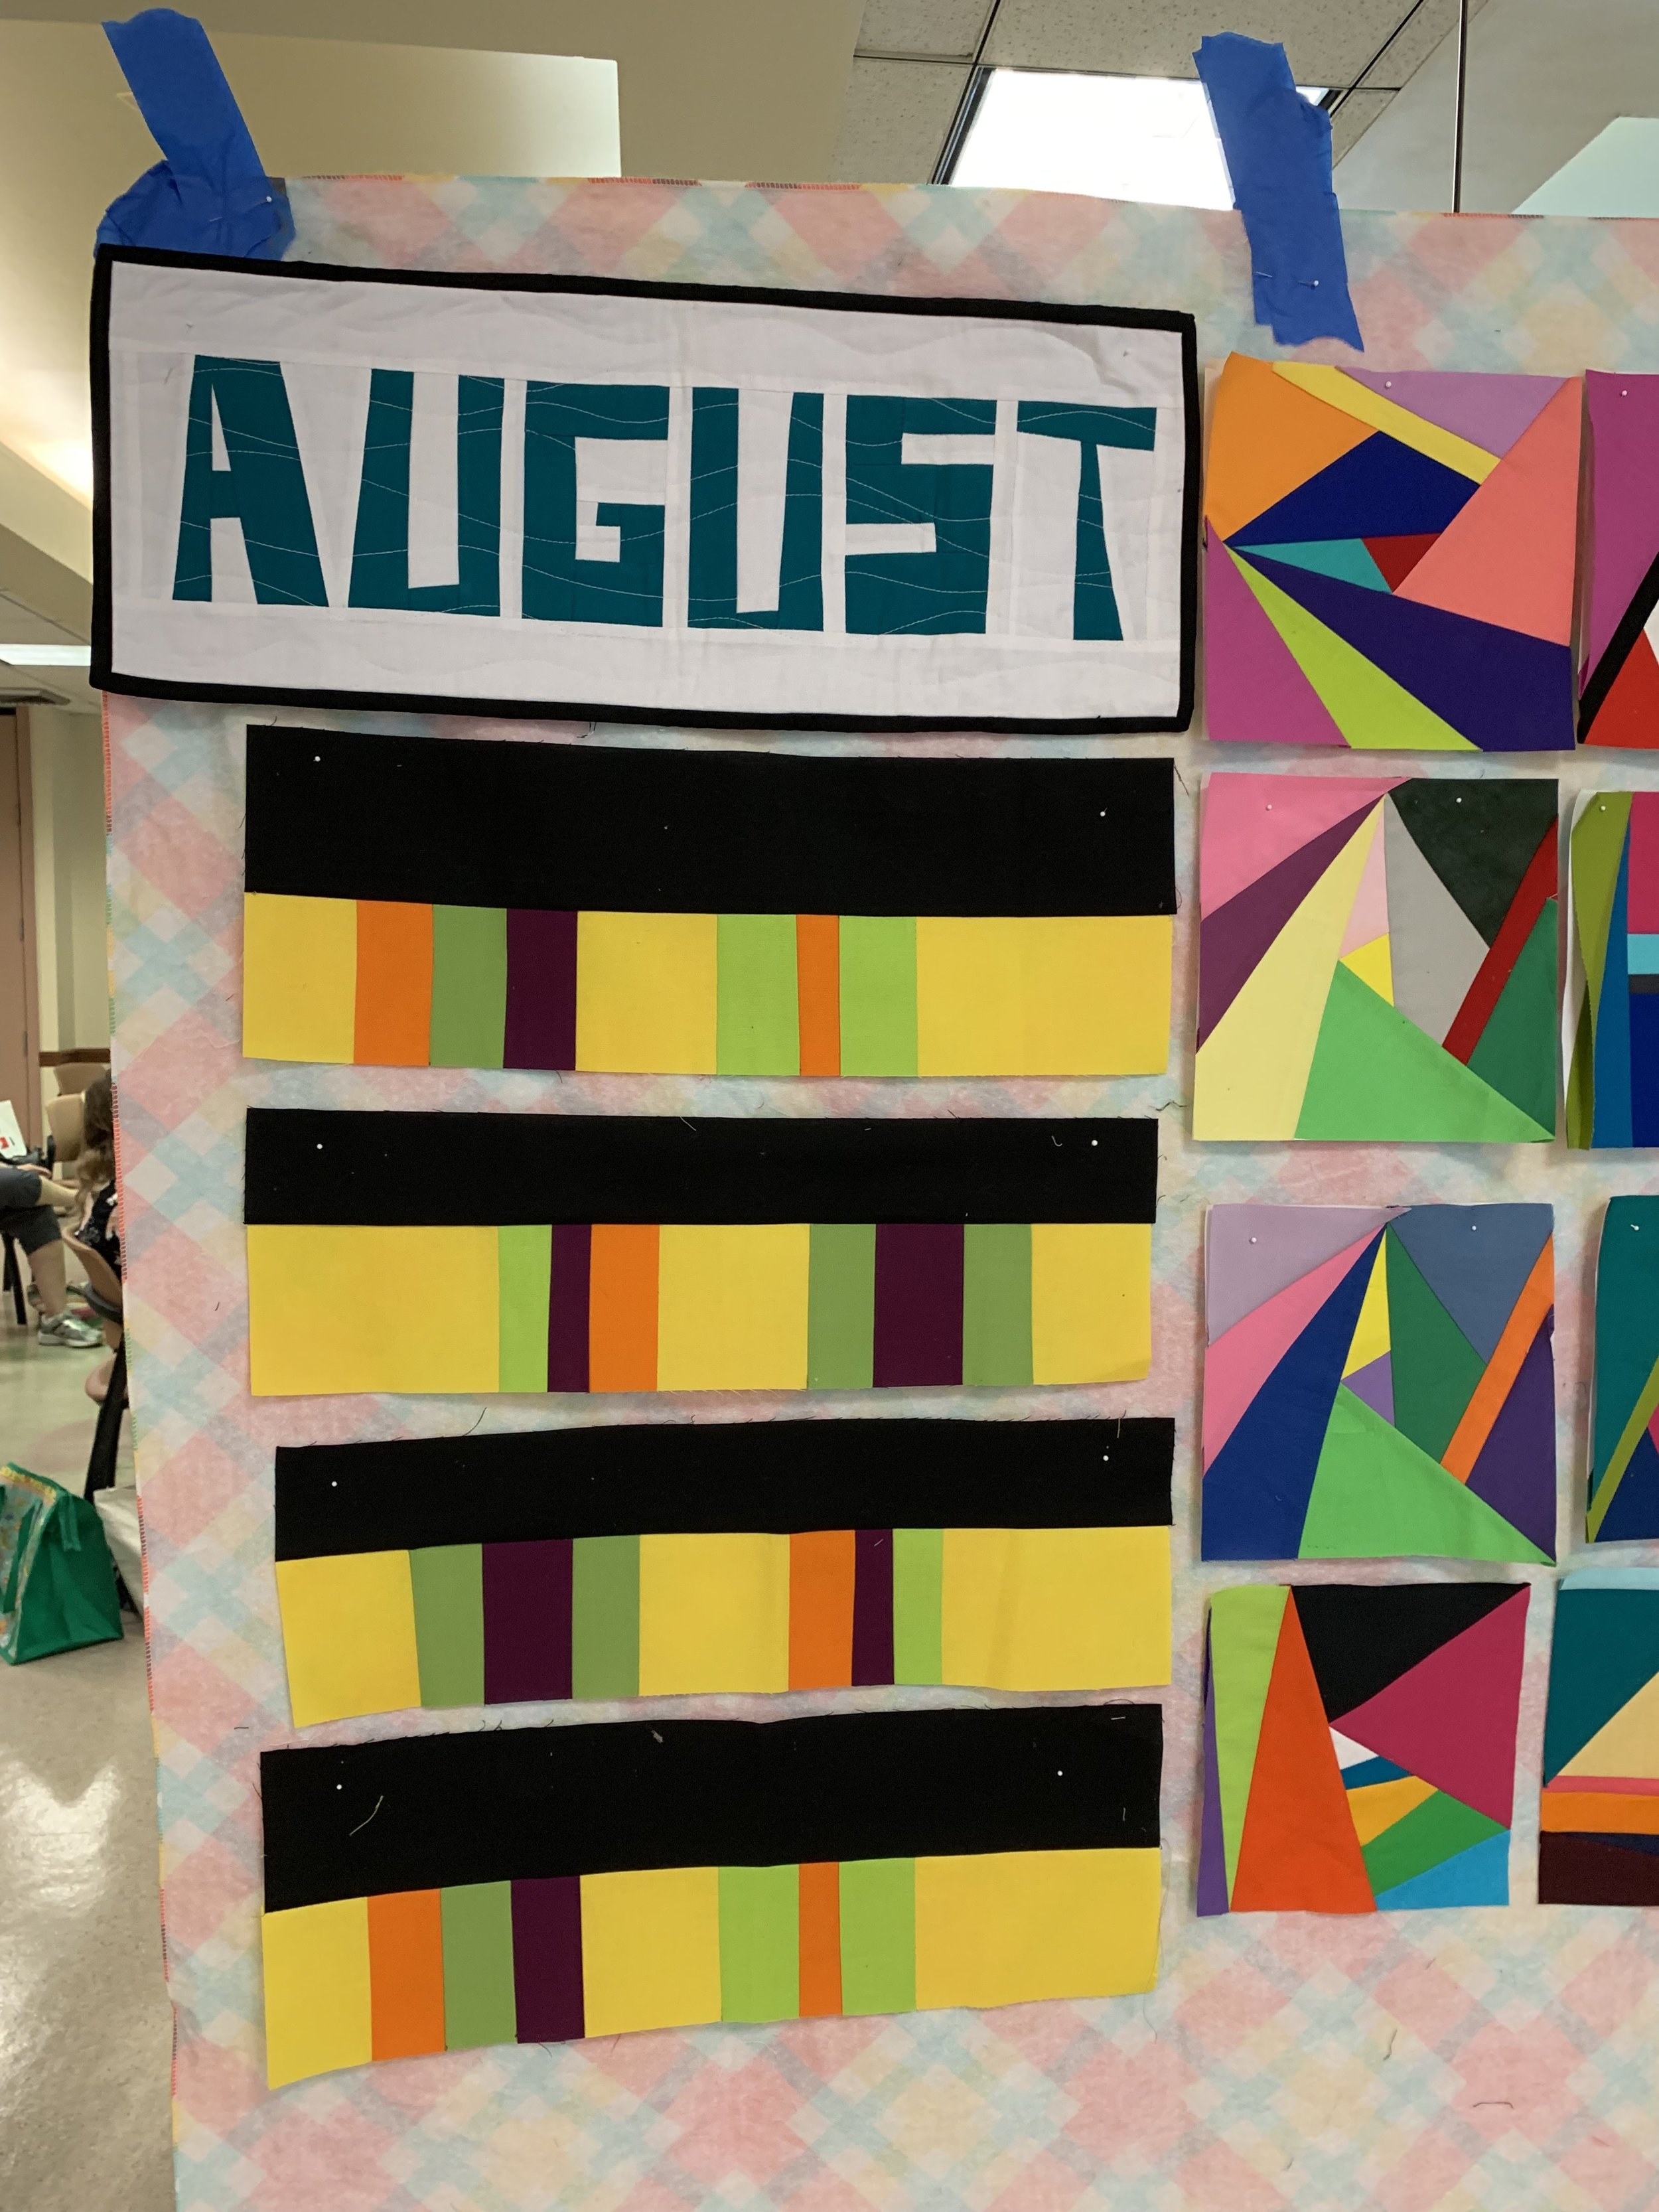
August 2019
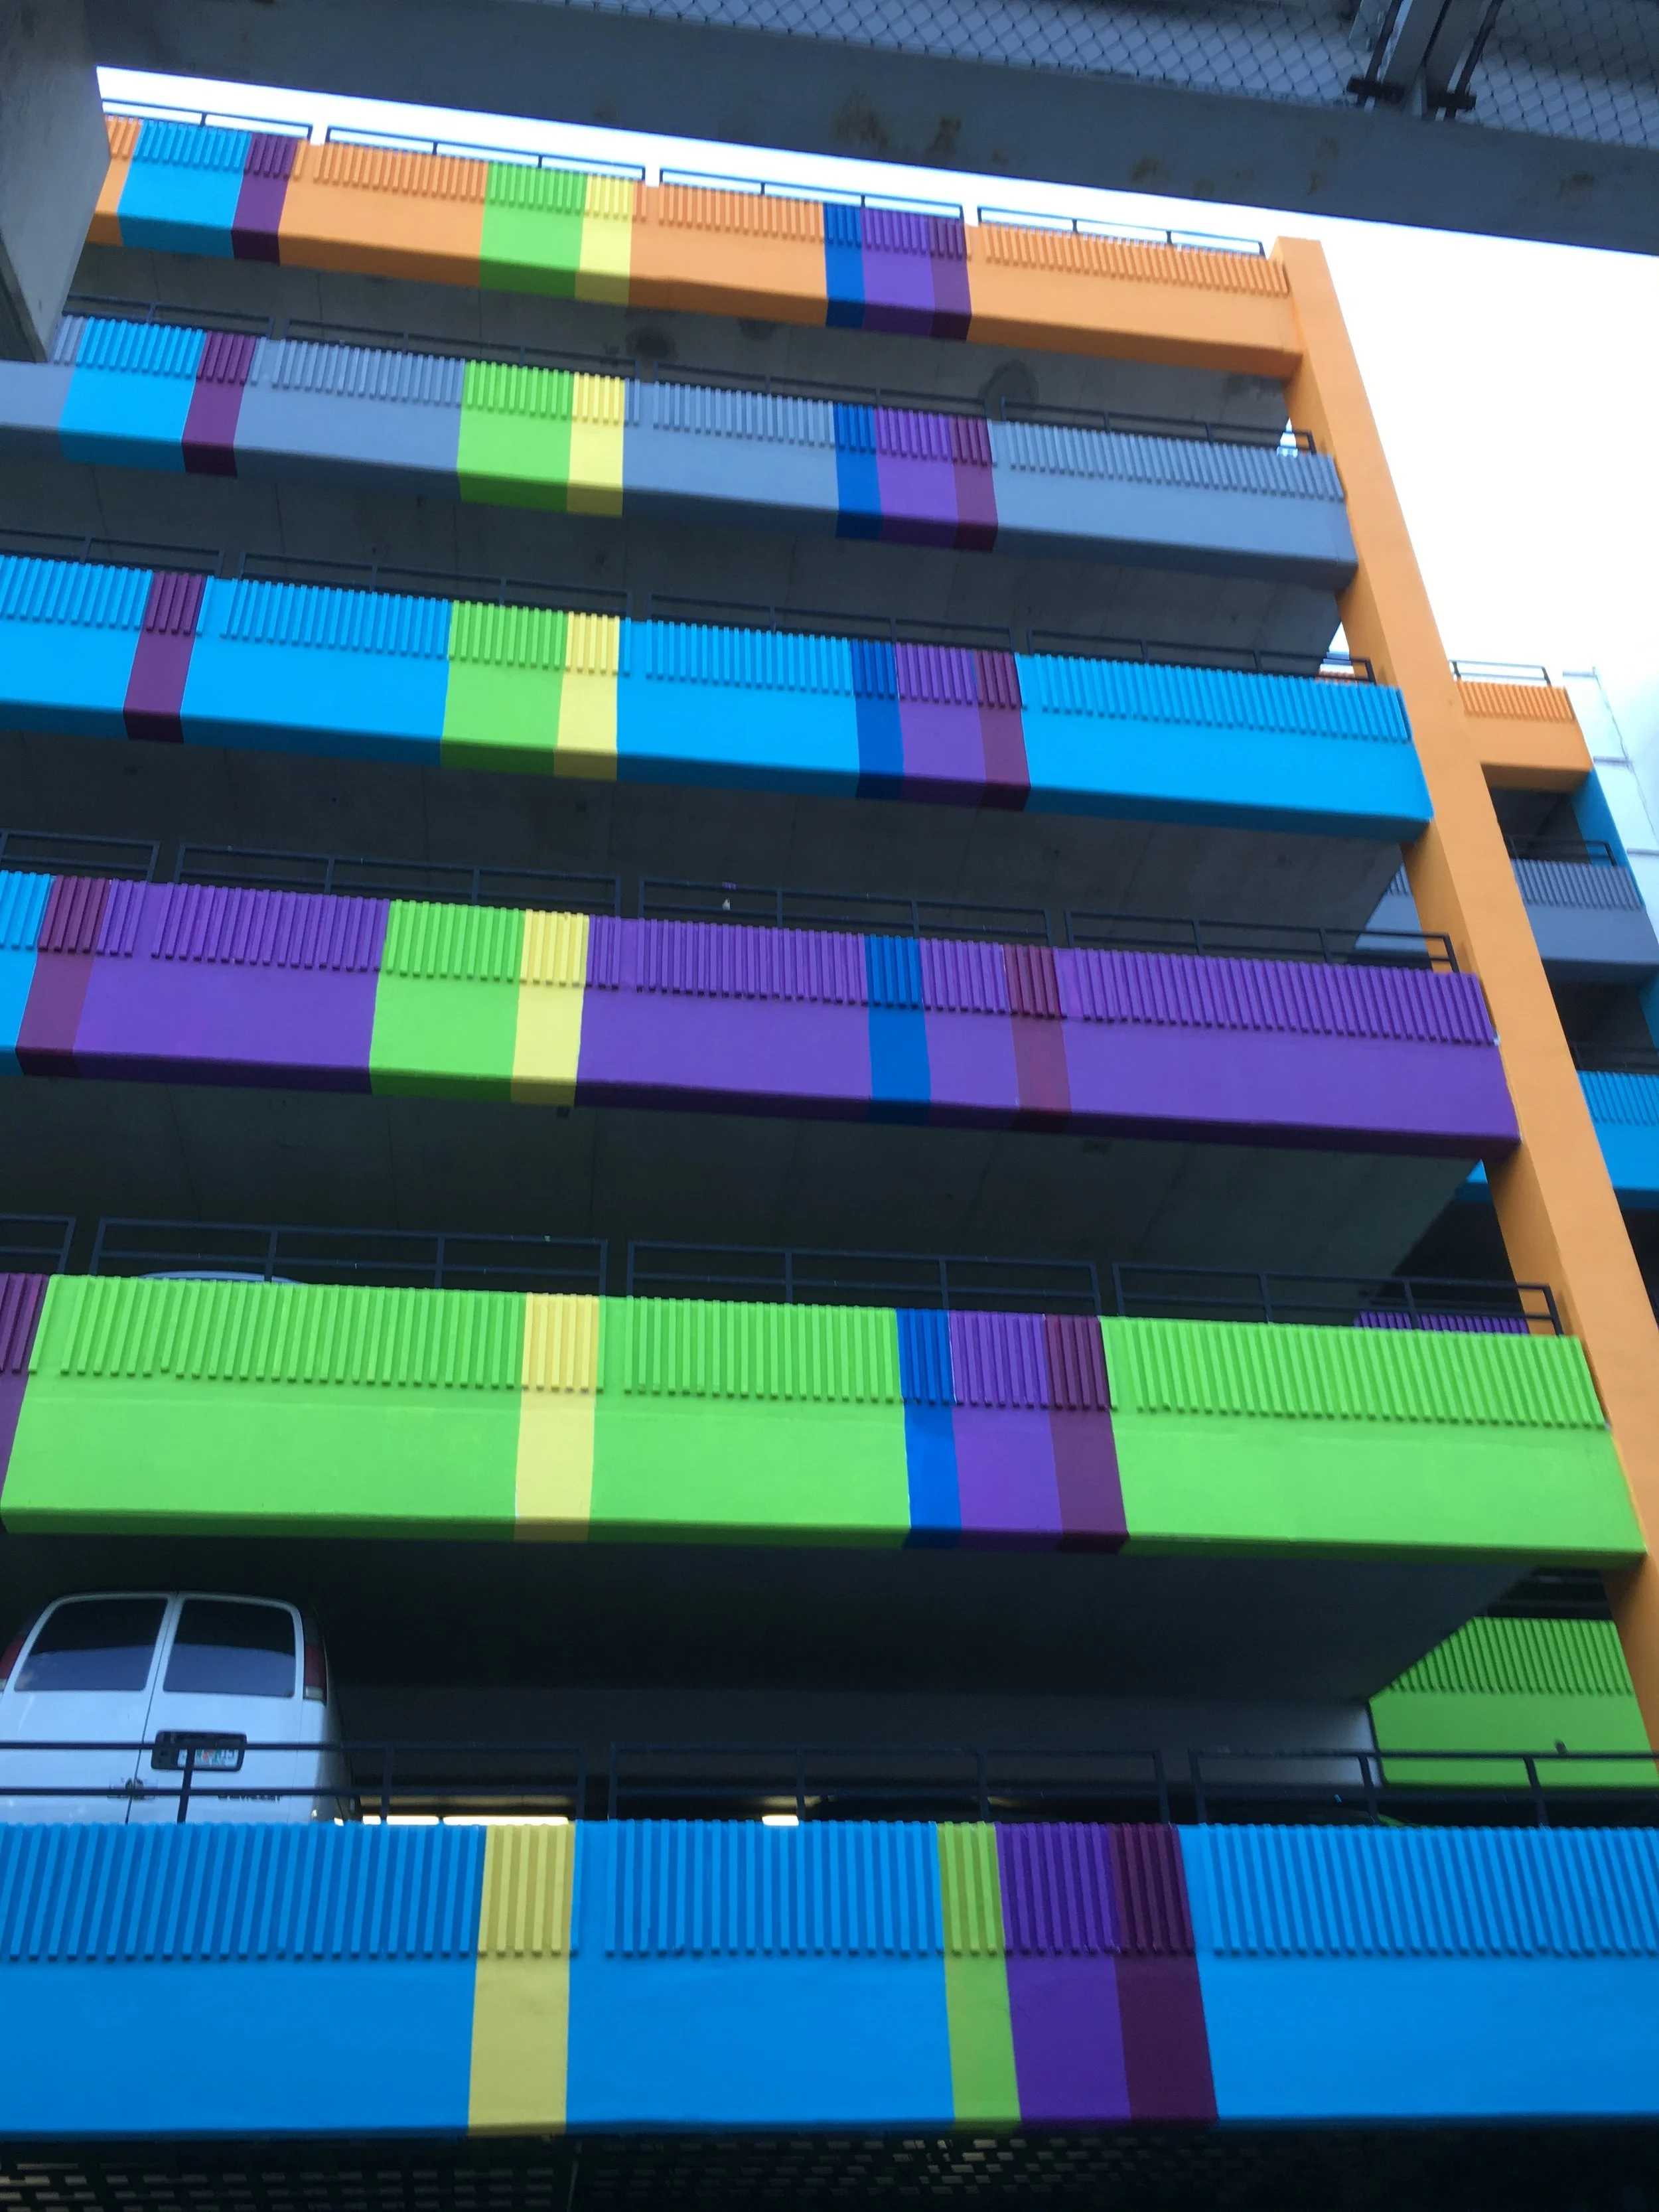
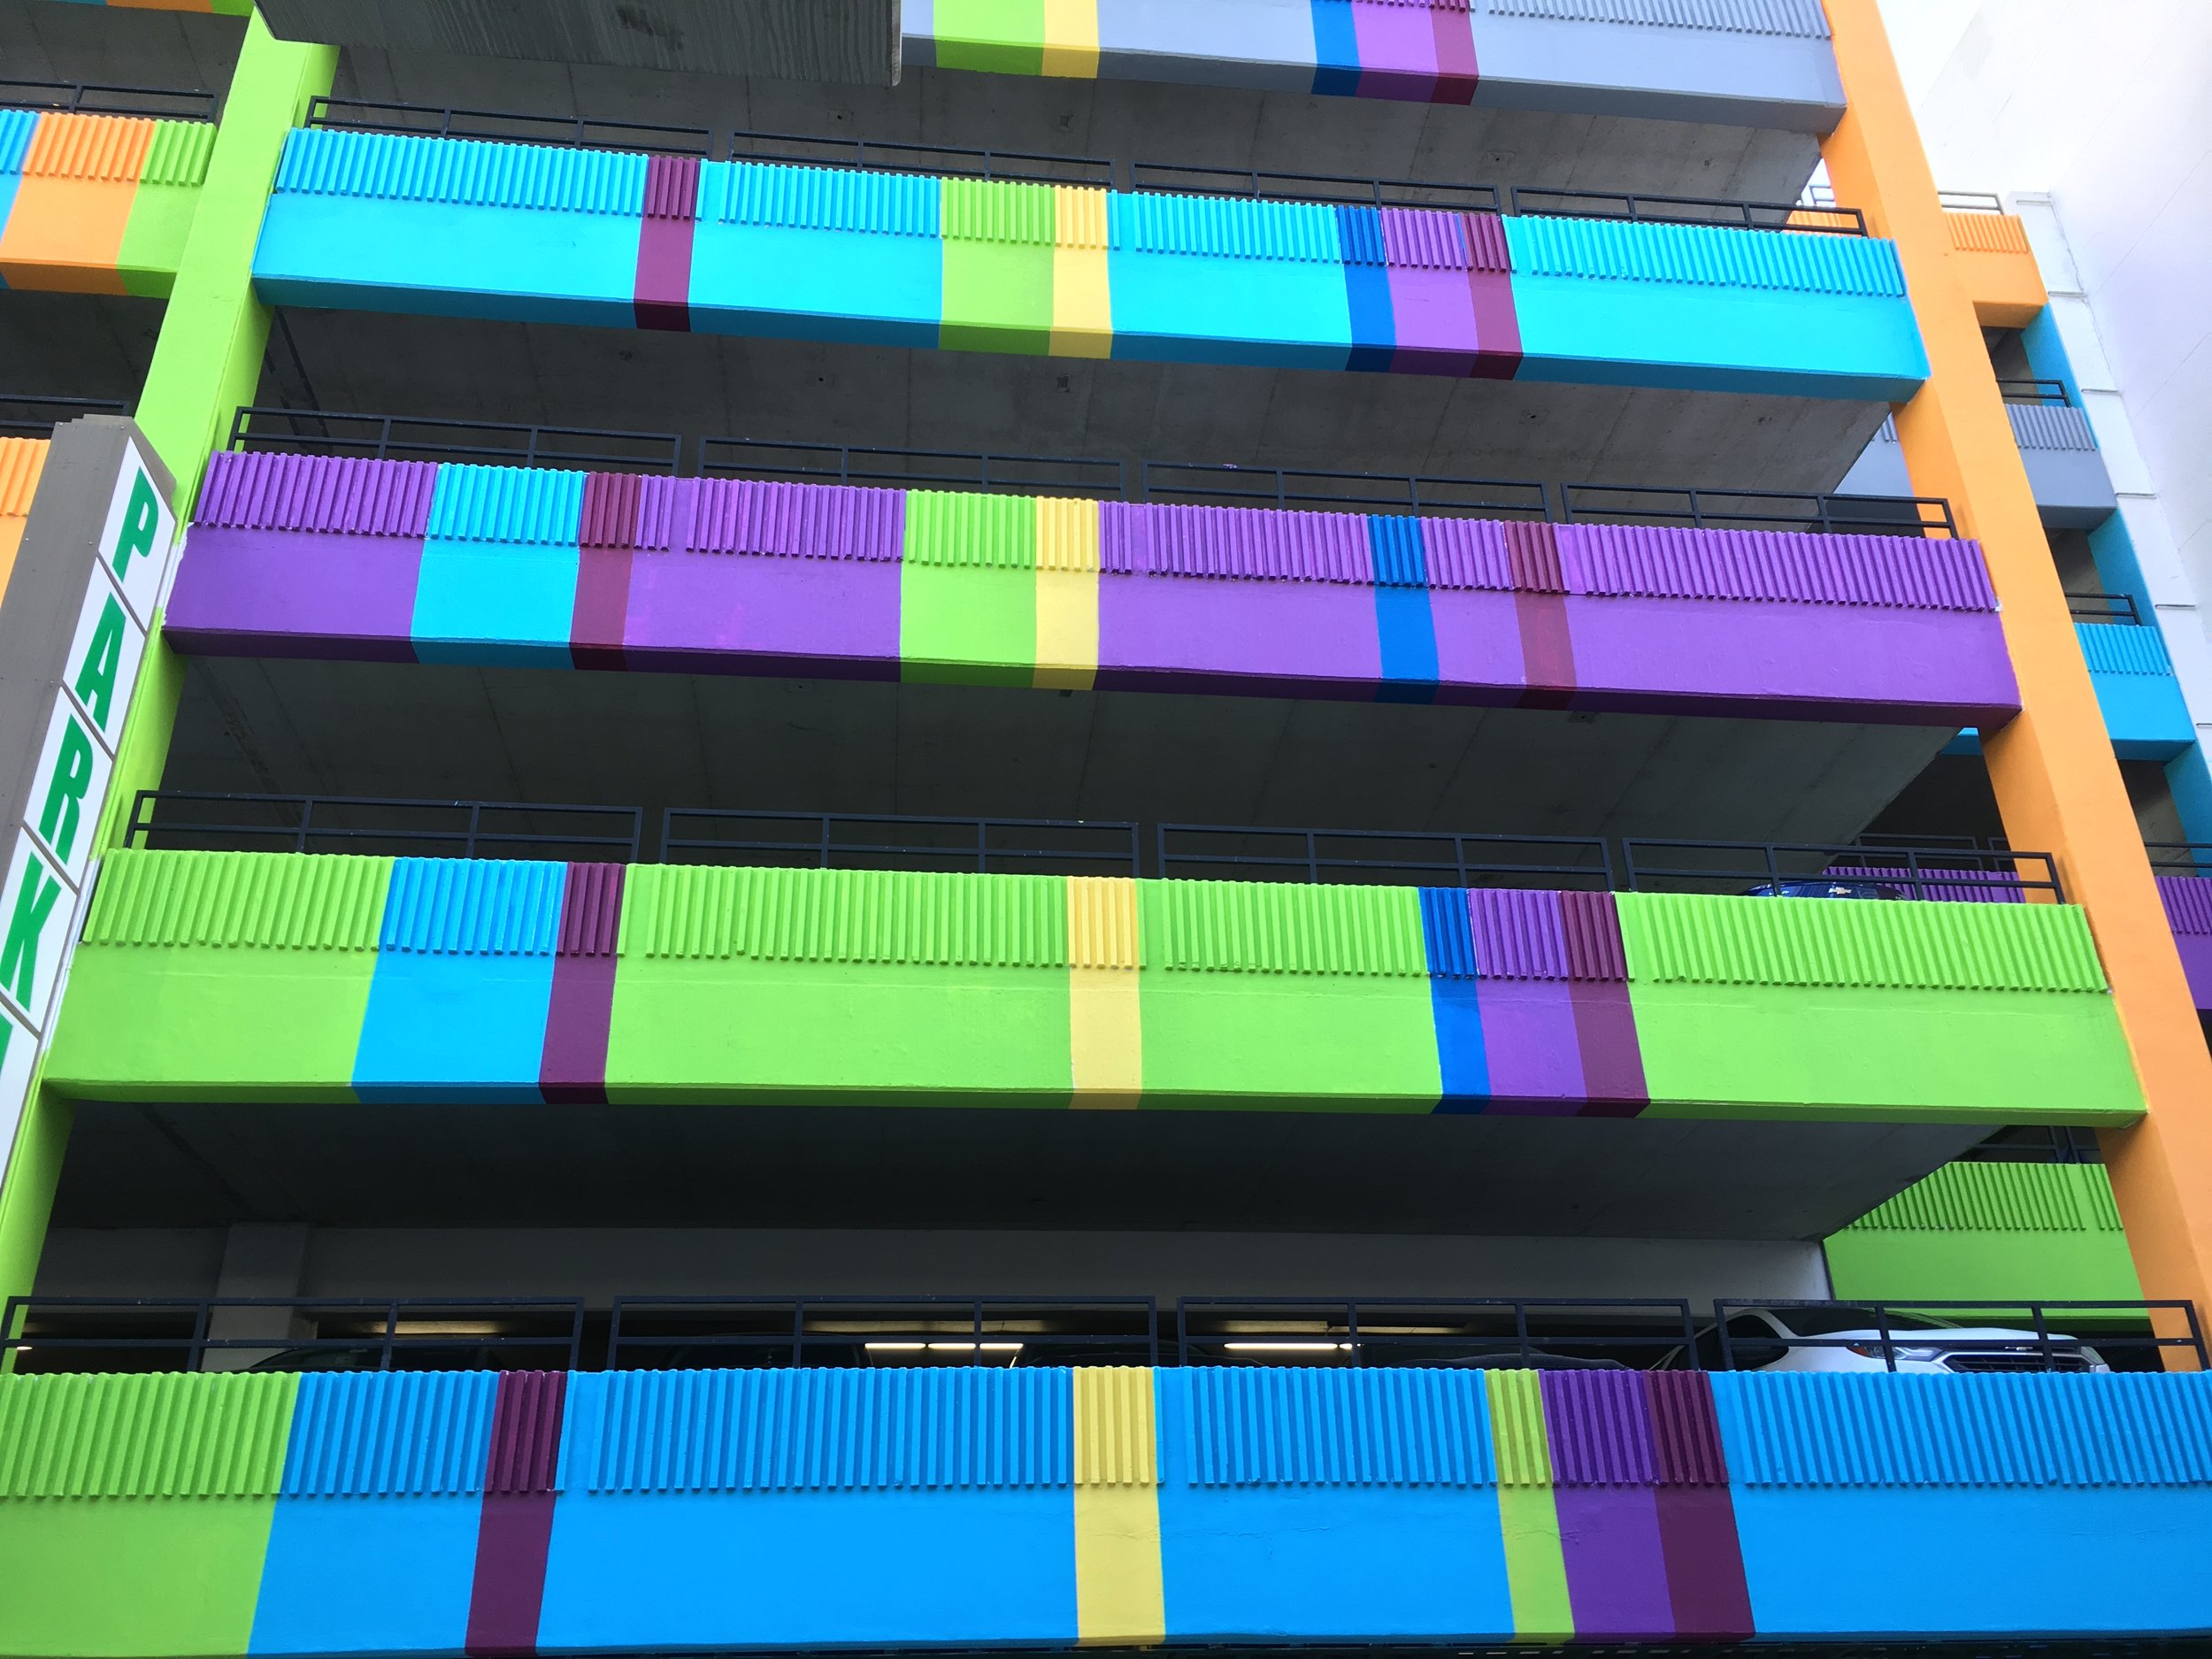
Inspiration: a recently painted garage in downtown Miami.
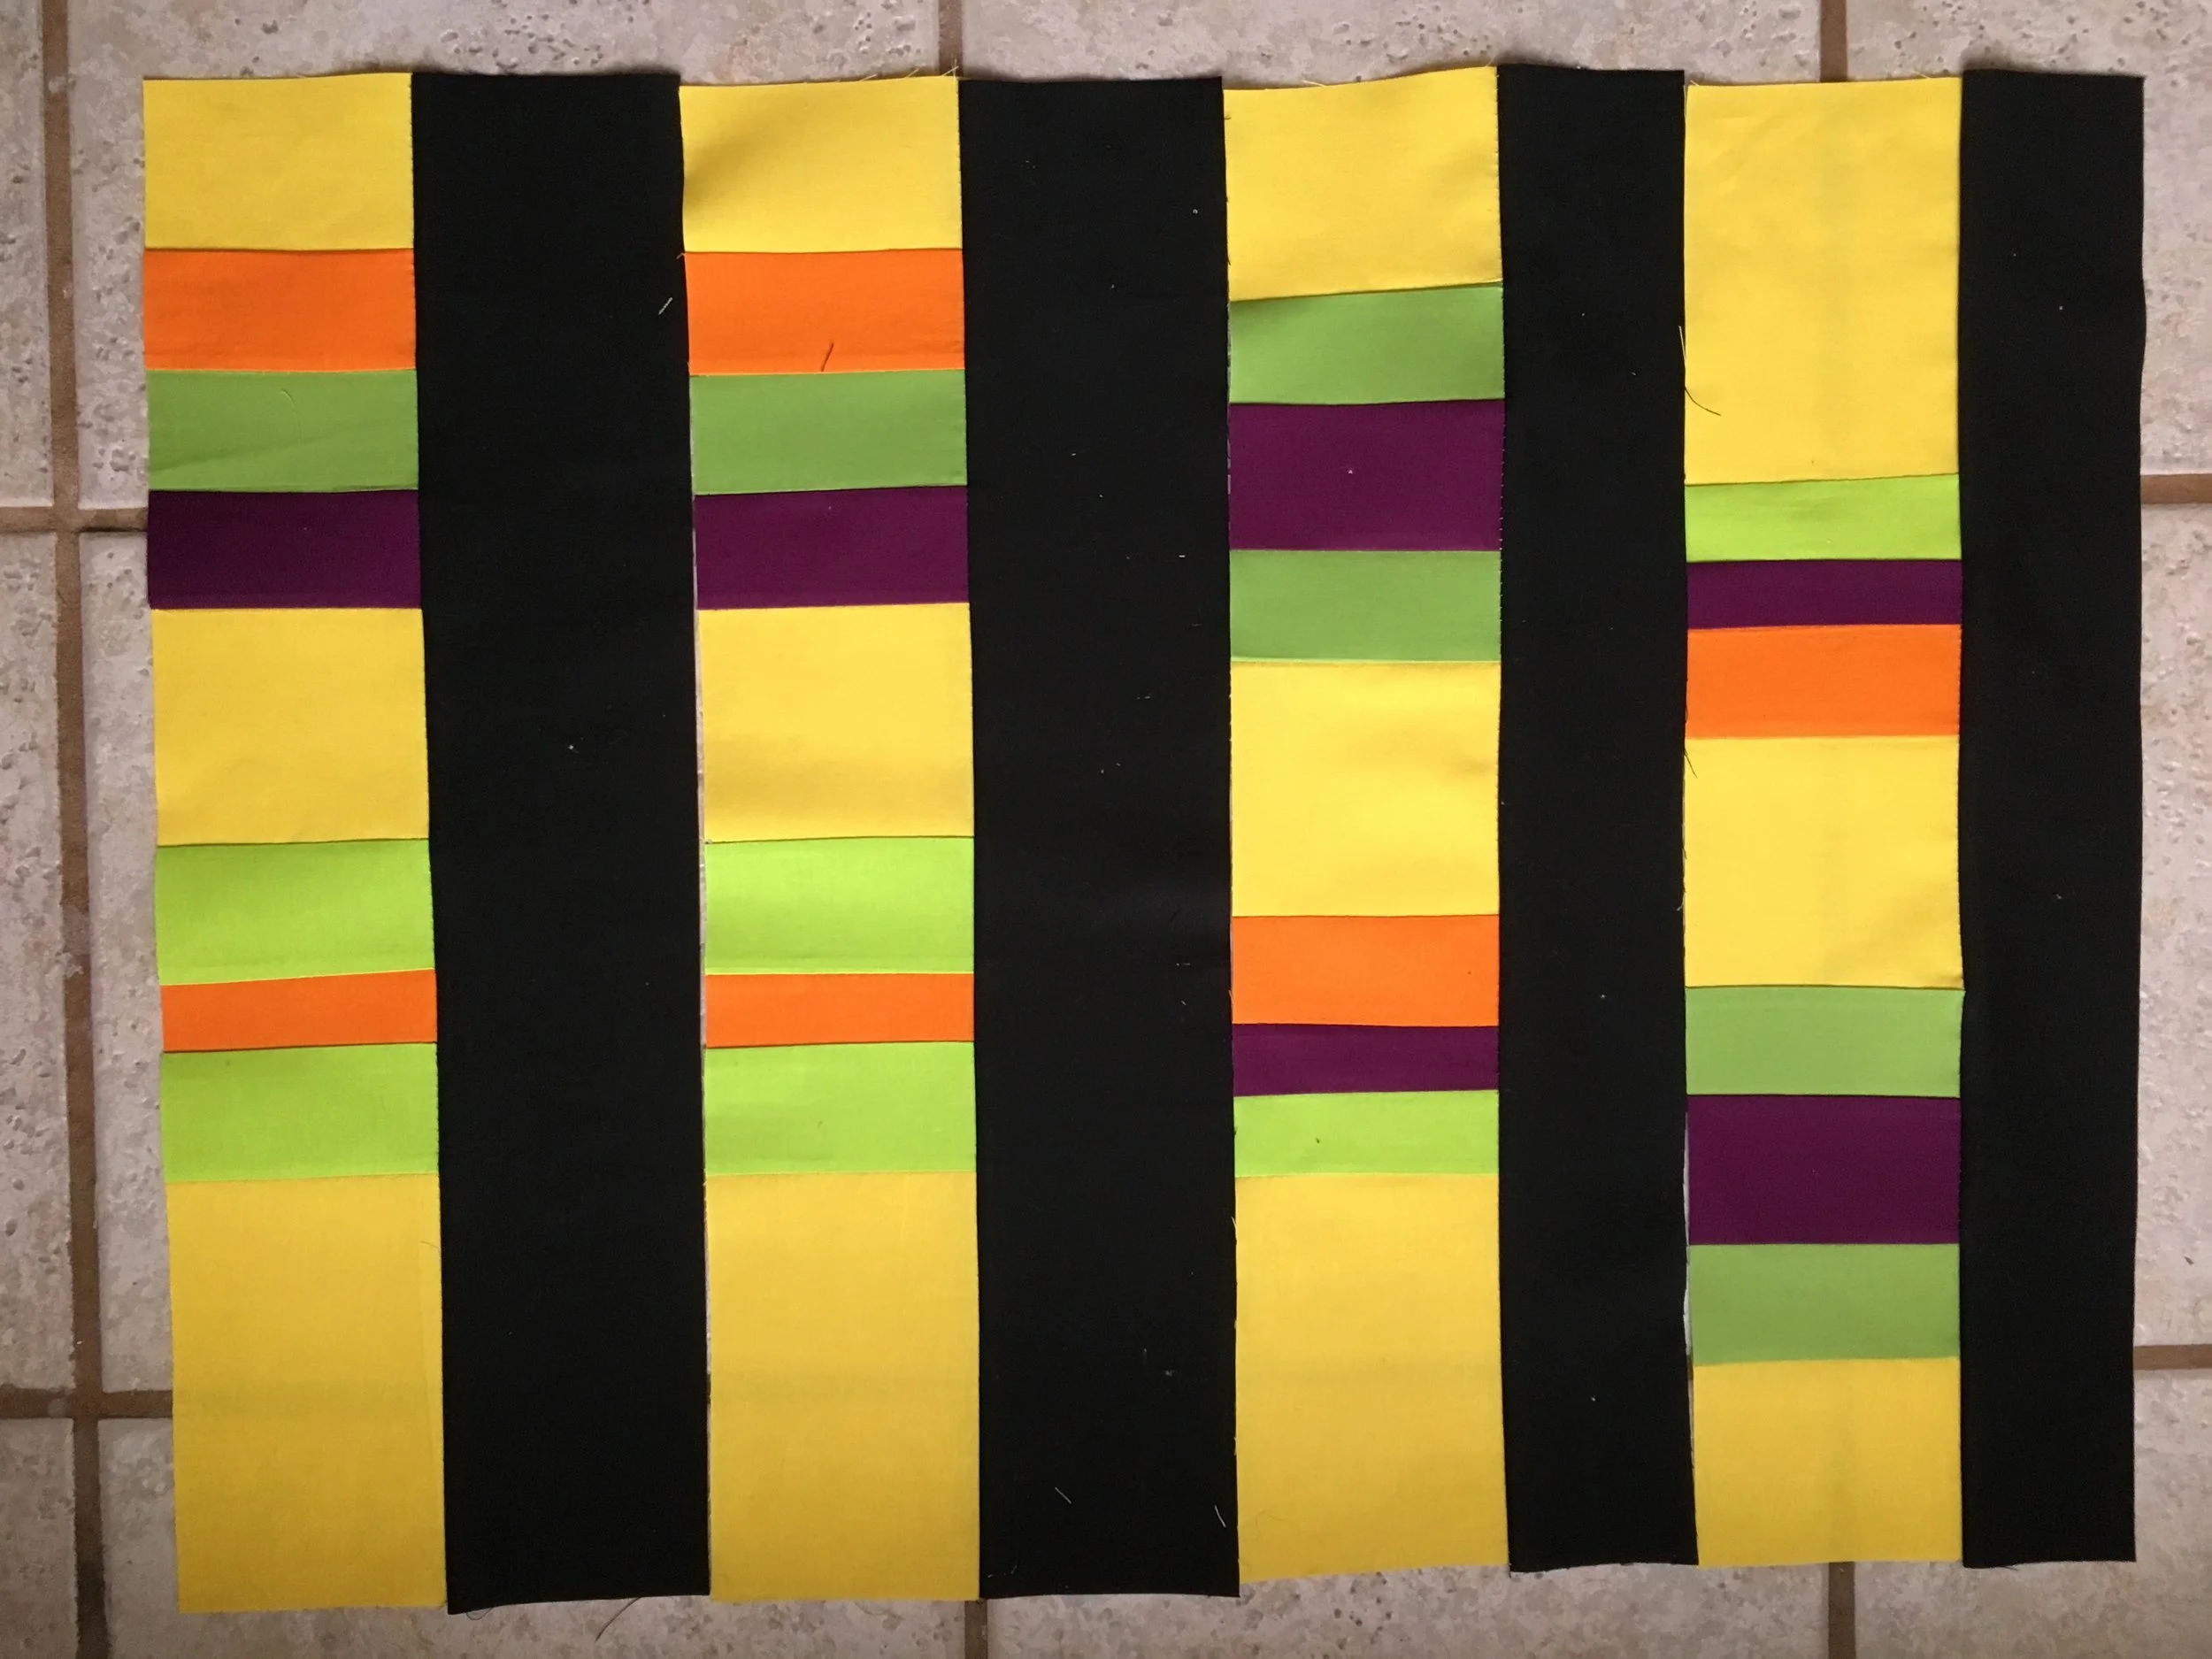
Fabrics: Neon to vibrant solids plus black. Cut black rectangles 2.5-by-12.5 inches. Cut solid colors 4.5 inches wide by varied lengths. Sew together to total 12.5 inches. You now have two long rectangles: one black, one in solid colors. Sew black and solid rectangles together along the 12.5-inch edge. The photo shows four completed blocks placed side by side.
(For anyone who wants to make a duplicate pair of blocks like the two on the left of the photo, cut colors 9 inches wide, sew various colors together to 12.5 inches long, cut in half to create two long rectangles, sew black strips to each piece. The pair on the right in the photo also are identical, but flipped before sewing on the black strip.)
If the completed rectangles end up shorter than 12.5 inches, bring them in. They will help the designer complete the assembly.
By Cathy
July 2019
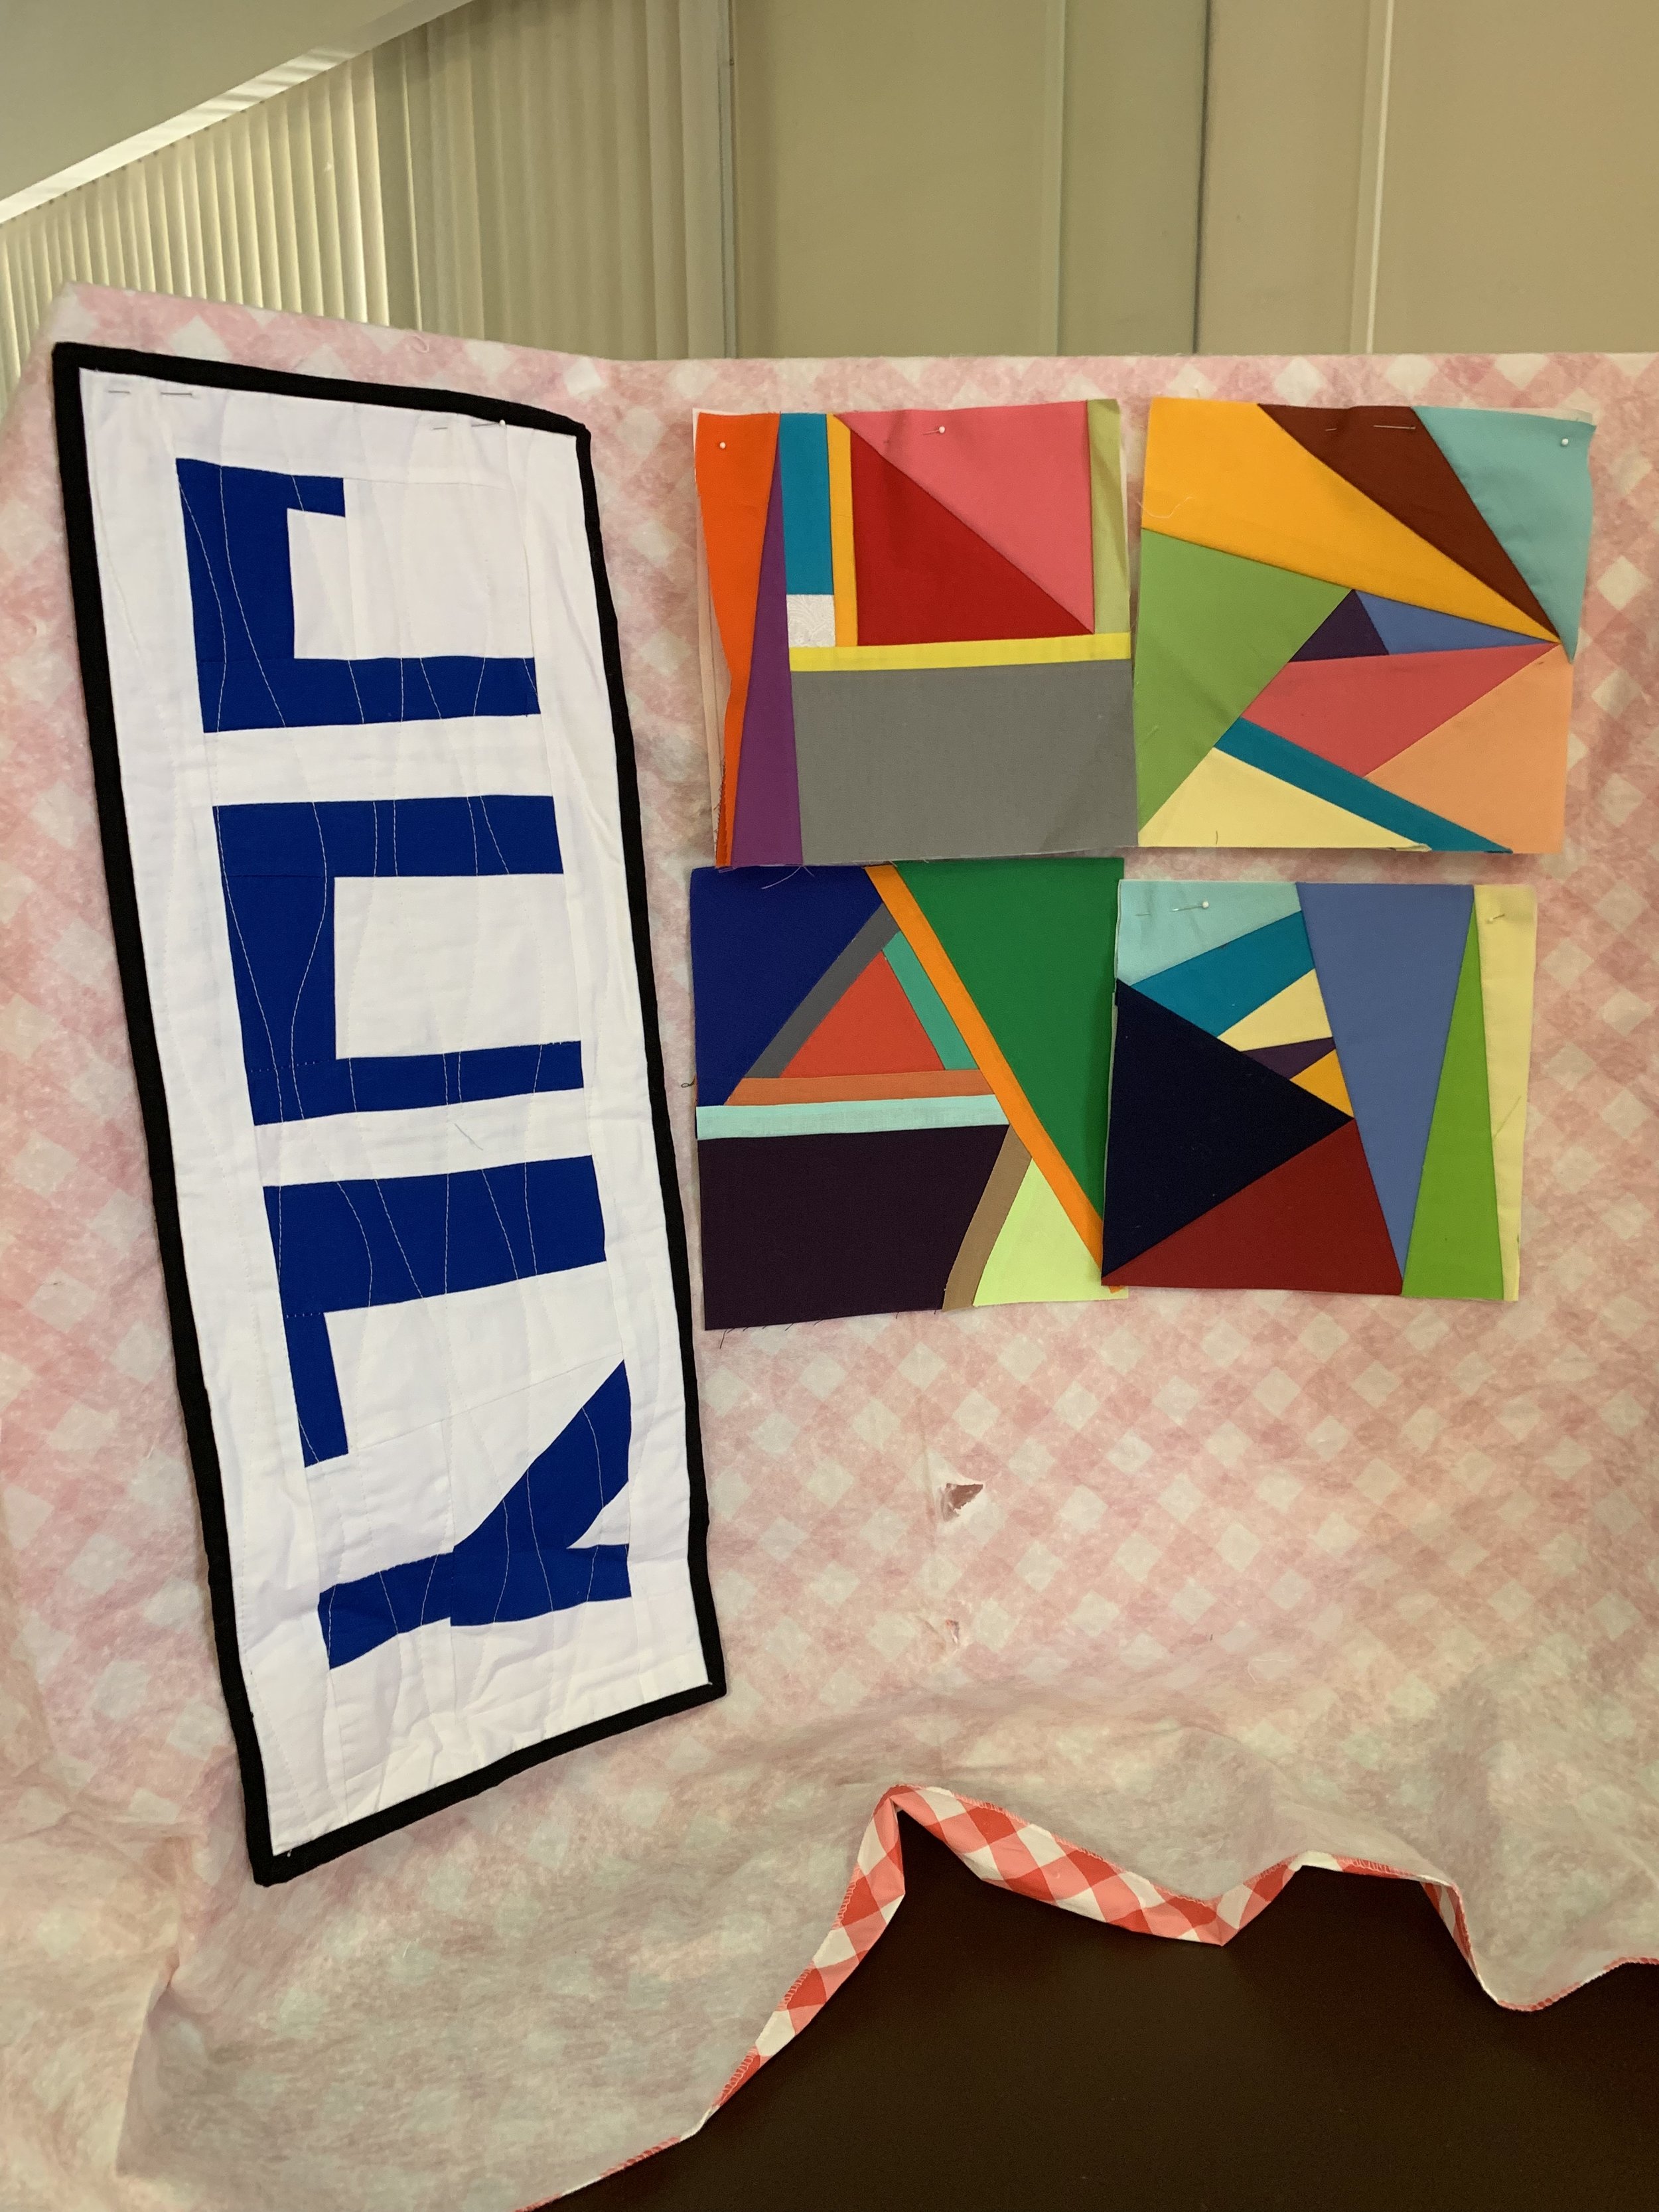
OK, I think everyone would agree some of this year's BOMs have been easy. The white, black and gray block was a three-seam wonder, and the curved rectangle was only one seam per challenging-to-sew block. Now we venture into paper piecing with extreme help from Li Sun, who breezes through it. The only request is all solids.
Here are four optional patterns, and one try is fine. It's called Playing with Blocks from The Long Thread. All instructions and printable patterns are on this link
Paper piecing and I are not friends. This is my third try at paper piecing, and I still get into trouble. One trick that helped was to hold the pattern up to a sliding glass door with a ruler and trace the pattern on the other side. It's harder to lose track when you do that.
For fellow amateurs, I found some Youtube tutorials helpful before launching into the sewing: Tutorial one, tutorial two, tutorial three.
By Cathy
June 2019
Aim for a finished 8.5-inch square using black, white and gray patterns and/or solids for the stripes and any solid colors for the corners. The stripes can be any width based on your scraps to reach a final 8.5 inches across and tall. I tacked on the triangle corners by trial and error. There's no set width or height to add to the variety. Same goes for the triangle direction. It can stretch across the stripes or stick to one side. Try for bright colors on the triangles because those will be the eye catchers when assembled. Bring to July meeting and you could win them all!
By Cathy


May 2019
Shoot for the Square
Shoot for a 10.5-inch finished square. But directions aren’t fussy about directions. When building center, it can be scrappy too — white, off white, cream or reads white. Here’s a tutorial to this scrap busting block.
By Cathy

April 2019
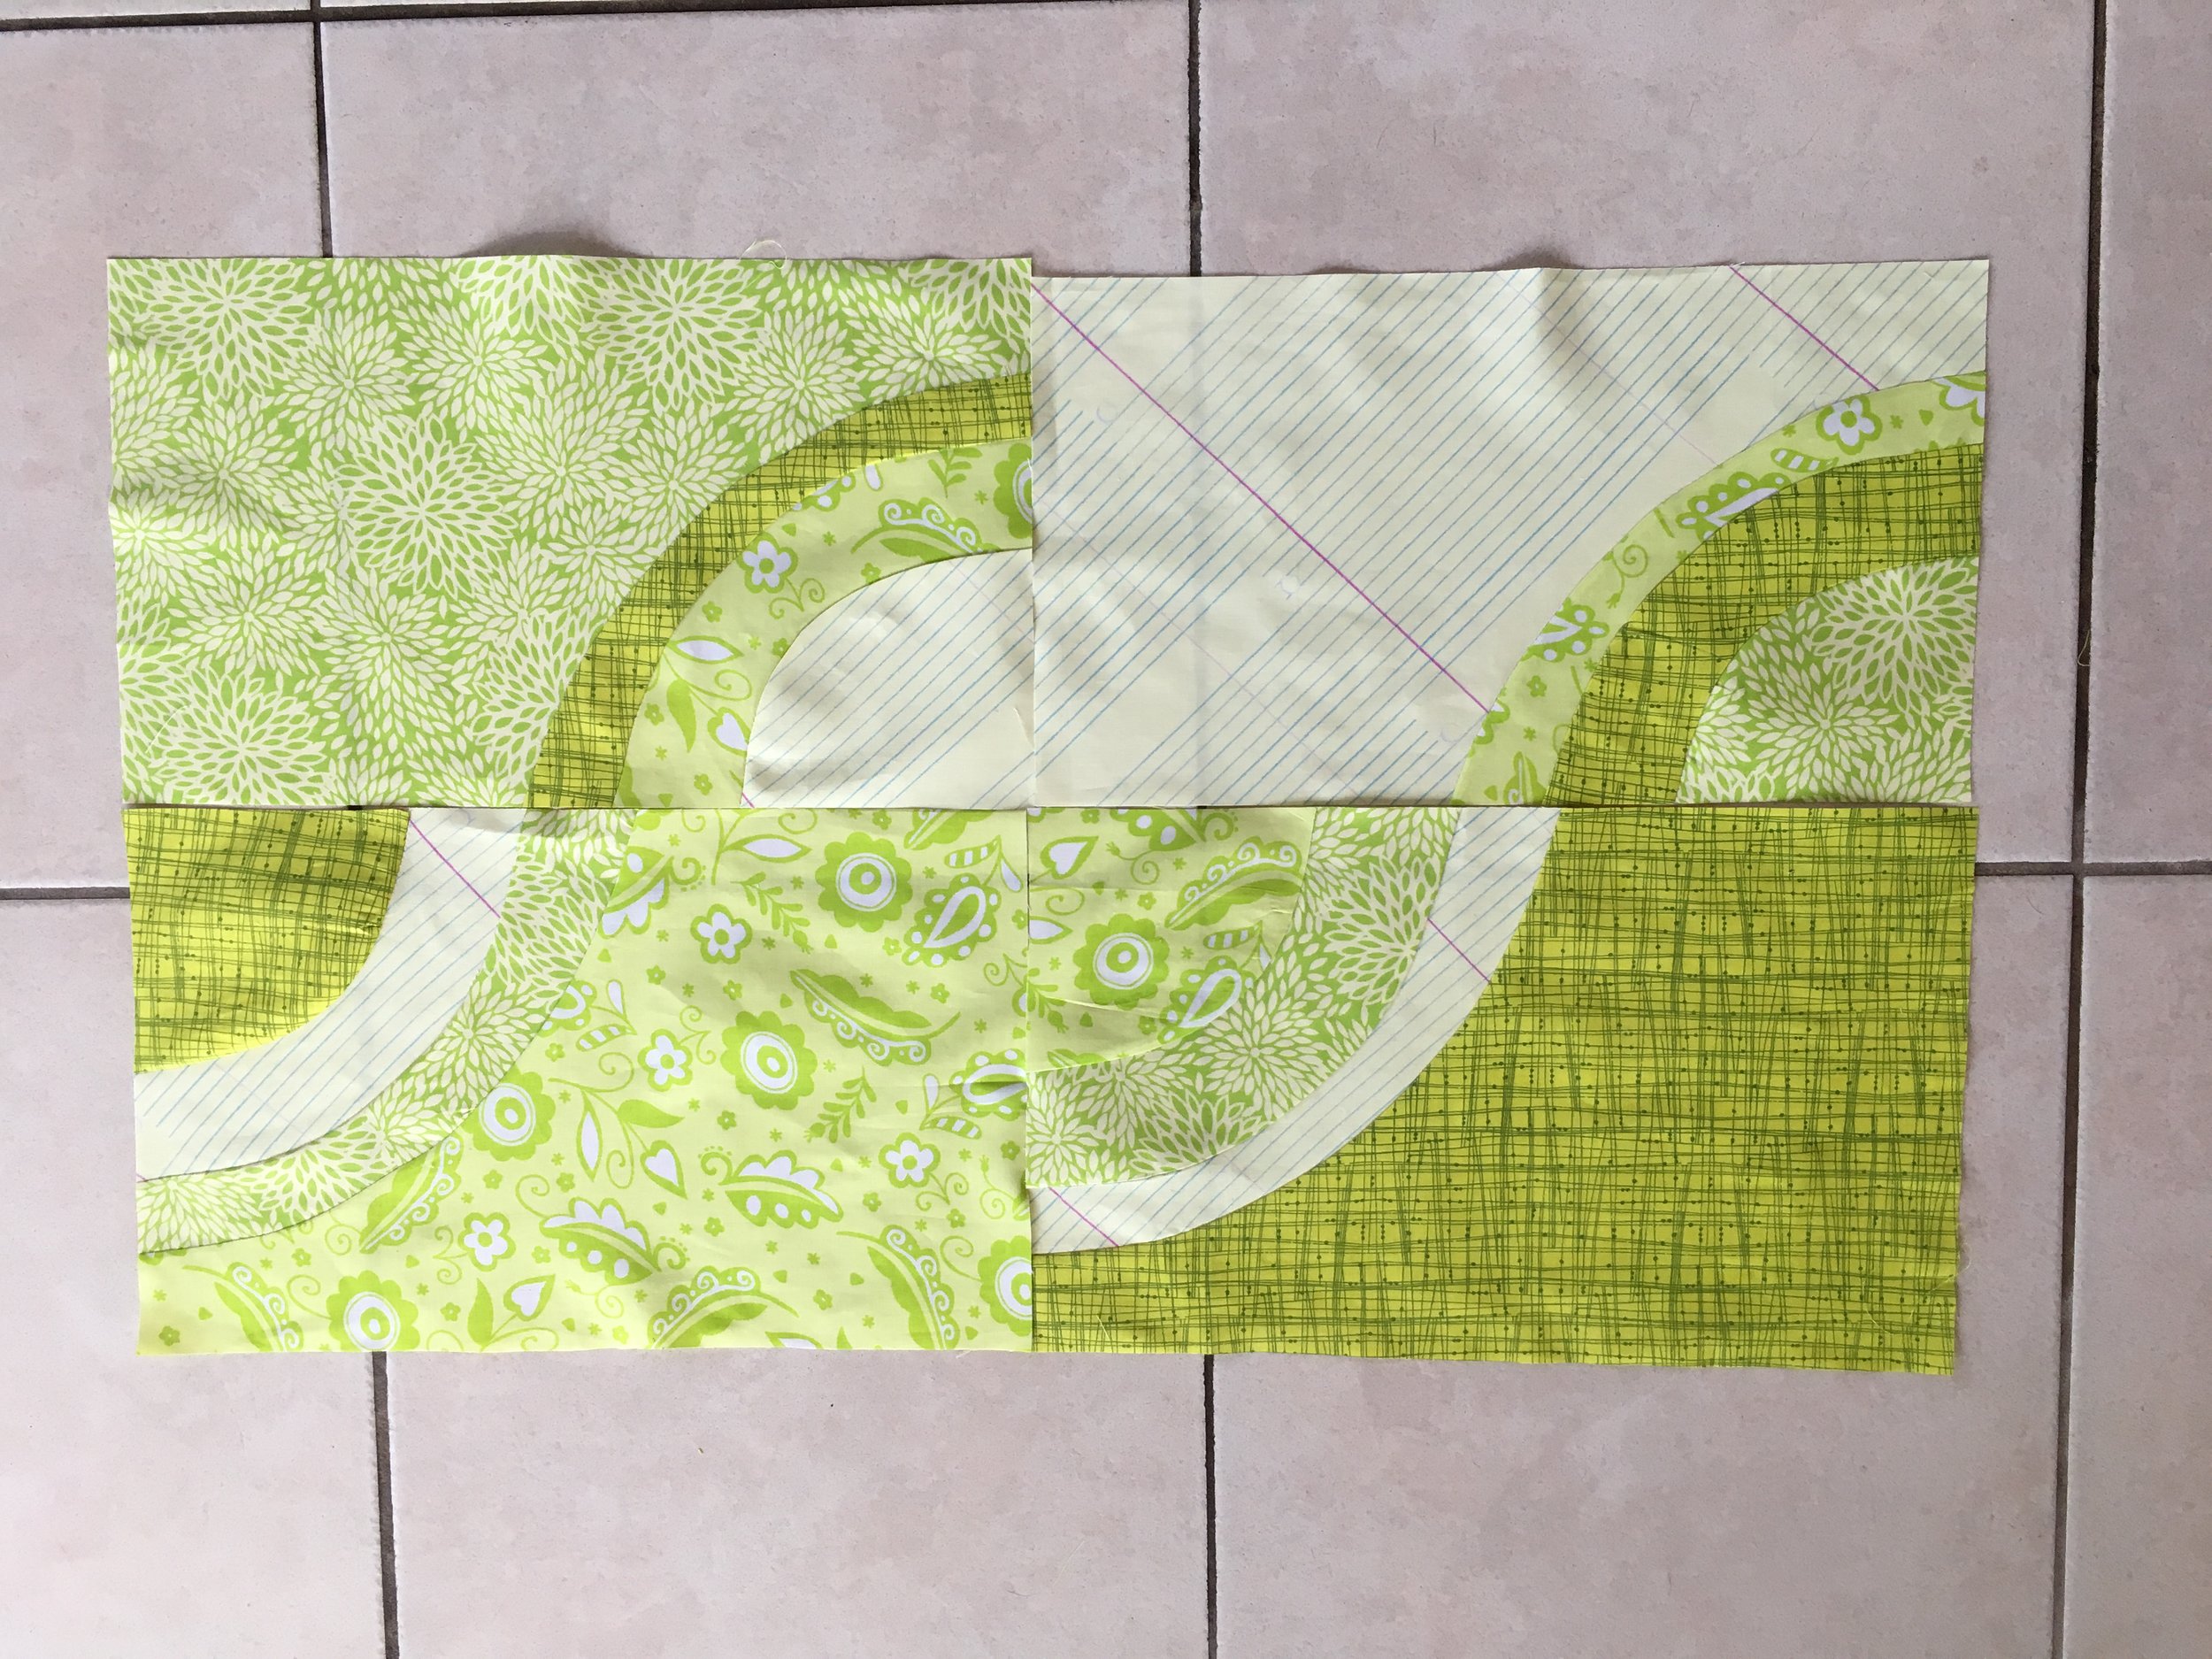
Practice with Curves
I need more practice with curves, and I'm guessing others do, too. Here is a link to a tutorial, which is a surprisingly good guide. Be ready to cut down for the final bock. It's spring, so let's go with pastels and no black. Use three or four fabrics to make three or four blocks. My oddball finished sizes are 9.5 to 10.25 by 17 to 17.5 inches. The photos and links show interesting design possibilities.
By Cathy


March 2019
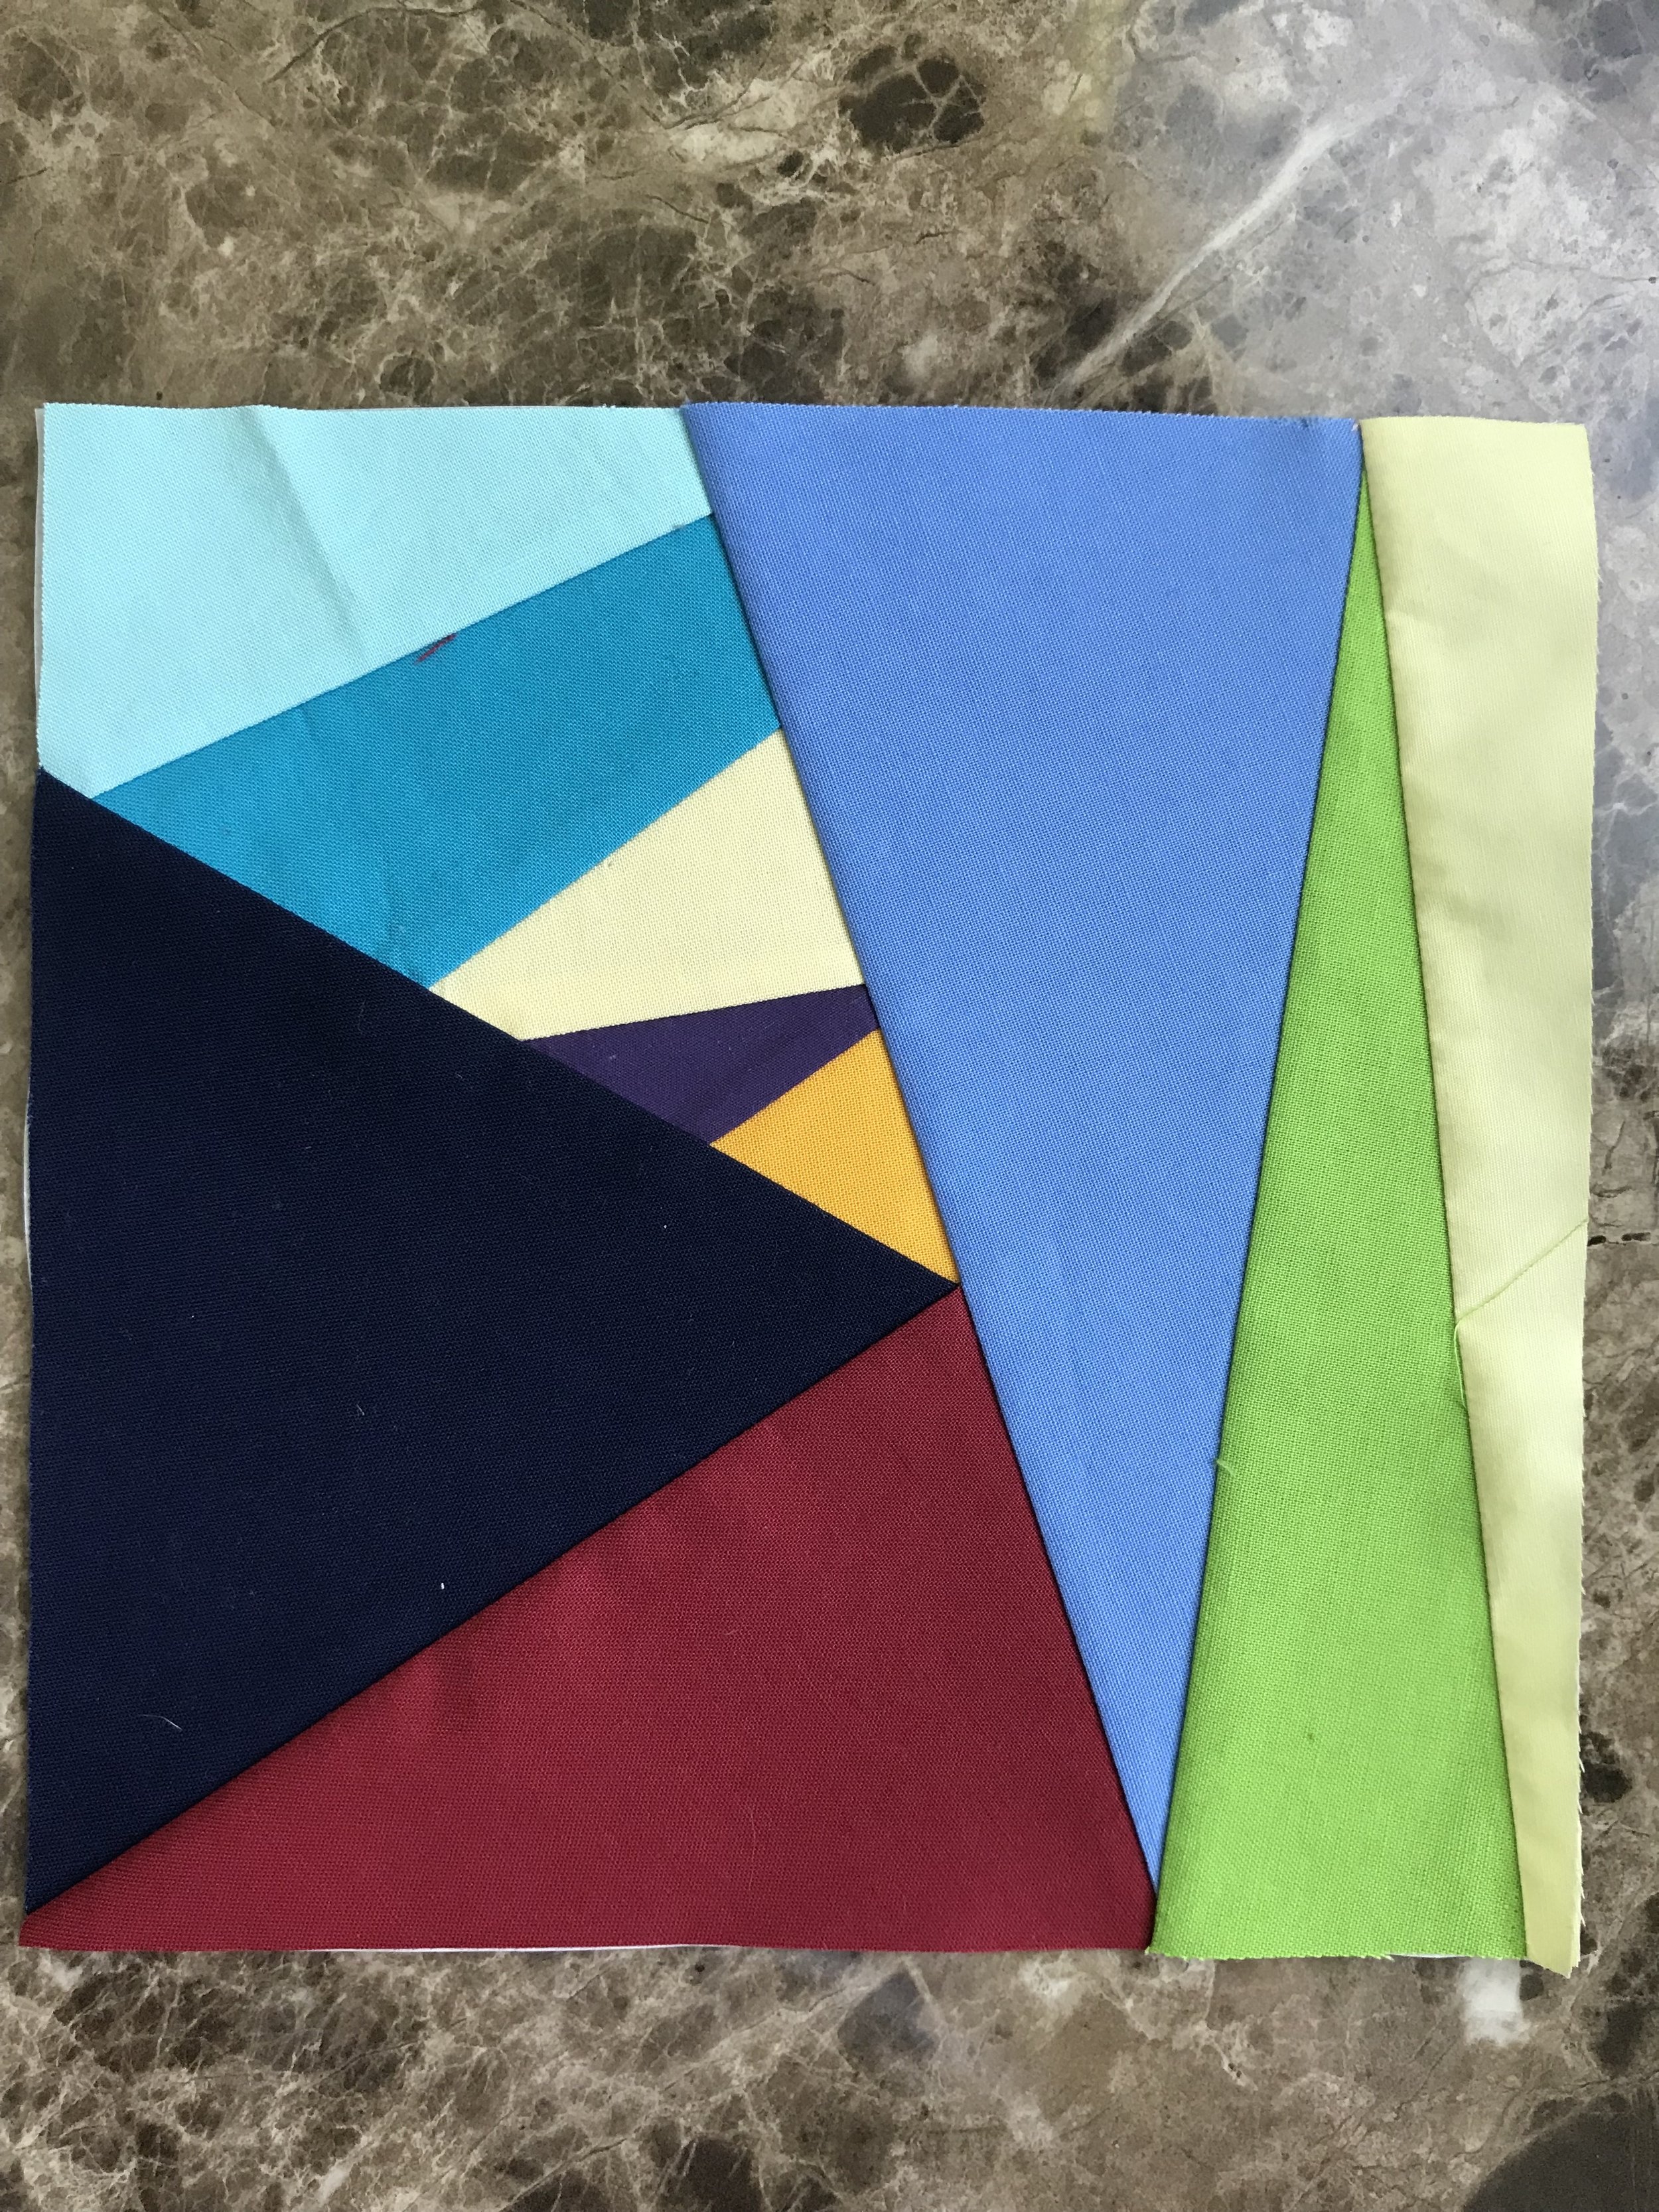
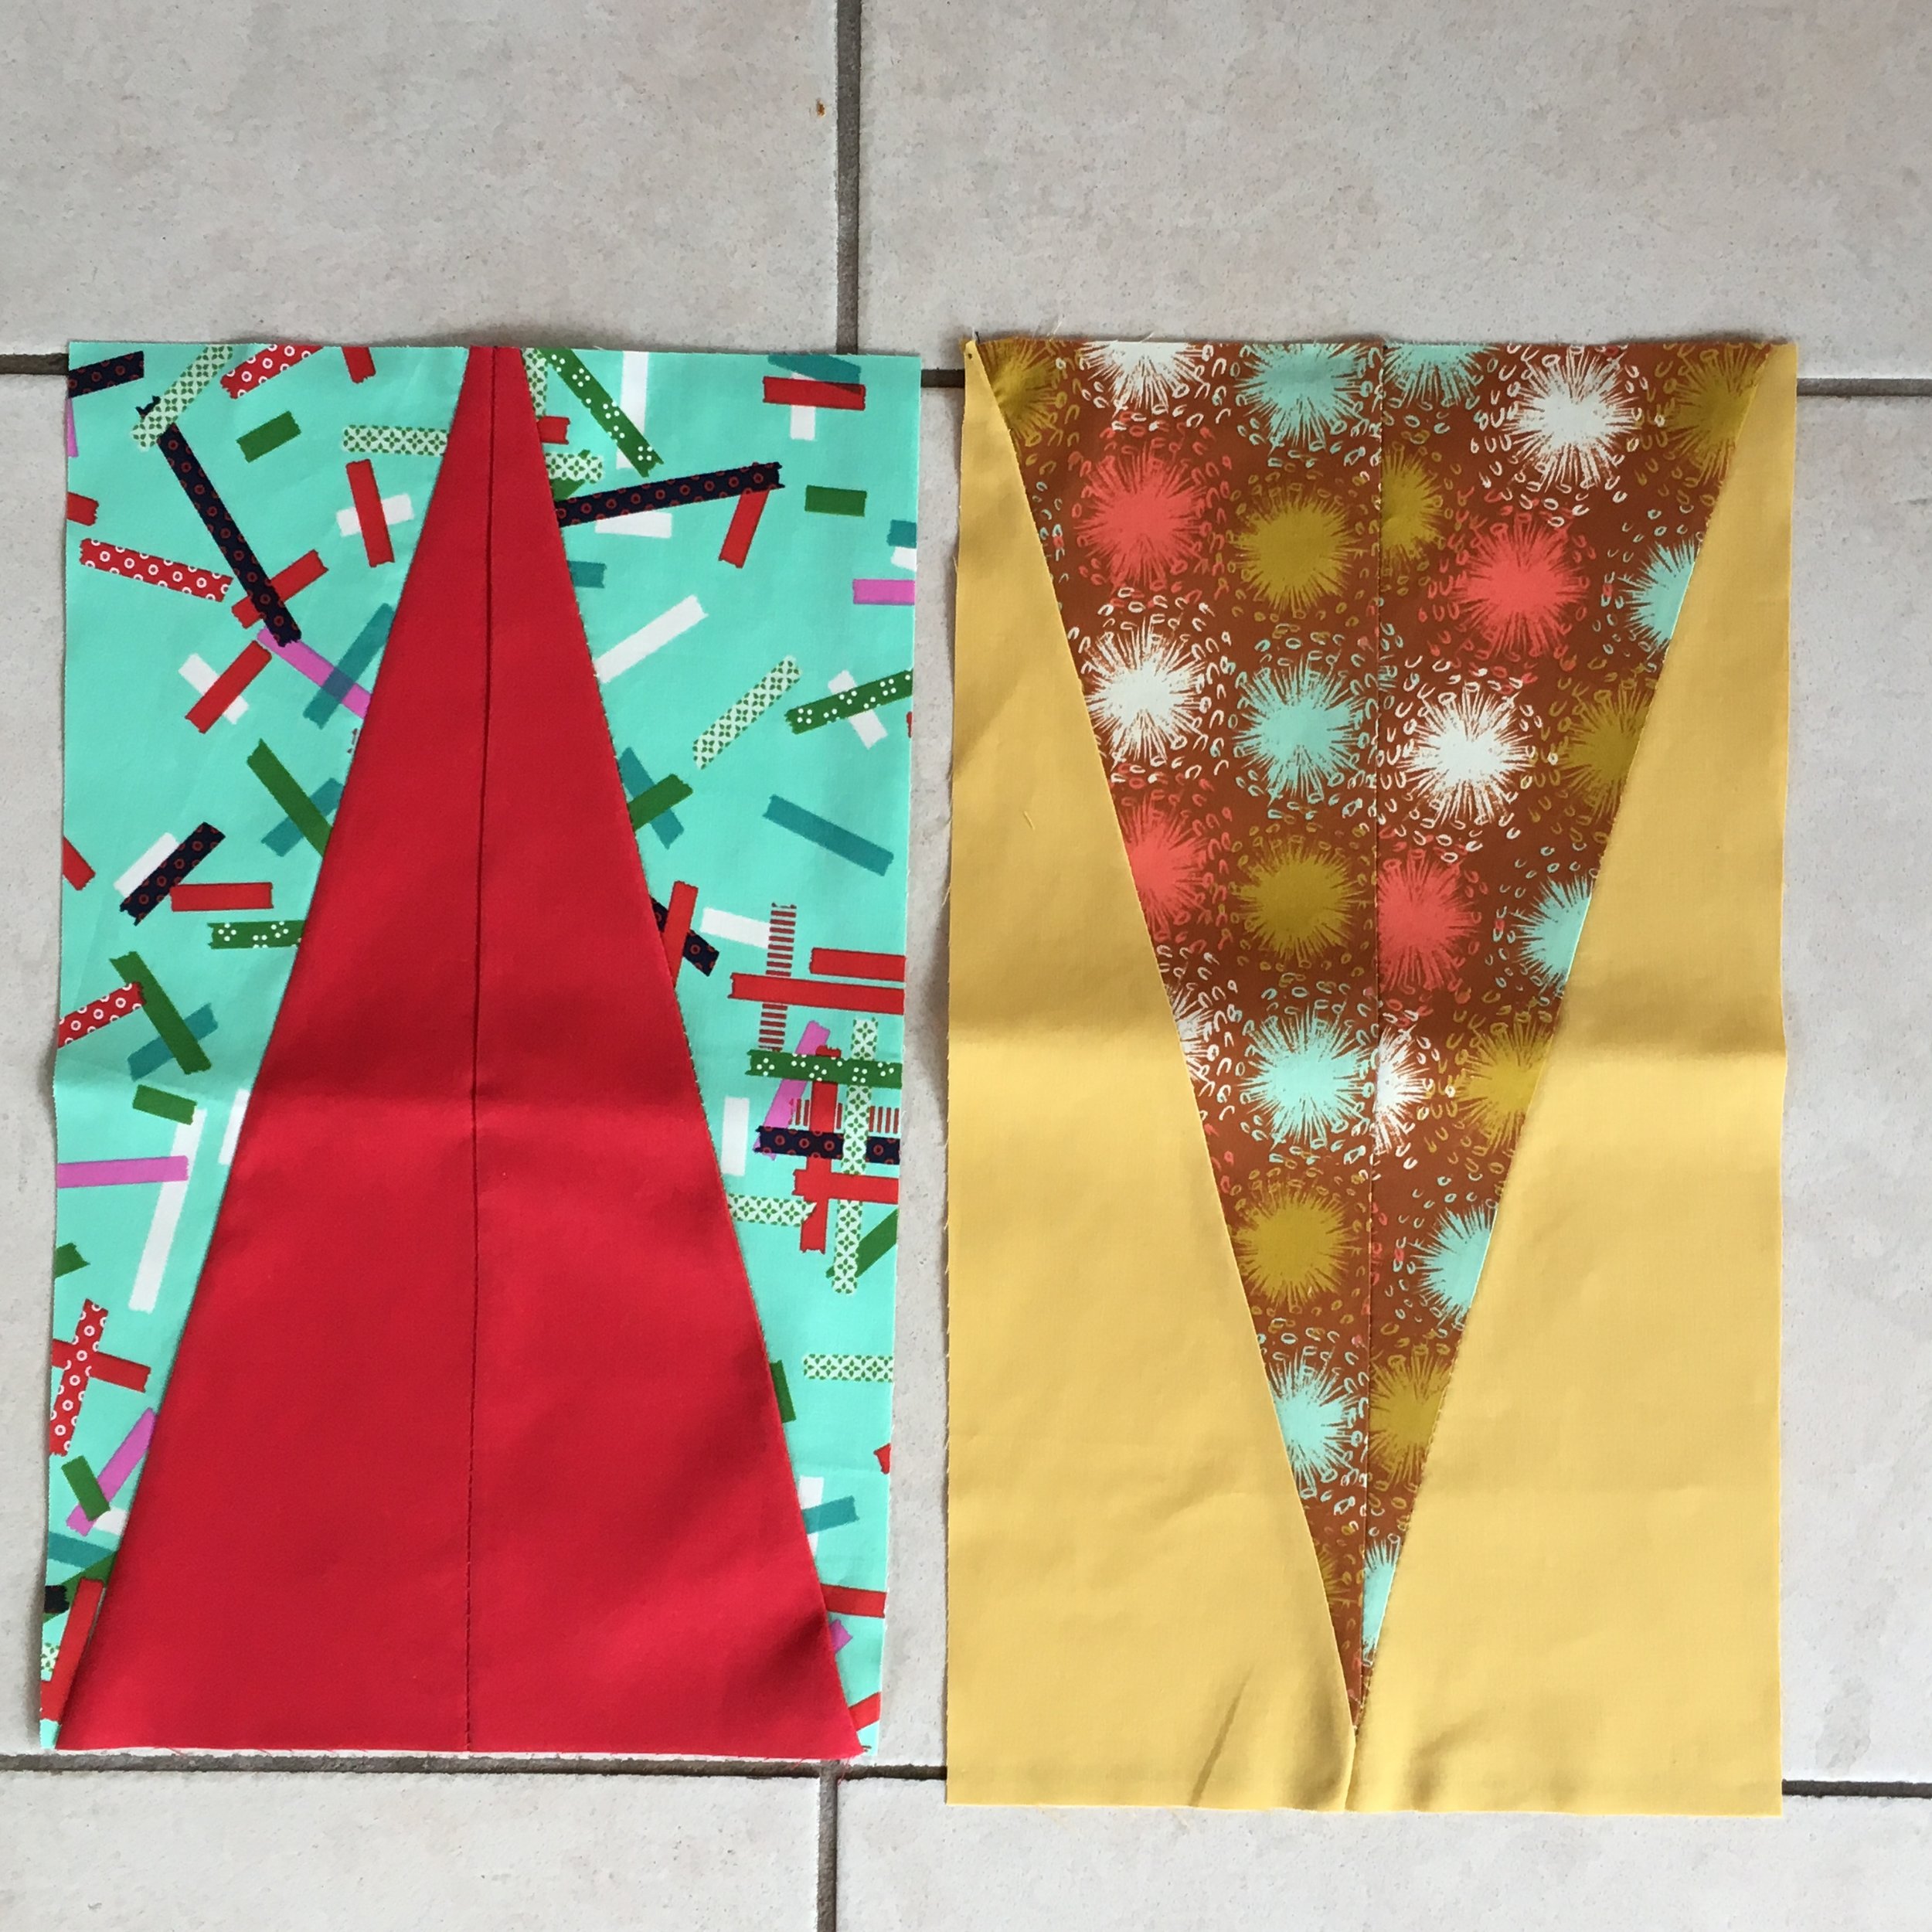
Aqua Heaven
First the inspiration "Exchanged" from Janet Steadman, Gallery Five
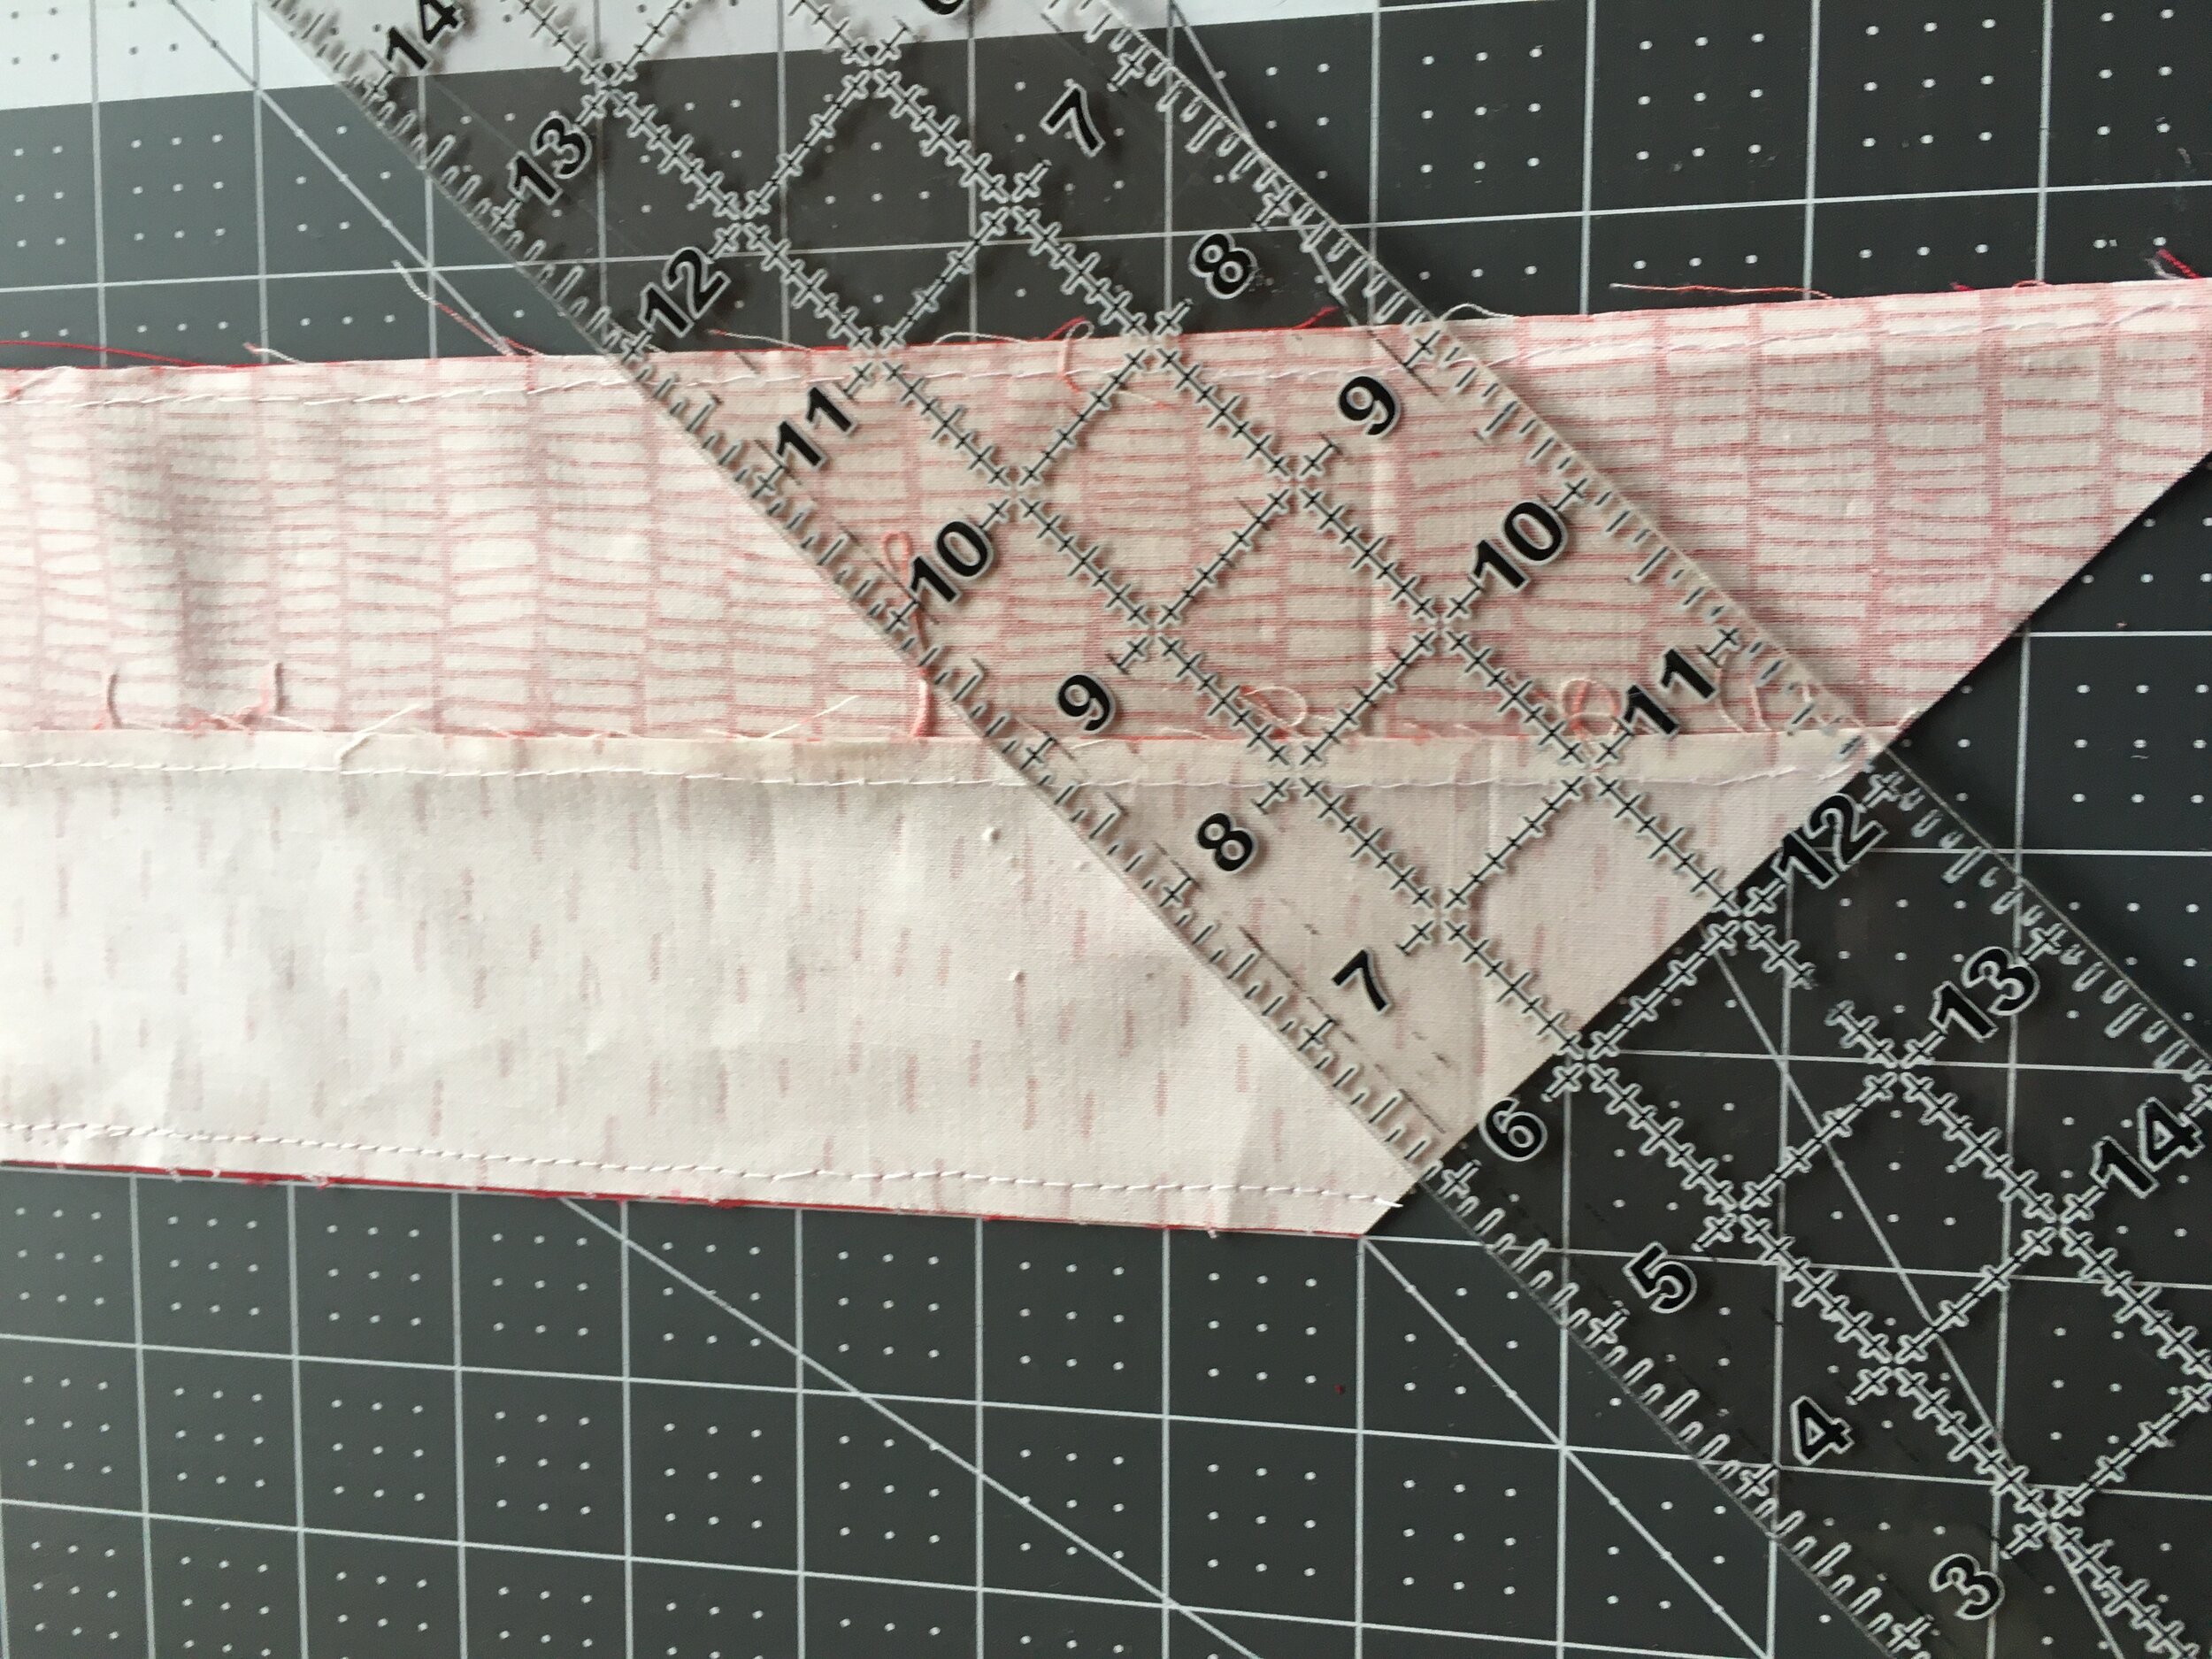
These tall triangles are the inspiration. The attached photo shows something can be lost or gained in translation. Use a pale green-blue aqua in there somewhere, and all the blocks will match up. This is great for fat quarters. Solids can be used. When using prints, be aware that the print fabric can't be flopped, so the dimensions will be off a little.
Cut a 5-inch rectangle from the short side of a fat quarter, and cut in half corner to corner for the inside fabric. Pin together to form a triangle. Sew the triangle.
Cut a 6-inch rectangle from the short side of another fat quarter, and cut in half corner to corner for the outside fabric. Pin to outer edge of triangle to form a long rectangle, leaving at least 1/2-inch of outer fabric to leave 1/4-inch border, which will disappear when piecing the completed blocks together. Sew to form a rectangle.
Don't be fussy about the finished width and height. It's perfectly OK to chop off the tip of the triangle, as you can see from the inspiration. These are made to be slashed or chopped. The samples ended up at 16 and 16.5 inches tall and 10 and 10.25 inches wide.
By Cathy

February 2019
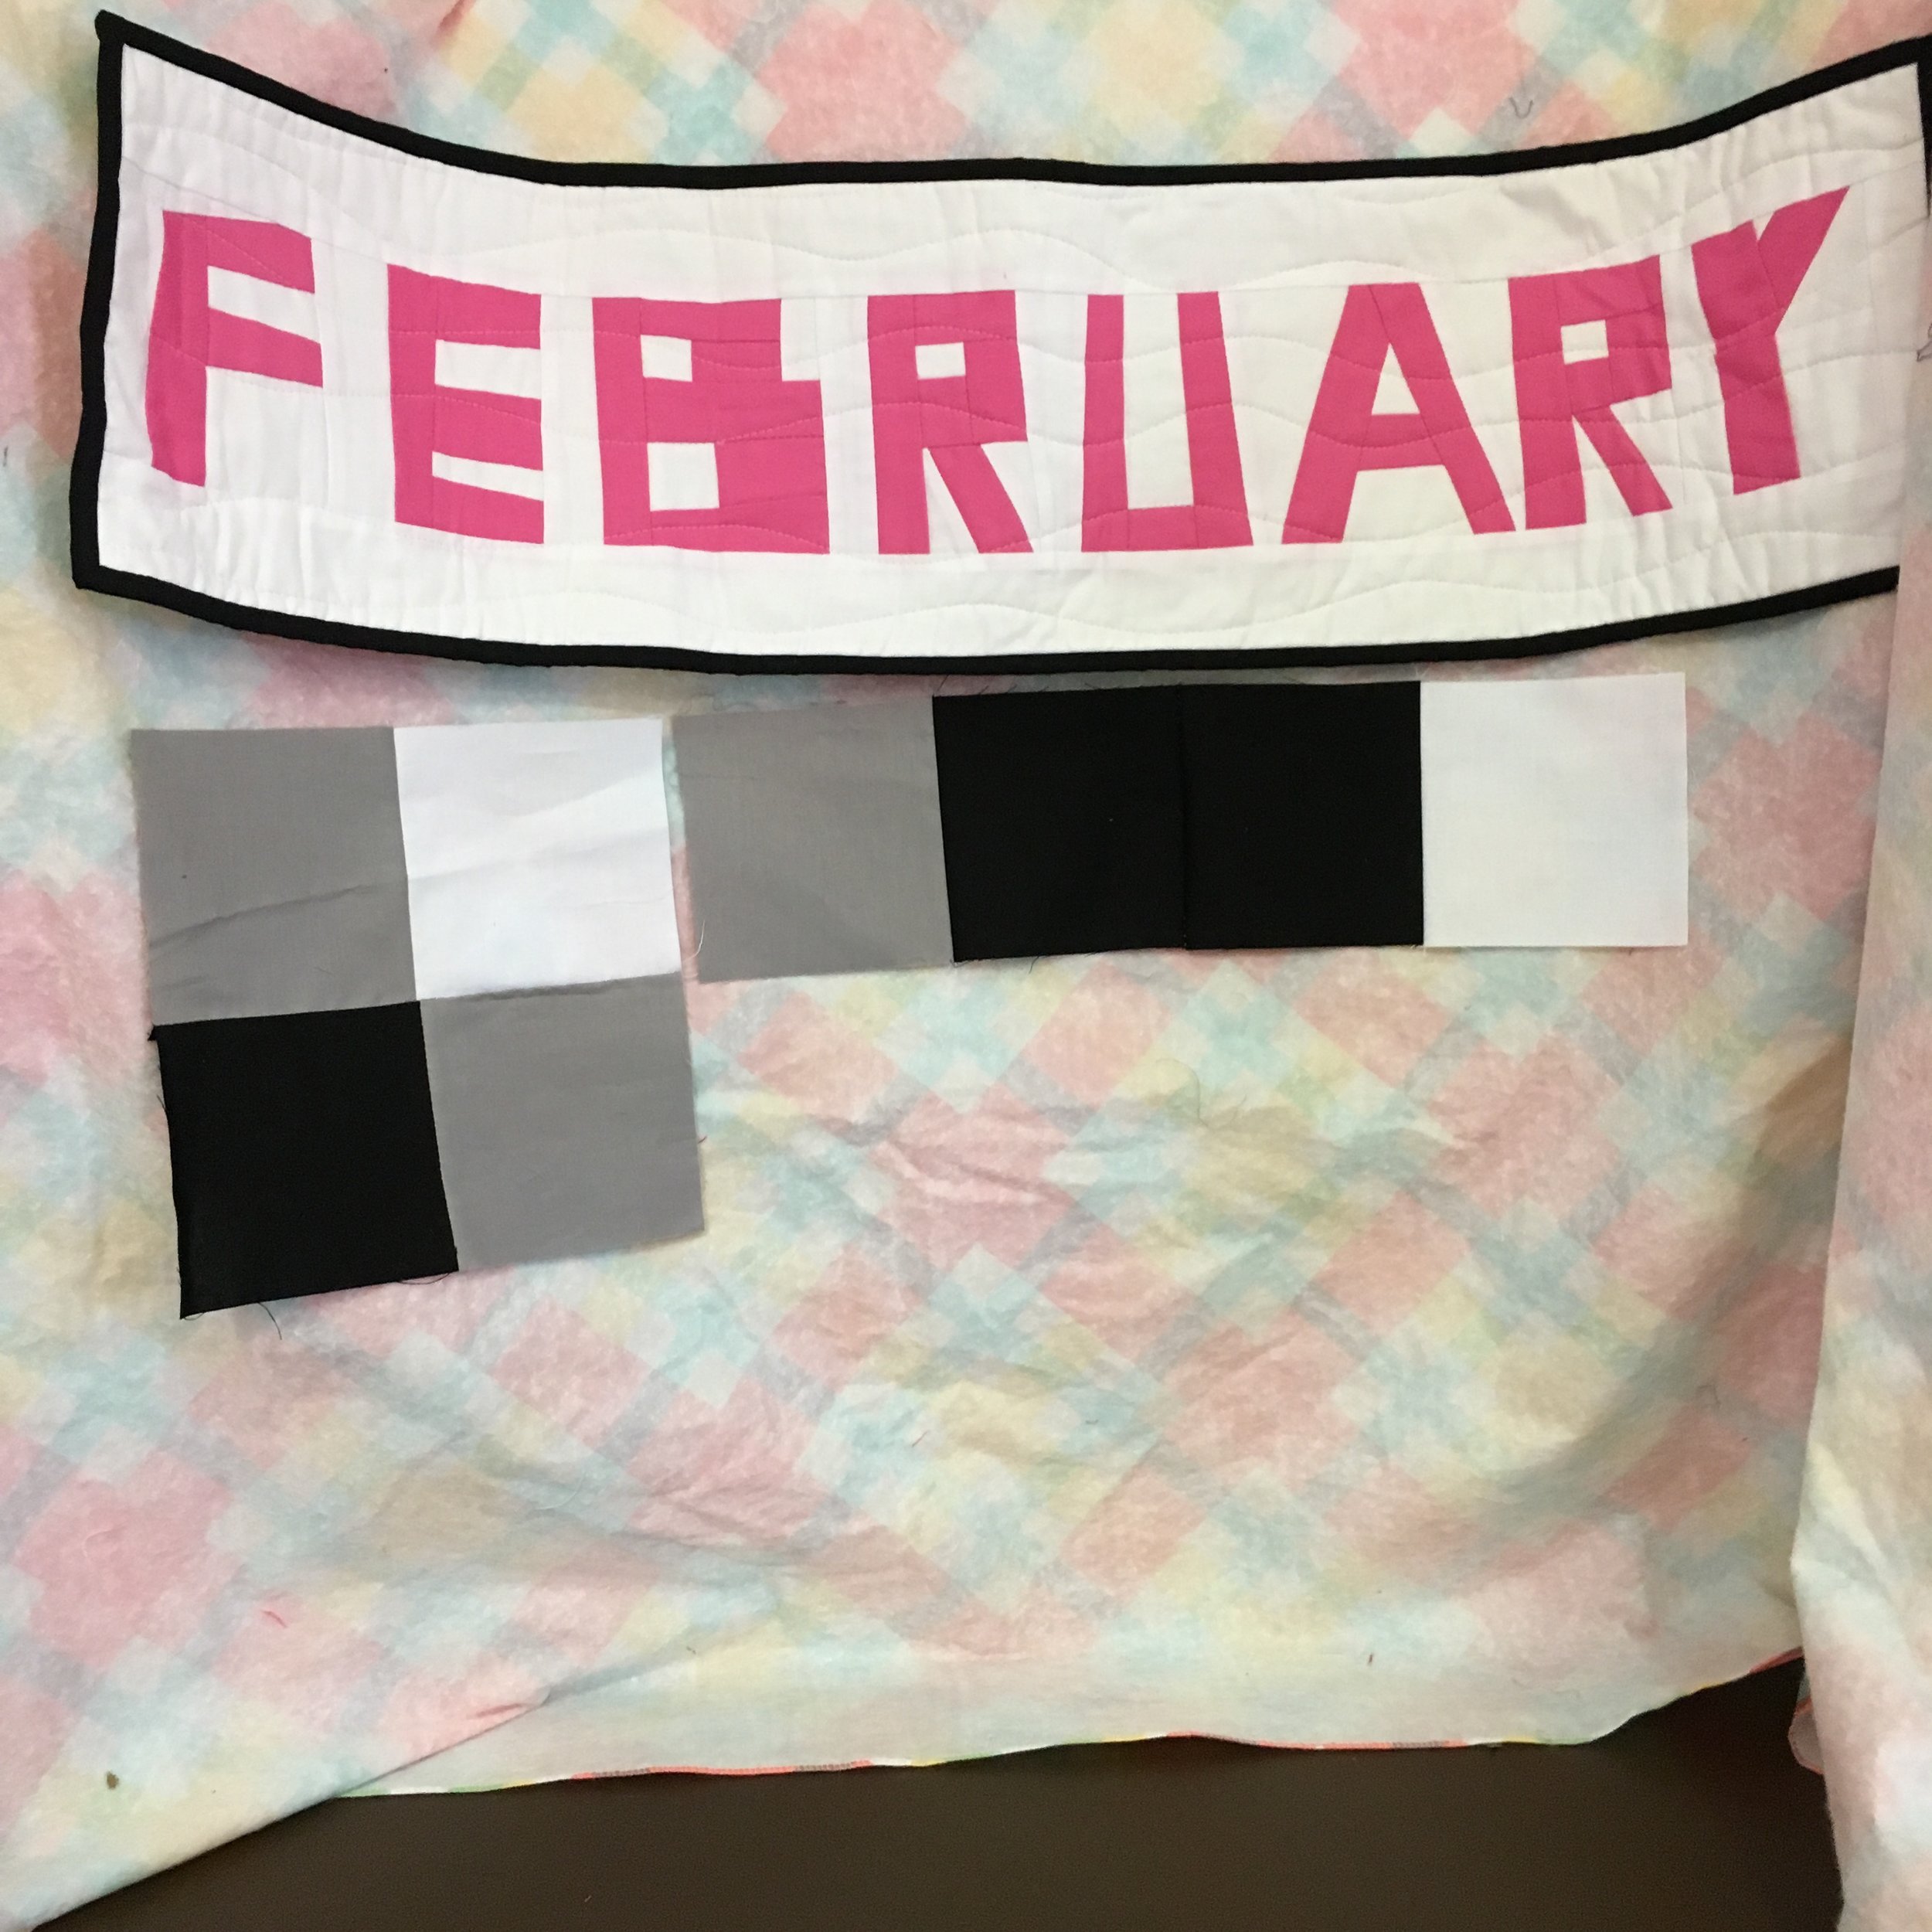
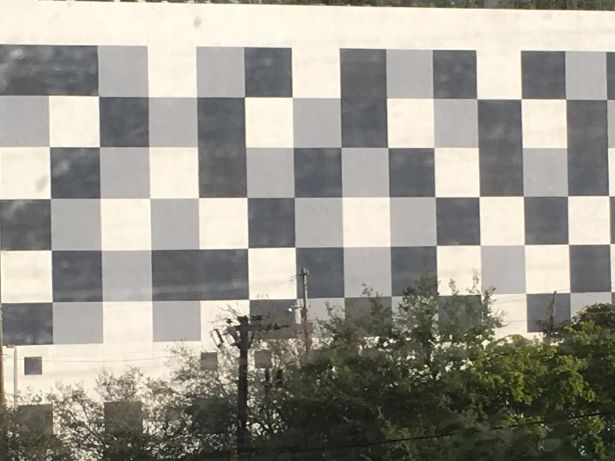
Eye of the Beholder
This will be the easiest block ever. I call it "In the eye of the beholder" because the end product will be something seen only be the assembler. It uses 4.5-inch solid squares of white, gray and black. The inspiration was a building under construction in downtown Miami. One wall is painted in a white, gray and black grid. The raffle winner can go with the neutral simplicity or add colors to suit. Plan to deliver a four-patch square measuring 8.5-by-8.5 inches or a four-block vertical strip measuring 4.5-by-16.5 inches. Raffle tickets also will be given to anyone who brings in four unsewn 4.5-inch squares, which gives the winner even more flexibility. Give it a try. Addendum: white-off white- cream square measures 6 inches, build log cabin to about 12 inches, cut in quarters, sew with white in outside corners.
By Cathy

January 2019
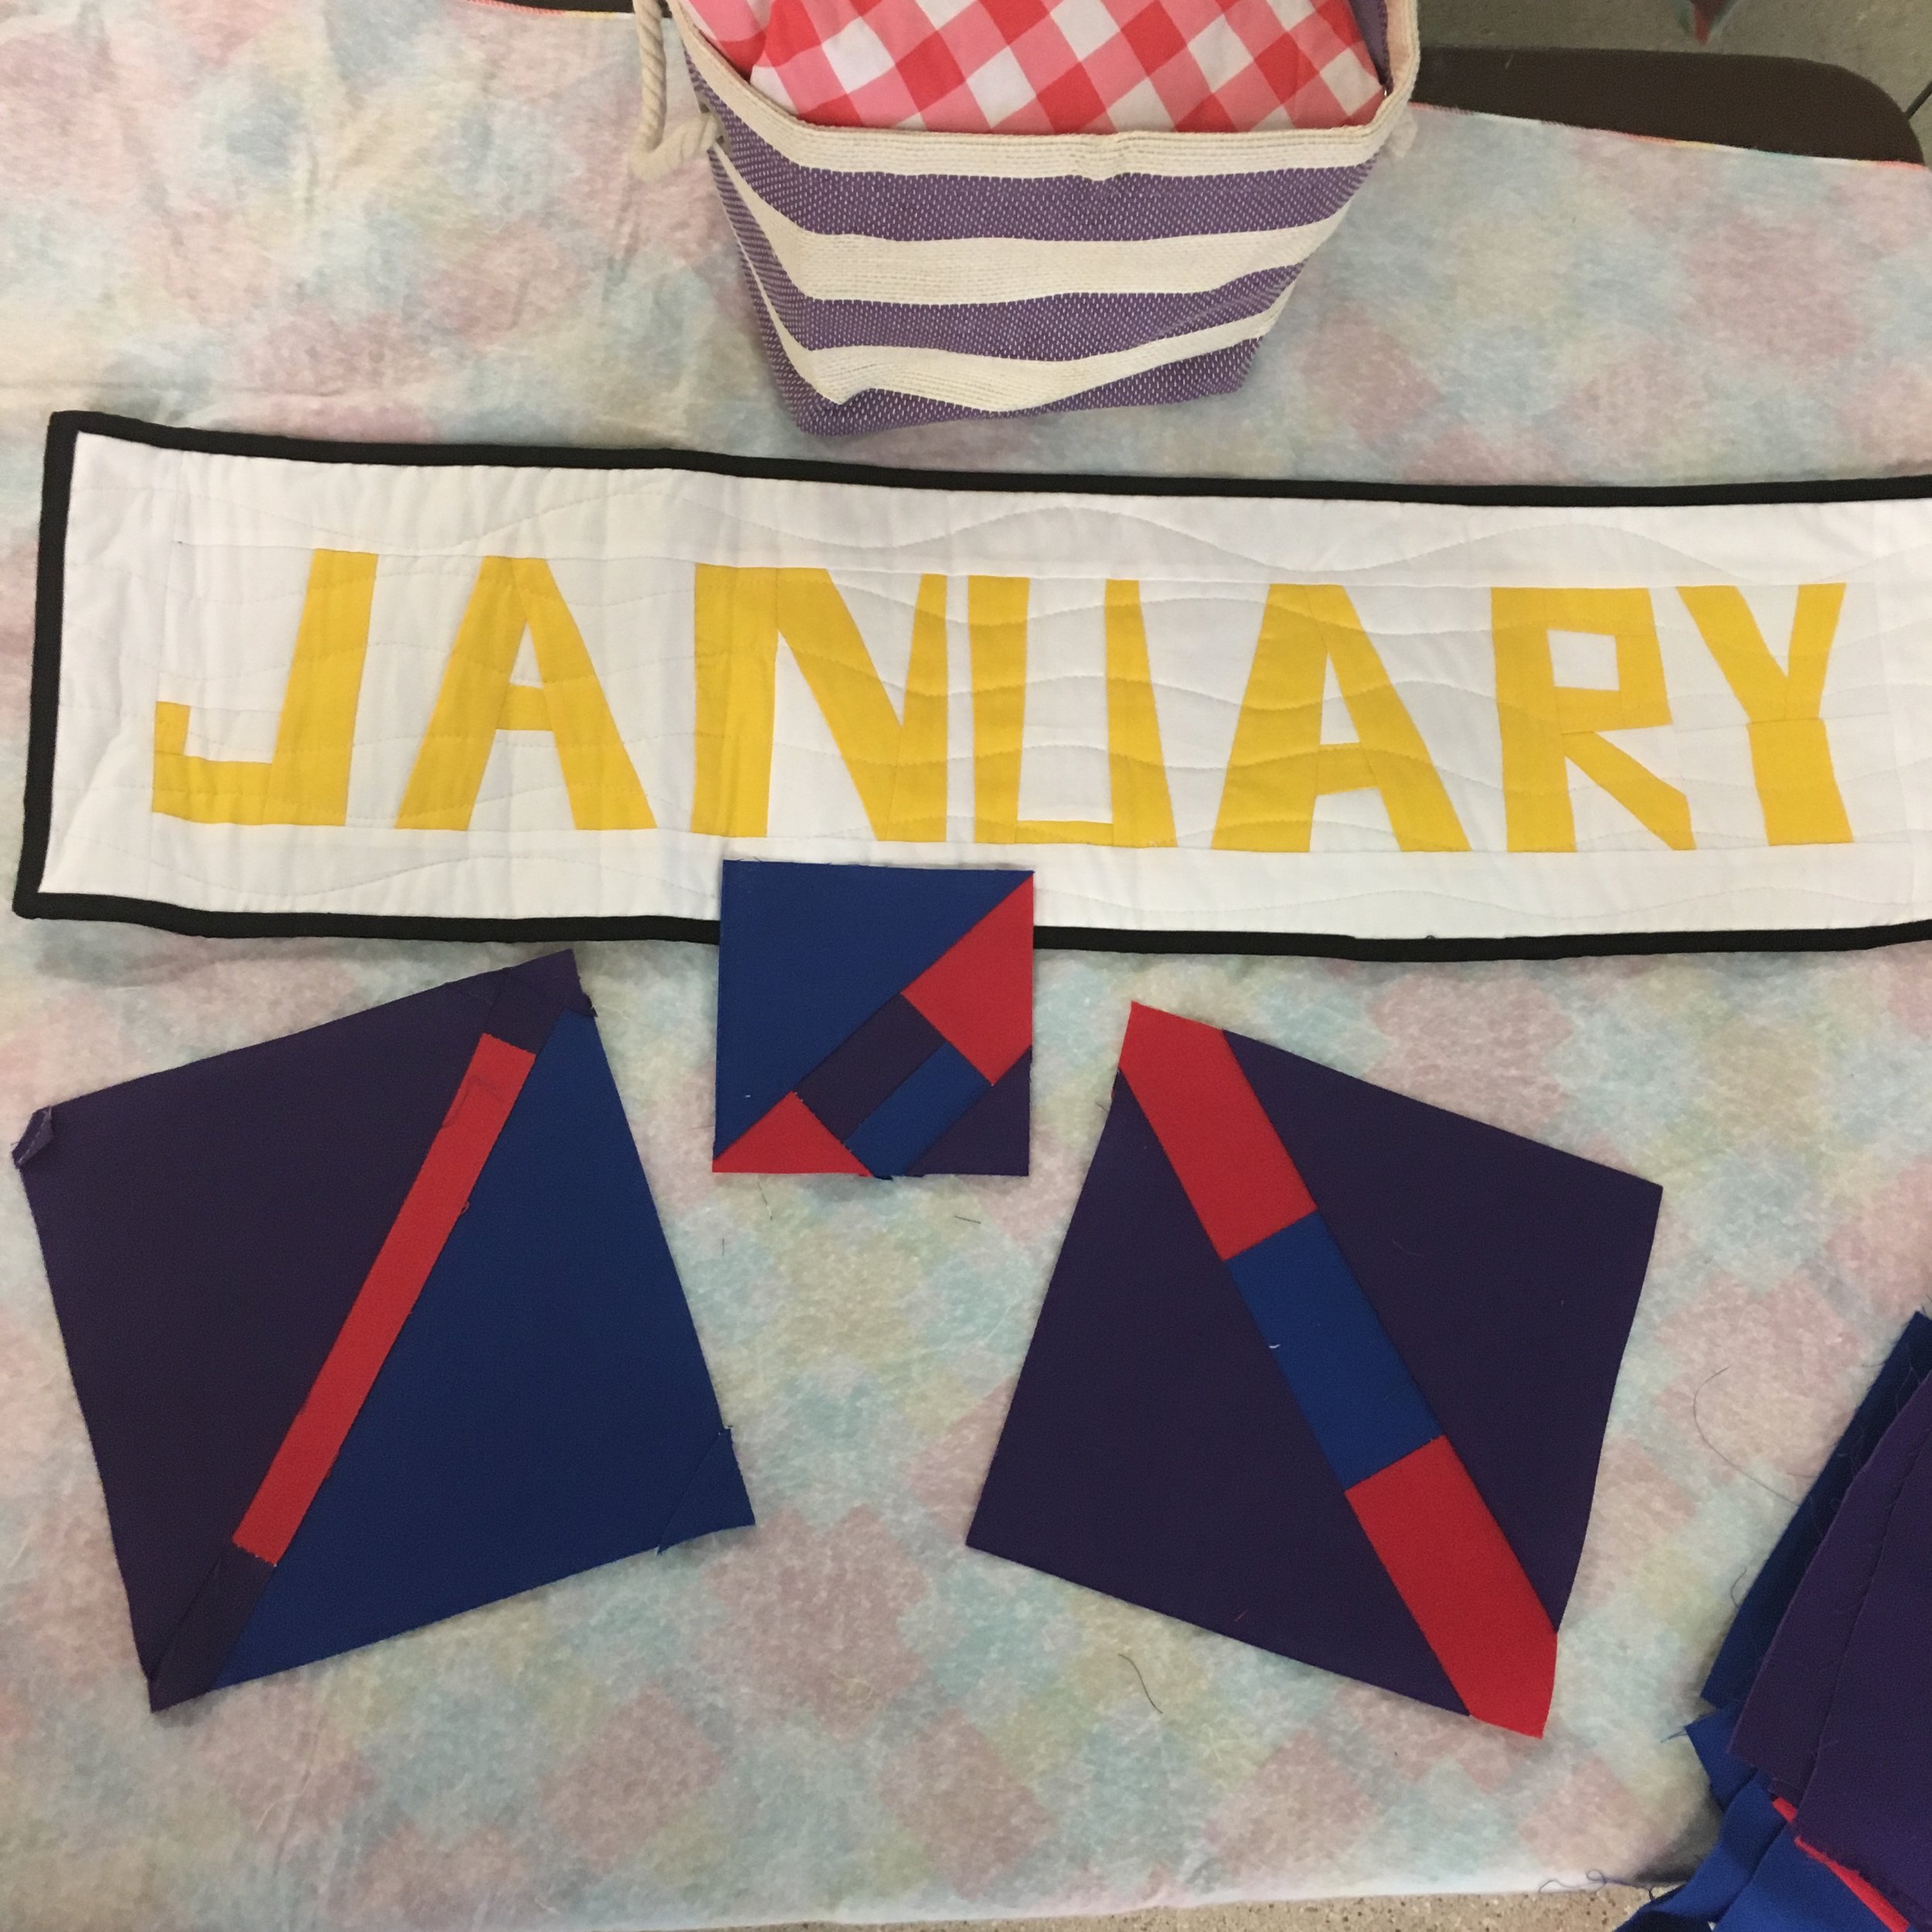
Stripe in Square
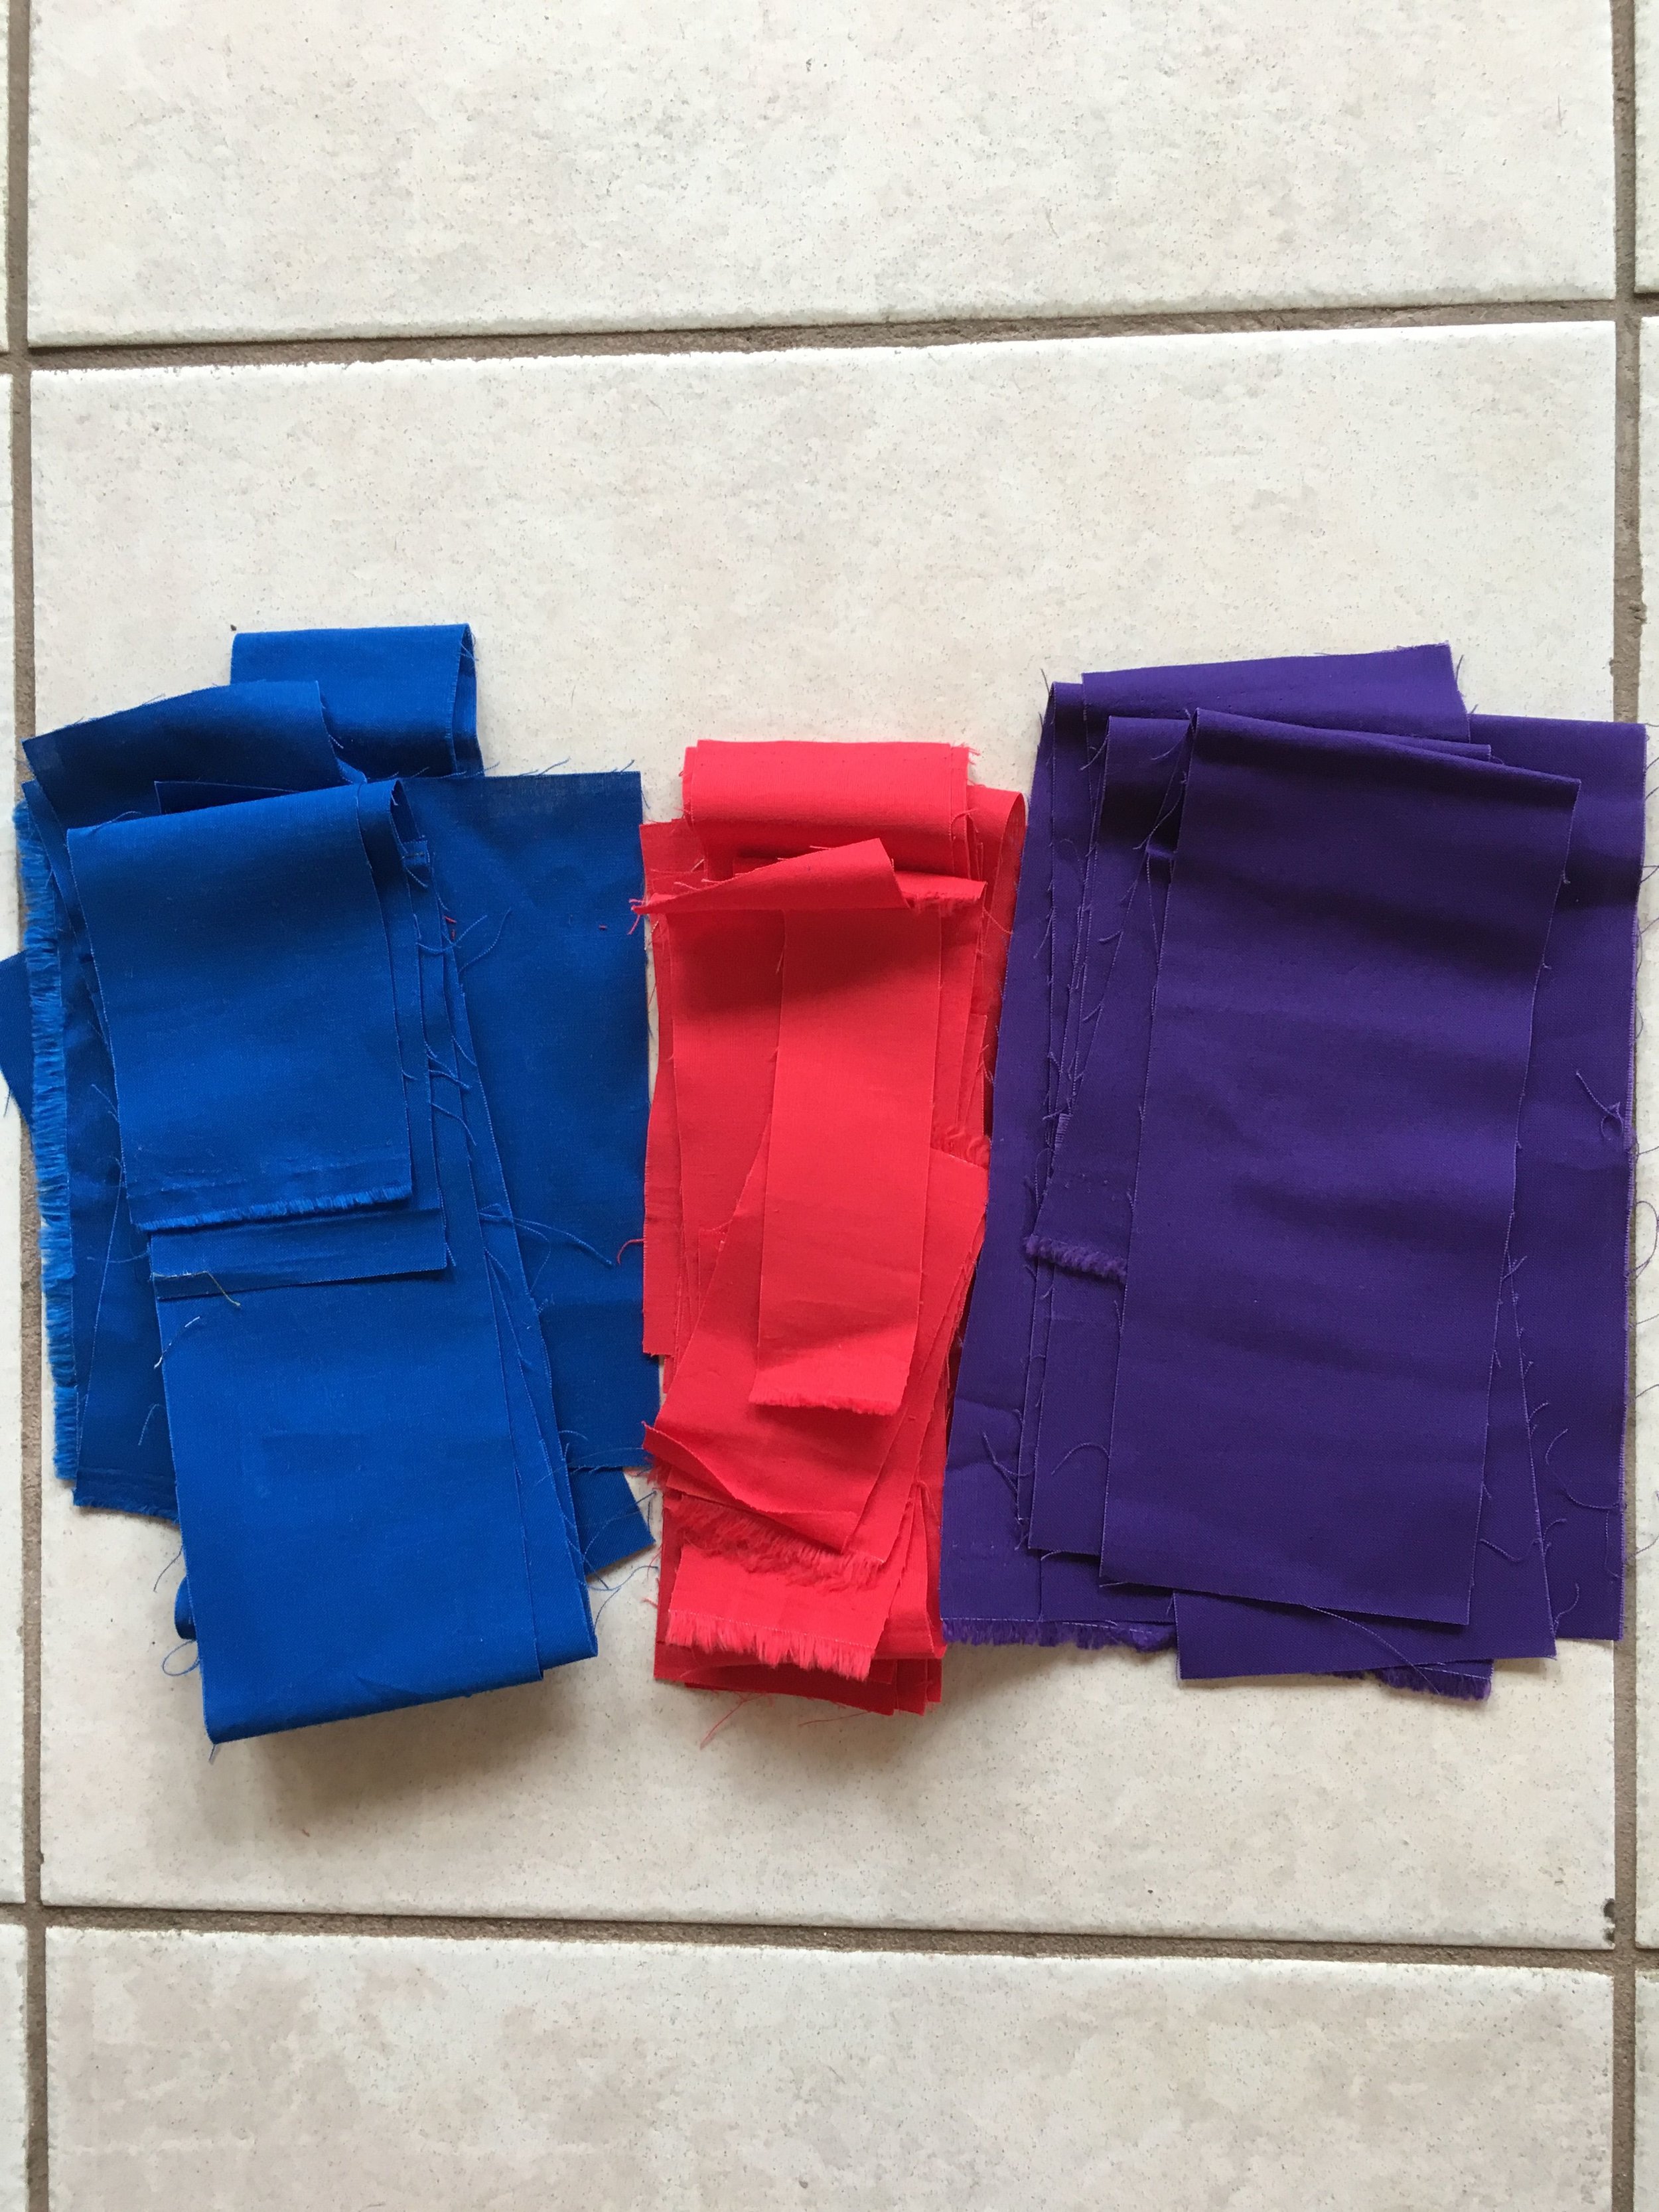
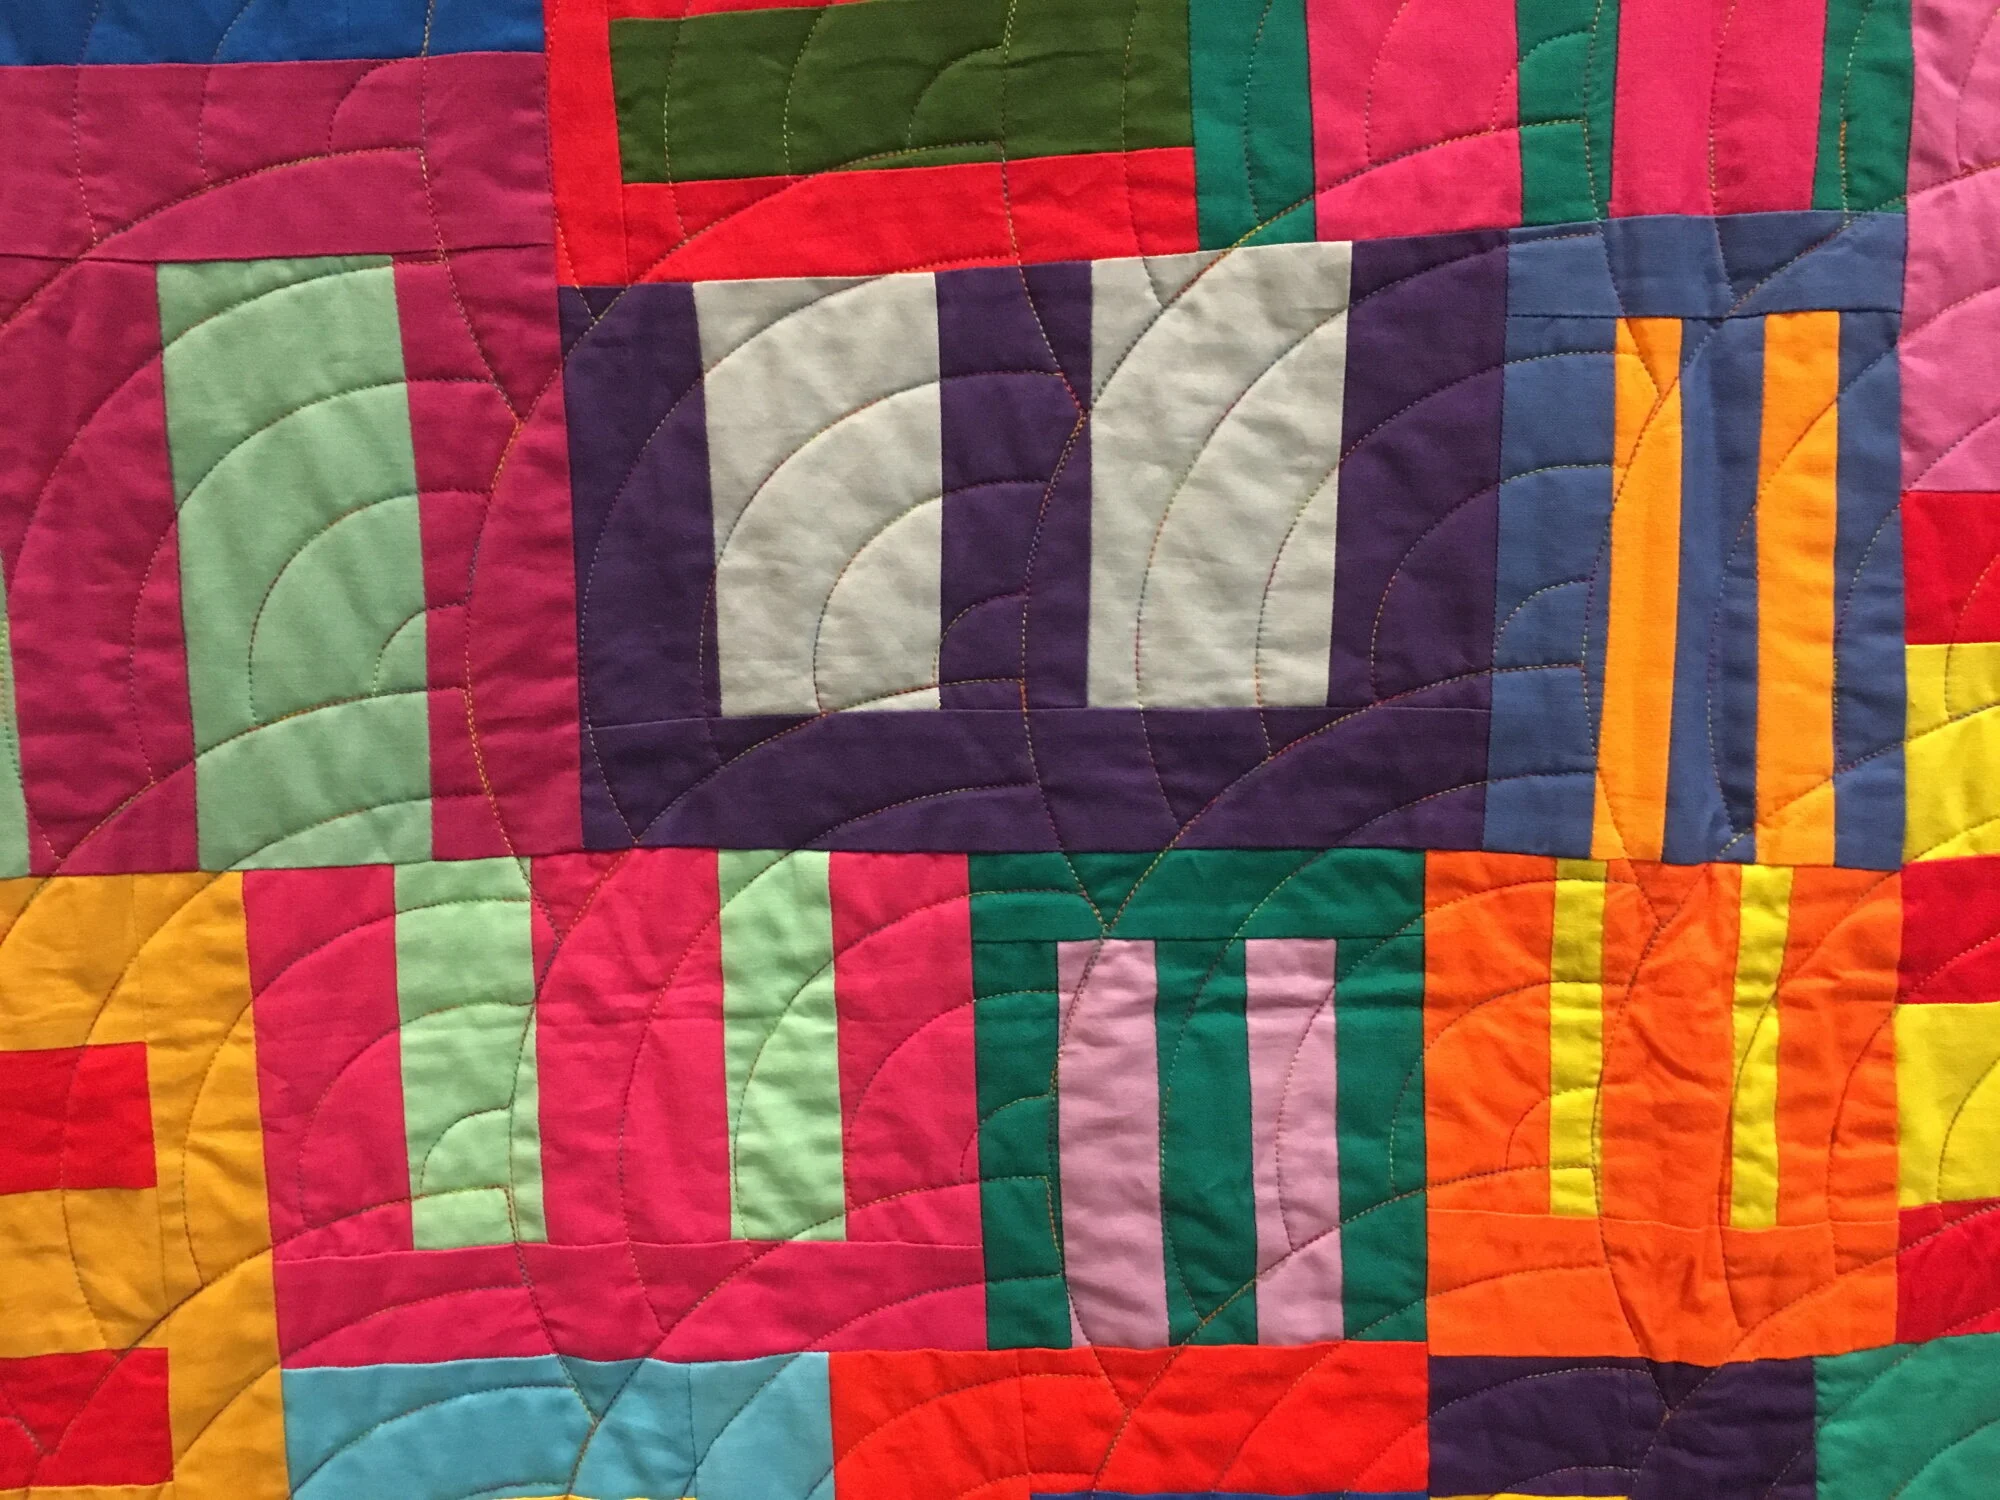
Inspired by Quilted Under the Influence these square blocks measure 8.5 or 4.5 inches. The idea is to sew a diagonal stripe inside a square. Photos below show the variations possible: straight or wonky, centered or off-center, using up to three fabrics in the stripe and using the same or different colors on the sides. Colors for this project are deep red, blue and purple solids. Some scraps were available for anyone in search of fabric.
By Cathy