April Block of the Month
The April Block of the Month is a little modern and a little retro. Blocks are due at the May meeting, giving the winner the chance to have a quilt ready for Father’s Day in June. Televisions seem like a great choice for a dad and this block is easy to assemble.
As for color? Anything goes! Make it modern fabric and try for contrast so your television doesn’t get lost. A low volume for the screen will help define the image. The original design has embroidery detail and buttons but we’ll leave that for the winner to decide.
The block finishes at 12 1/2” x 12 1/2” and uses 1/4” seams throughout.
The best tutorial for this block can be found on Lori Holt’s website
We’ll be making the 12 x 12” size but she provides a 6 x 6” size on this page and an 18 x 18” size later on her blog. Following her directions is the easiest way to go for this but just in case, here are the measurements and how I did it.
Background for the block (turquoise in the sample)
- 2 pieces 3 1/2” x 5 1/2”
- 1 pieces 1 1/2” x 4 1/2”
- 1 square 2 1/2” x 2 1/2”
- 2 pieces 1 1/2” x 2 1/2”
- 2 pieces 1 1/2” x 8 1/2”
- 2 squares 1 1/2” x 1 1/2”
- 4 squares 1” x 1”
Television (light orange in the sample)
- 2 pieces 1 1/2”x 10 1/2”
- 2 pieces 1” x 6 1/2”
- 1 piece 1 1/2” x 6 1/2”
- 4 squares 1” x 1”
Television contrast (dark orange in the sample)
- 1 piece 1 1/2” x 6 1/2”
- 3 pieces 1 1/2” x 2 1/2”
First Make the Television screen
1 piece, 6 1/2” x 7 1/2”
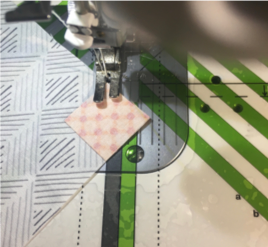
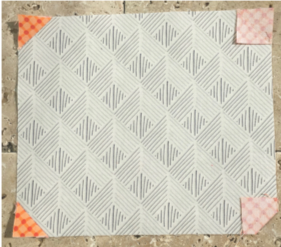
Begin the block by using corner triangle method on the ‘television screen’. Sew the four 1” squares to each corner of the television screen diagonally, corner to corner on the squares. Trim the seam and press the resulting triangle back.
Next, add the sides to the television.
Sew the 1 1/2” x 6 1/2” piece to the left side of the screen. Then, in order, sew one 1” x 6 ½” piece, then the contrast 1 1/2” x 6 1/2” piece and finally the remaining 1” x 6 1/2” television piece. (This is much easier than the written directions appear!)
Now add the two 1 1/2” x 10 1/2” pieces to the top and the bottom of your screen.
The screen is now finished
Next add on the antenna and the legs.
Antenna:
- To create the antenna, use the corner triangle method on one of the 1 1/2” x 2 1/2” contrast pieces using two of the 1” square background pieces.
- Then sew the 2 1/2” square to the top of your antenna box.
- Finally, add a 3 1/2” x 5 1/2” piece to each side of the resulting rectangle.
Feet:
- To create the feet for the television, it’s corner triangle method again. Use the remaining two contrasting 1 1/2” x 2 1/2” pieces.
- The 1” square background piece goes on the top of the rectangle,
- The 1 1/2” piece on the bottom.
- Be sure to use the opposite corners on each piece.
TV Block Assembly:
Now, assemble the bottom strip of the square. Sew in this order, a 1 1/2” x 2 1/2” background piece, an assembled leg piece (with the small triangle corner on the left top corner), then the 1 1/2” x 4 1/2” background piece, the other leg (small triangle on the right top corner) and finally the remaining 1 1/2” x 2 1/2” background piece.
Make sure your leg pieces are opposite and that the small triangles are on the top. If you look at the next photos, you can tell how I know that’s important!
All that’s left to do now is to finish the block. Add the two 1 1/2” x 8 1/2” pieces to each side of the television. Then add the antenna piece to the top and the legs to the bottom.
Submitted by Linda Iismail


