We are excited to embark on a 2017 Block of the Month odyssey! Our 2017 BOM will be essentially the same as it was last year, but with a few exciting changes. Here is a run-down.
Block of the Month 2017
- Members in good standing and guests are invited to participate in the monthly block lottery.
- Make one or more blocks in the design of the month, and using the colors specified in the tutorials. Details will be published on the blog each month.
- Blocks should be turned in before the meeting starts. Participants will be given one ticket for each correctly completed block.
- One winner will be drawn at random, and will be awarded all of the blocks!
- Each month’s winner gets a BOM winner button.
- Any winner who completes a quilt from 2017 BOM blocks, and brings it for show & tell before the end of the year, will win a fabric bundle!
- Members should note how many BOM blocks they are entering in the draw, when they sign in at the beginning of the meeting. Why? Because the member who makes the most BOM blocks in 2017 will win a big prize!!
Chunky Log Cabin
The Chunky Log Cabin block
The inspiration for this block came from a post about scrappy quilts on the blog Tanya Quilts In Colorado. Tanya was in turn inspired by an uncredited photo she found on the internet, and she made up a tutorial. We took her tutorial and altered it slightly, so the block has evolved a bit, in the great tradition of quilters being inspired by one another and making things their own.
We have called this block the Chunky Log Cabin, because it is definitely built like a traditional log cabin block. Varying the width of the logs gives it an interesting look, and choosing a variety of bright prints will achieve the scrappy result we are looking for.
For this block you will need
Two examples of fabric pulls for colorful prints/solids.
- Fat eighth white or white-on-white fabric
- Four strips (2.5 x 12 inches) fabric in four different prints
Choosing your print fabrics
- Please choose four different prints in the same color. Solids are good too! (From here on, when we say "prints", we mean either!)
- Use any color except black, brown, or grey.
- Bright or saturated colors will look best, to contrast with the white.
- If you don’t have four different prints in one color, feel free to use four strips of the same print.
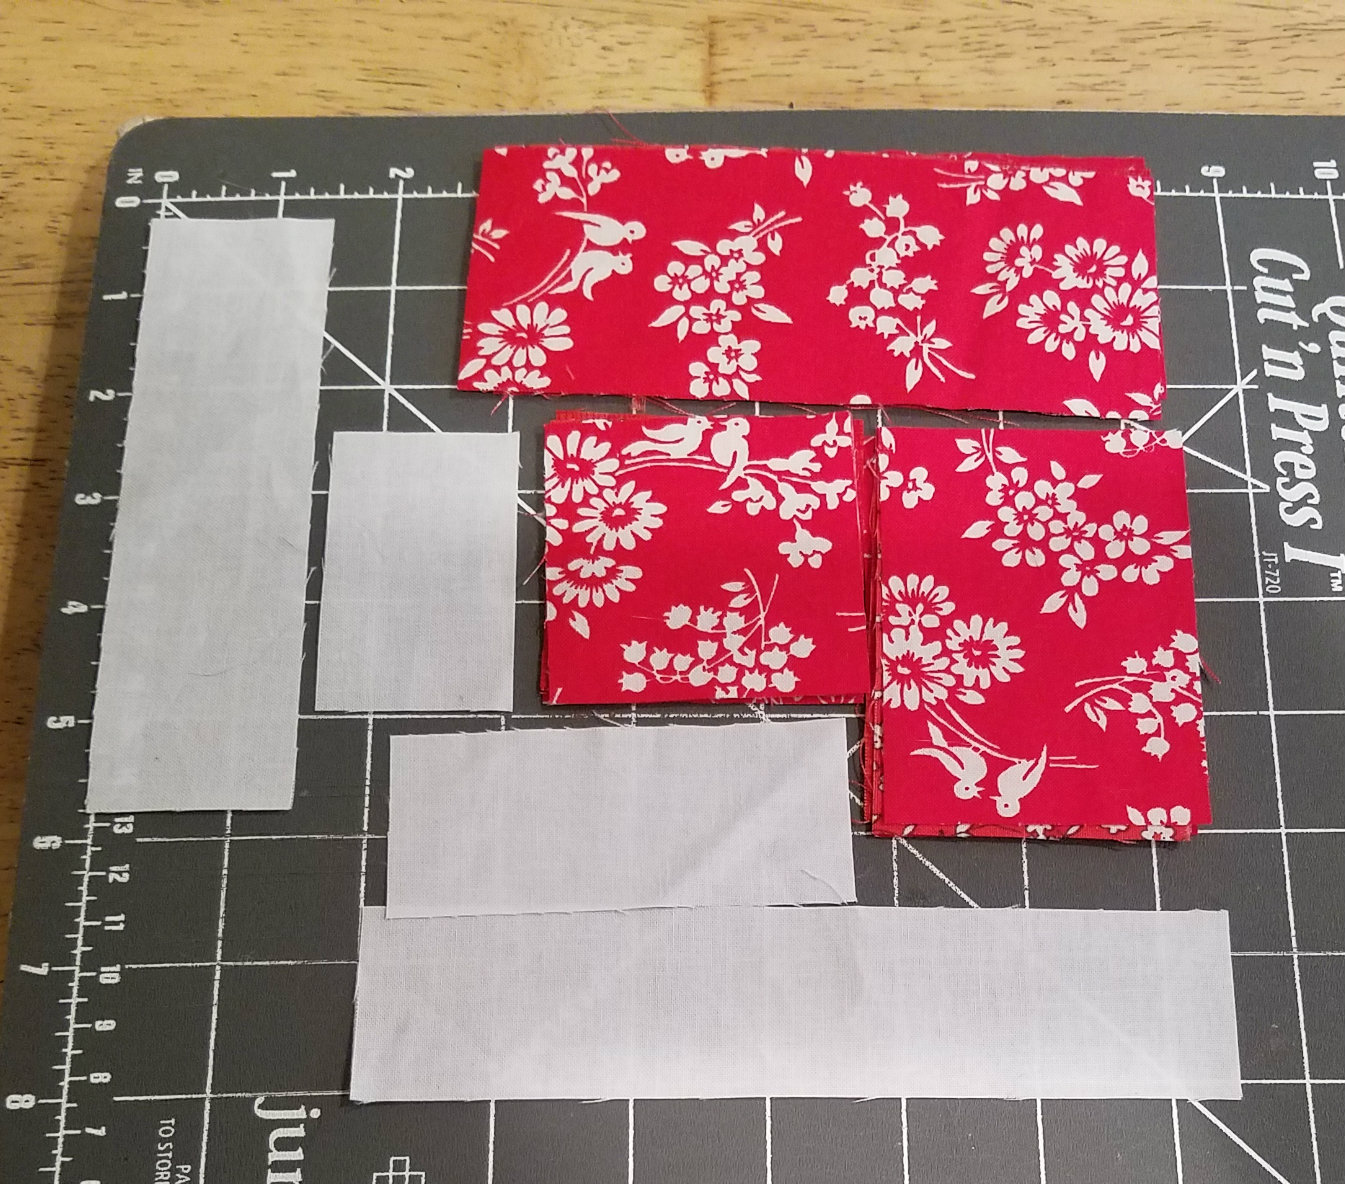
Cutting instructions
Cutting and placement for one section
White fabric: cut four sets of
- 1 ½ x 2 ½ inches
- 1 ½ x 3 ½ inches
- 2 x 5 ½ inches
- 2 x 7 inches
Colored prints: cut one set from each of four prints (finish with four sets)
- 2 ½ x 2 ½ inches
- 2 ½ x 3 ½ inches
- 2 ½ x 5 ½ inches
The block is constructed by sewing four smaller log cabin squares and then combining them to make a 12.5 inch block (12 inch finished). Log cabins are made by starting with a center square, and adding strips to the sides, working in a clockwise direction.
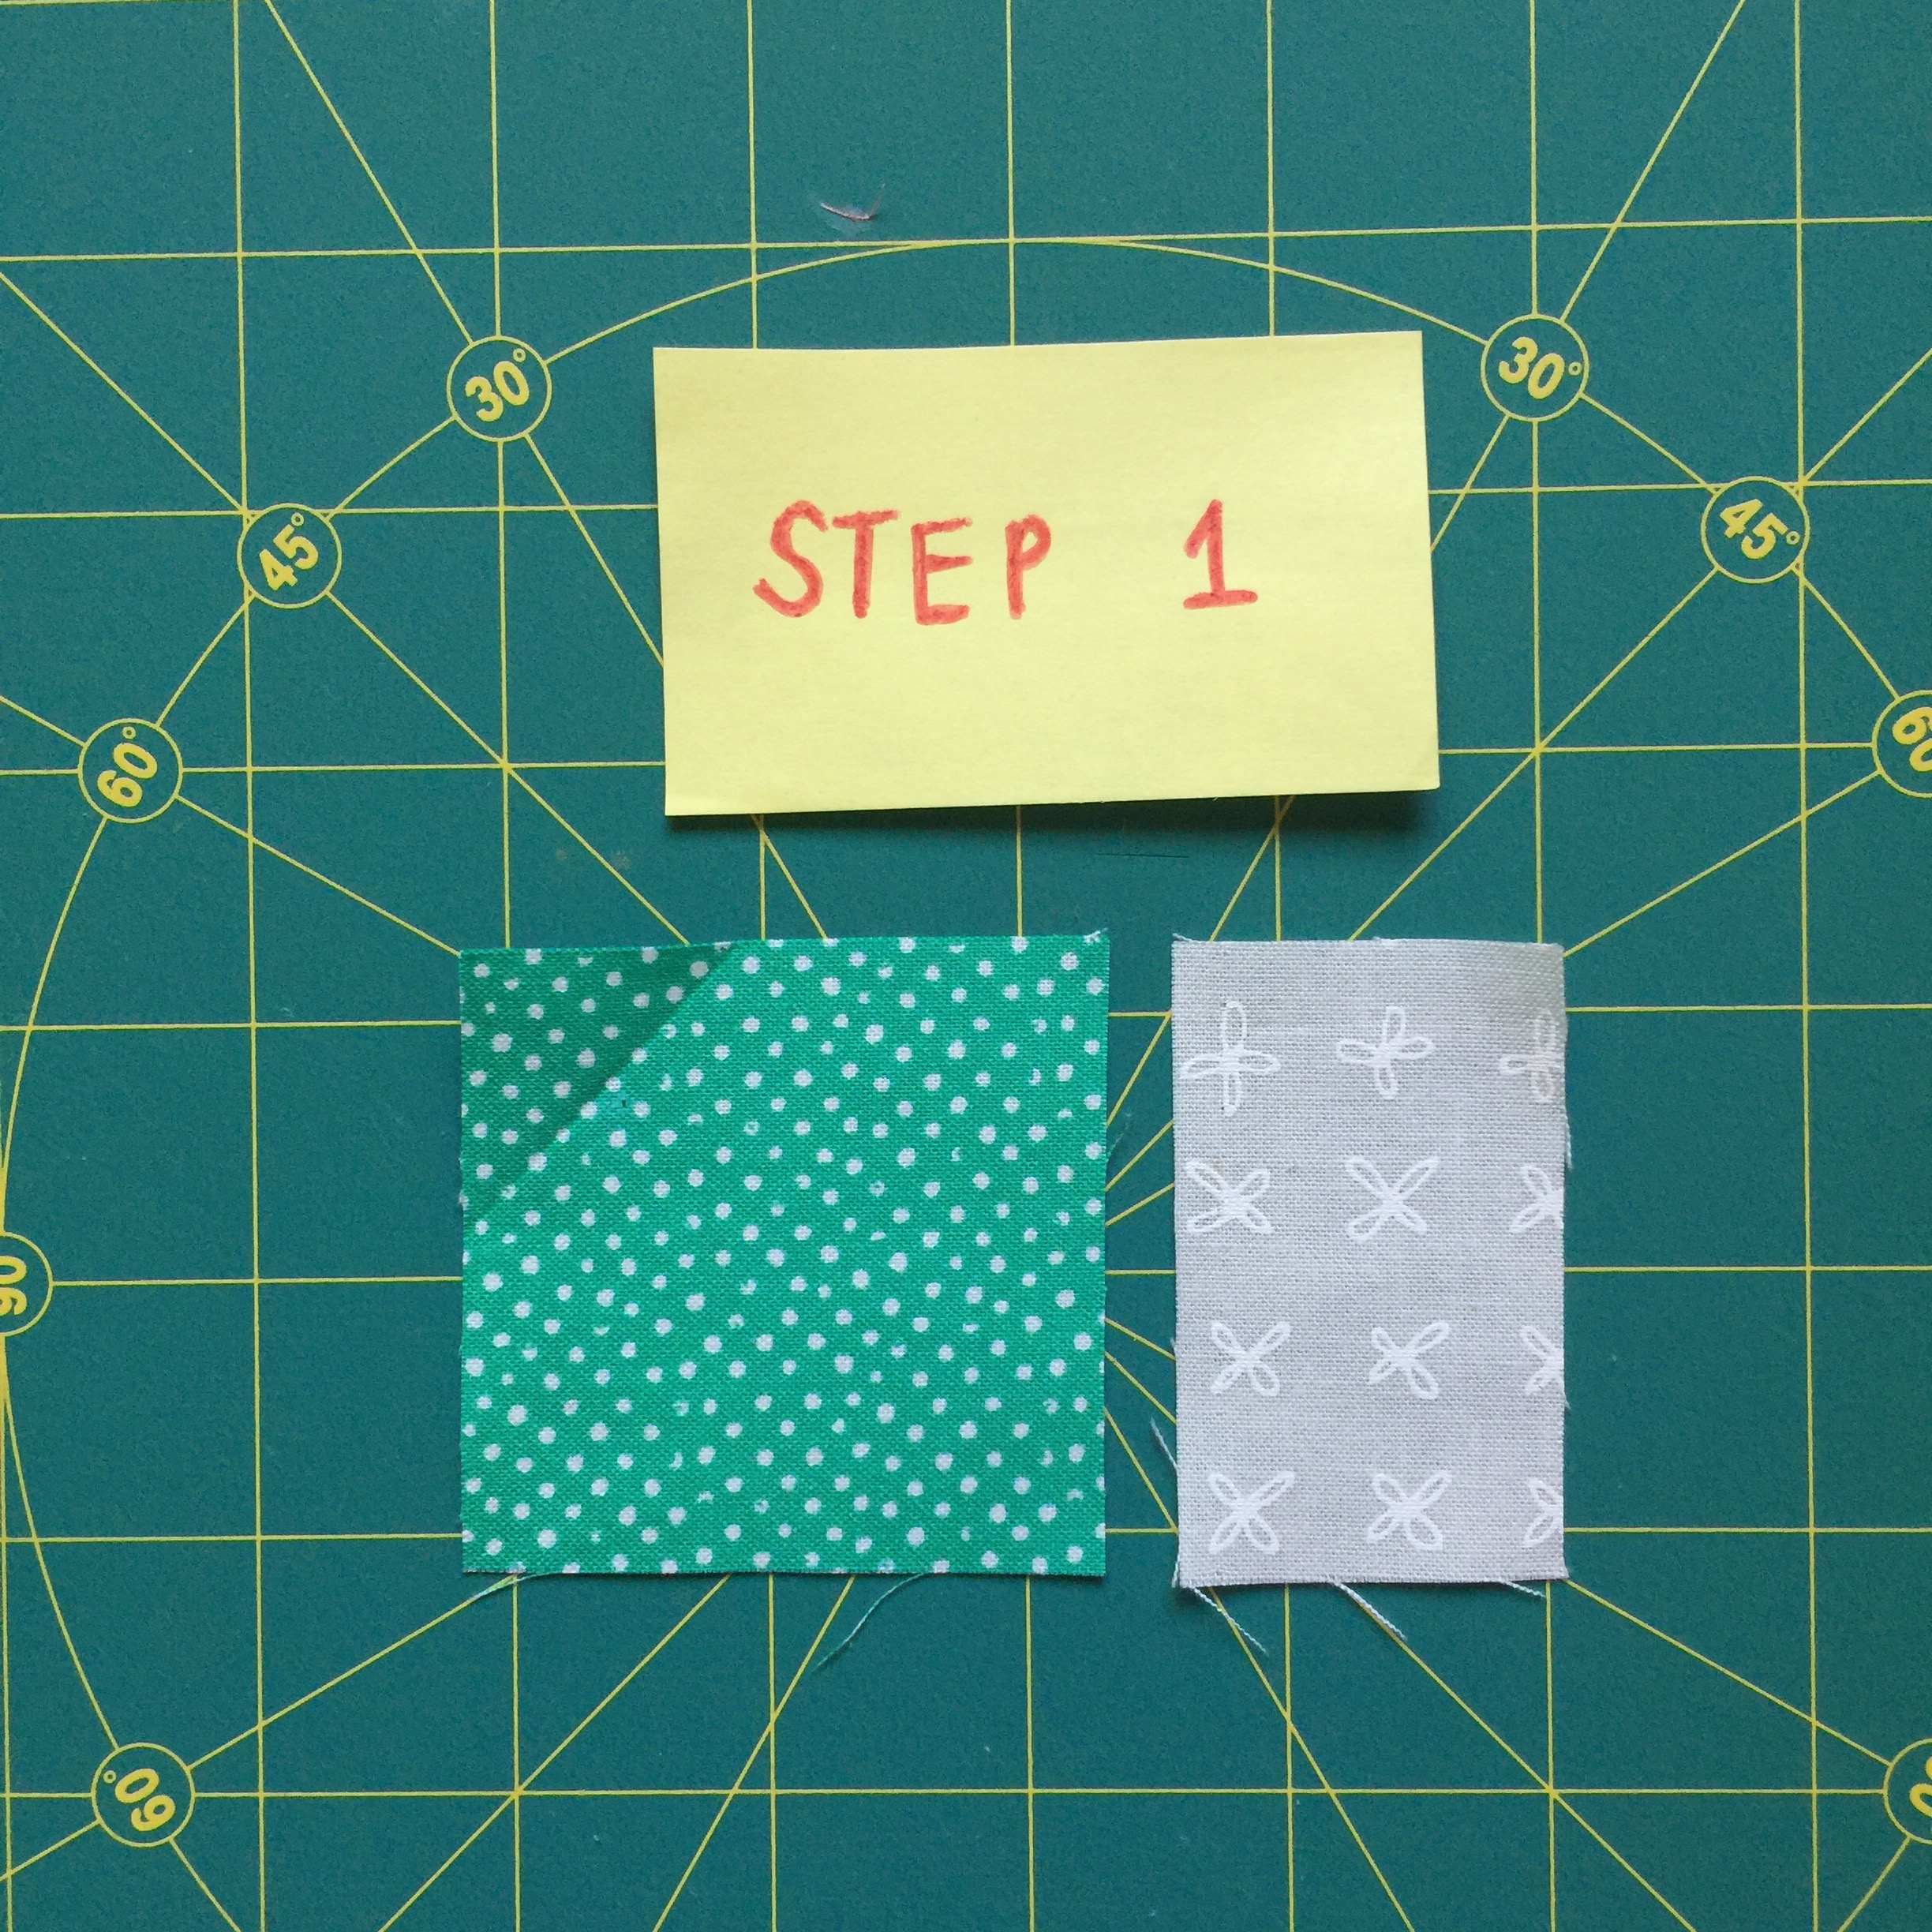
Piecing
Tip: to make the sewing go quickly, chain piece: sew all four pairs of pieces together in each step.
Tip: It’s helpful to lay out each of the four sections before you begin sewing; it helps keep the pieces in order.

Be sure to look at the step-by-step photos!
* Press towards the print after each step.
- Sew the 2 ½ x 2 ½ print piece to the 2 ½ x 1 ½ white piece
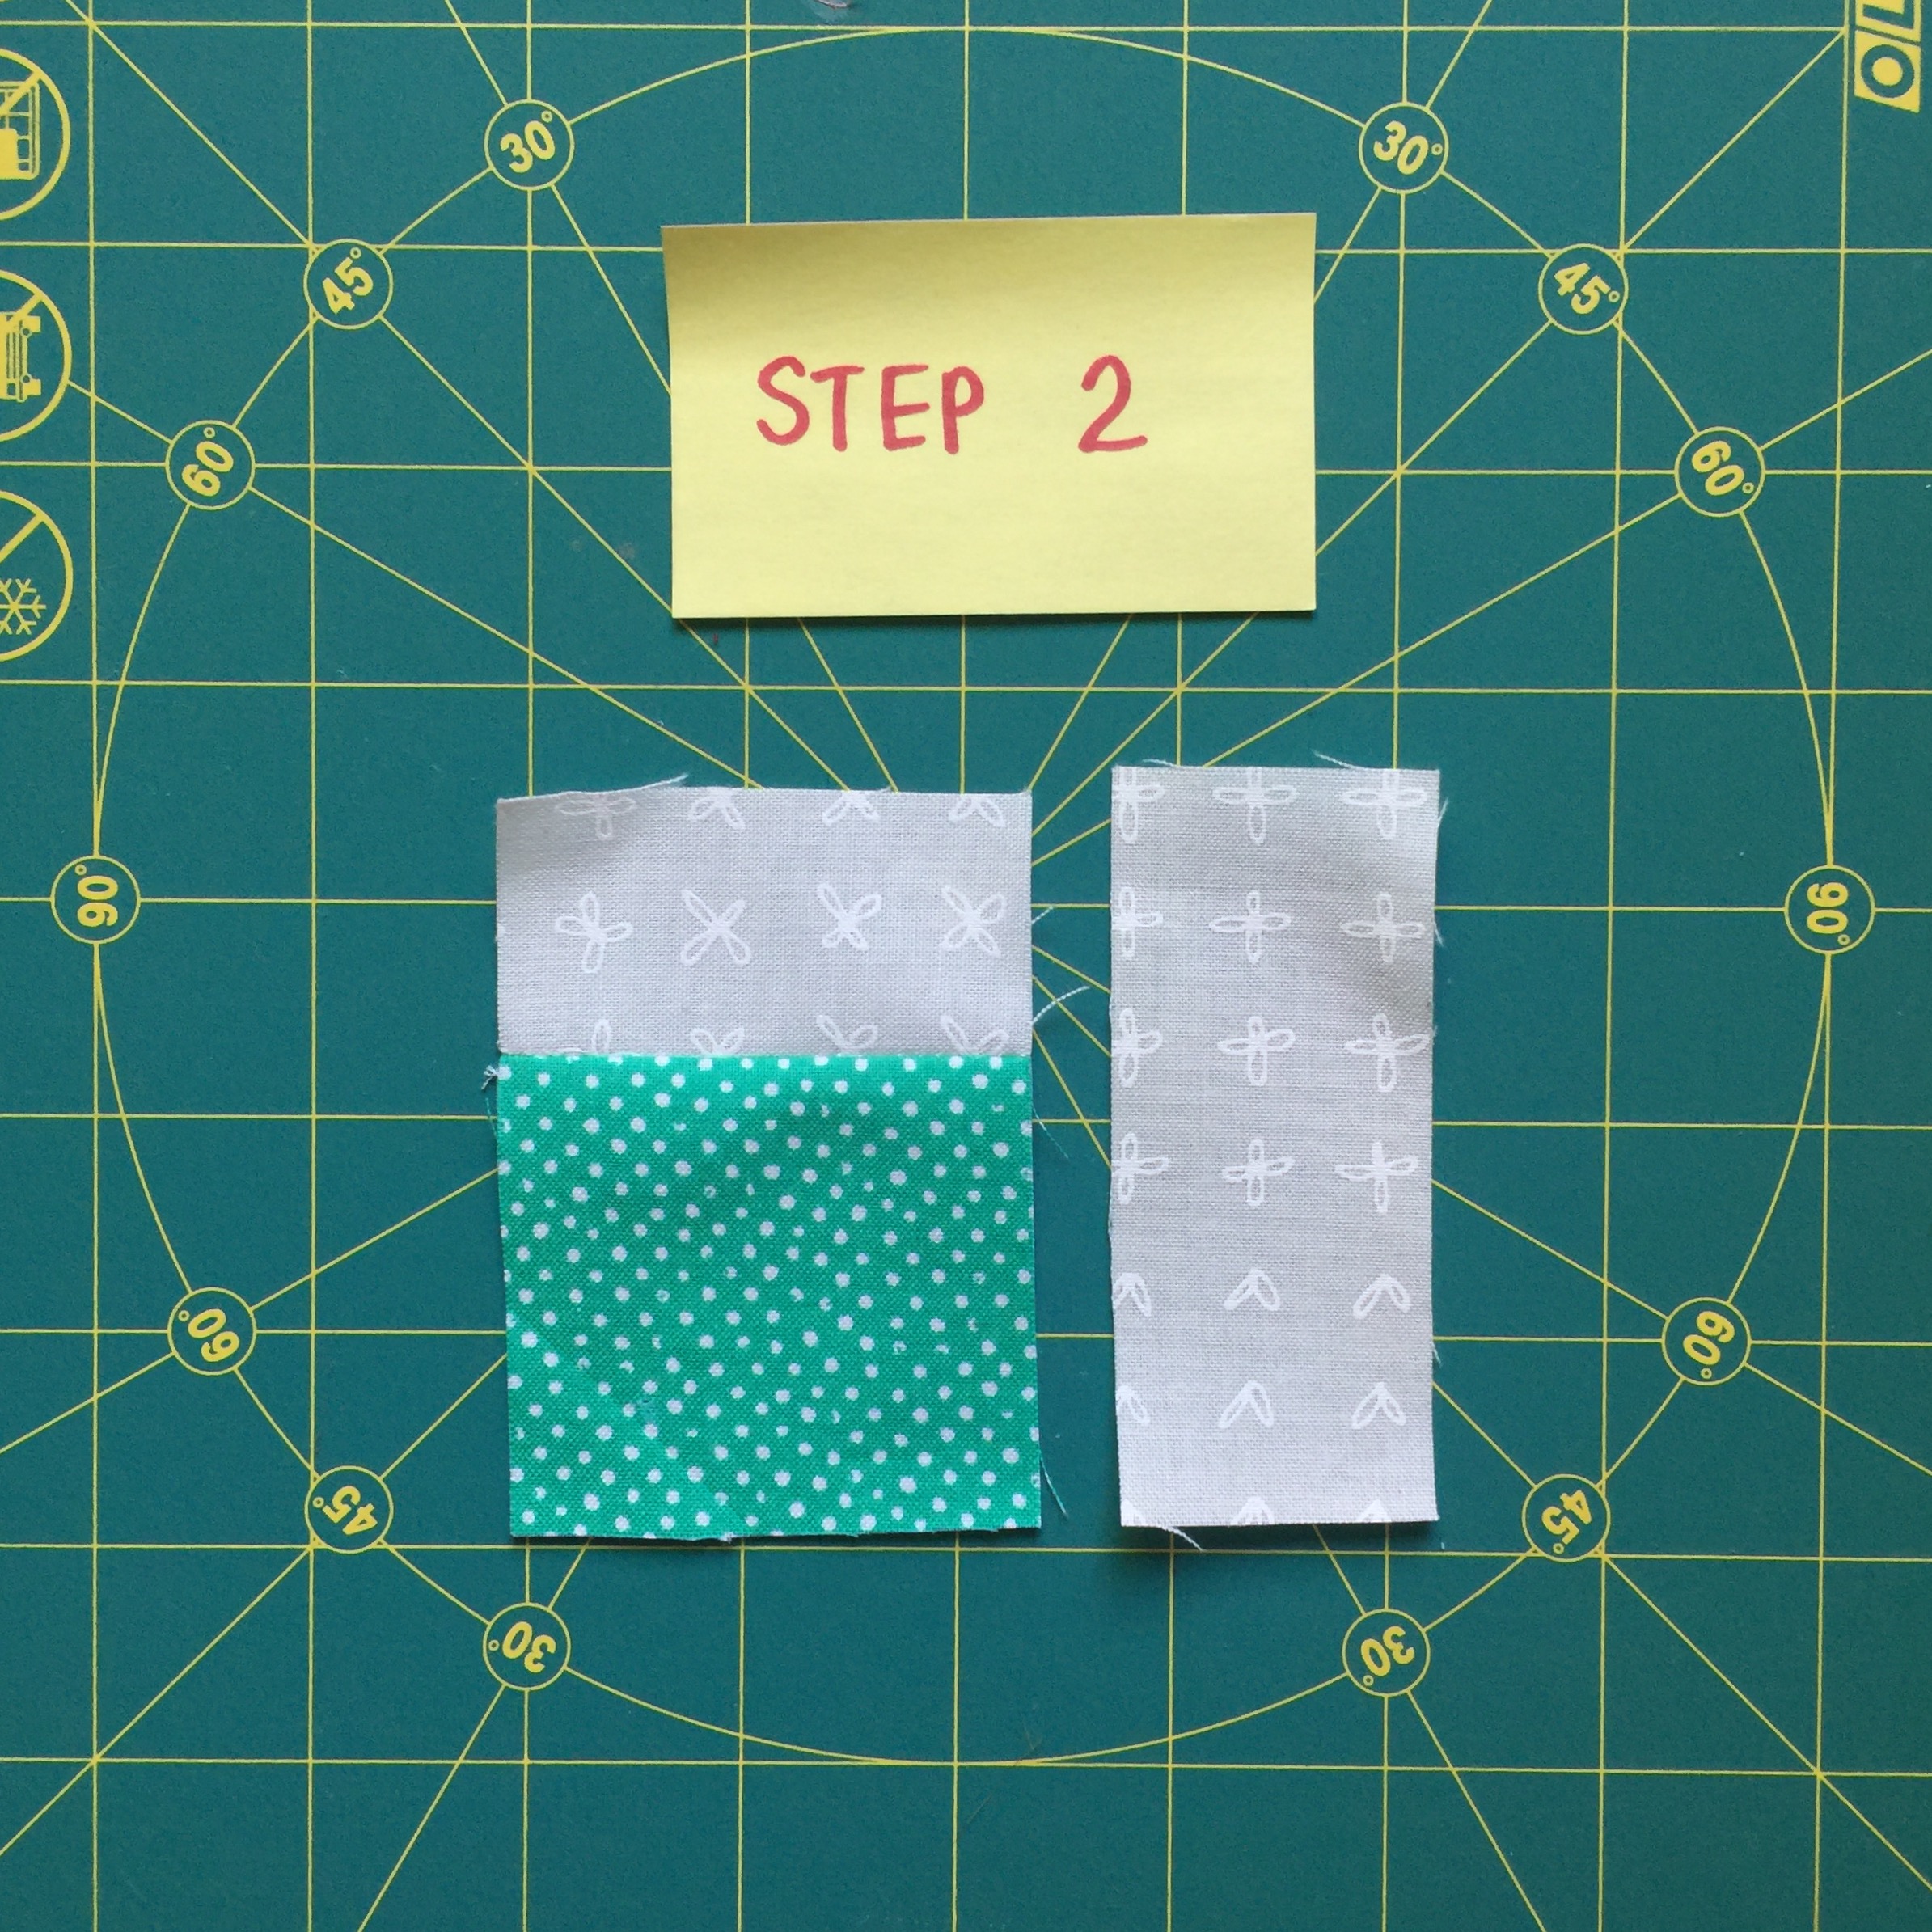
- Add the 1 ½ x 3 ½ white piece.
- Add the 2 ½ x 3 ½ print piece.
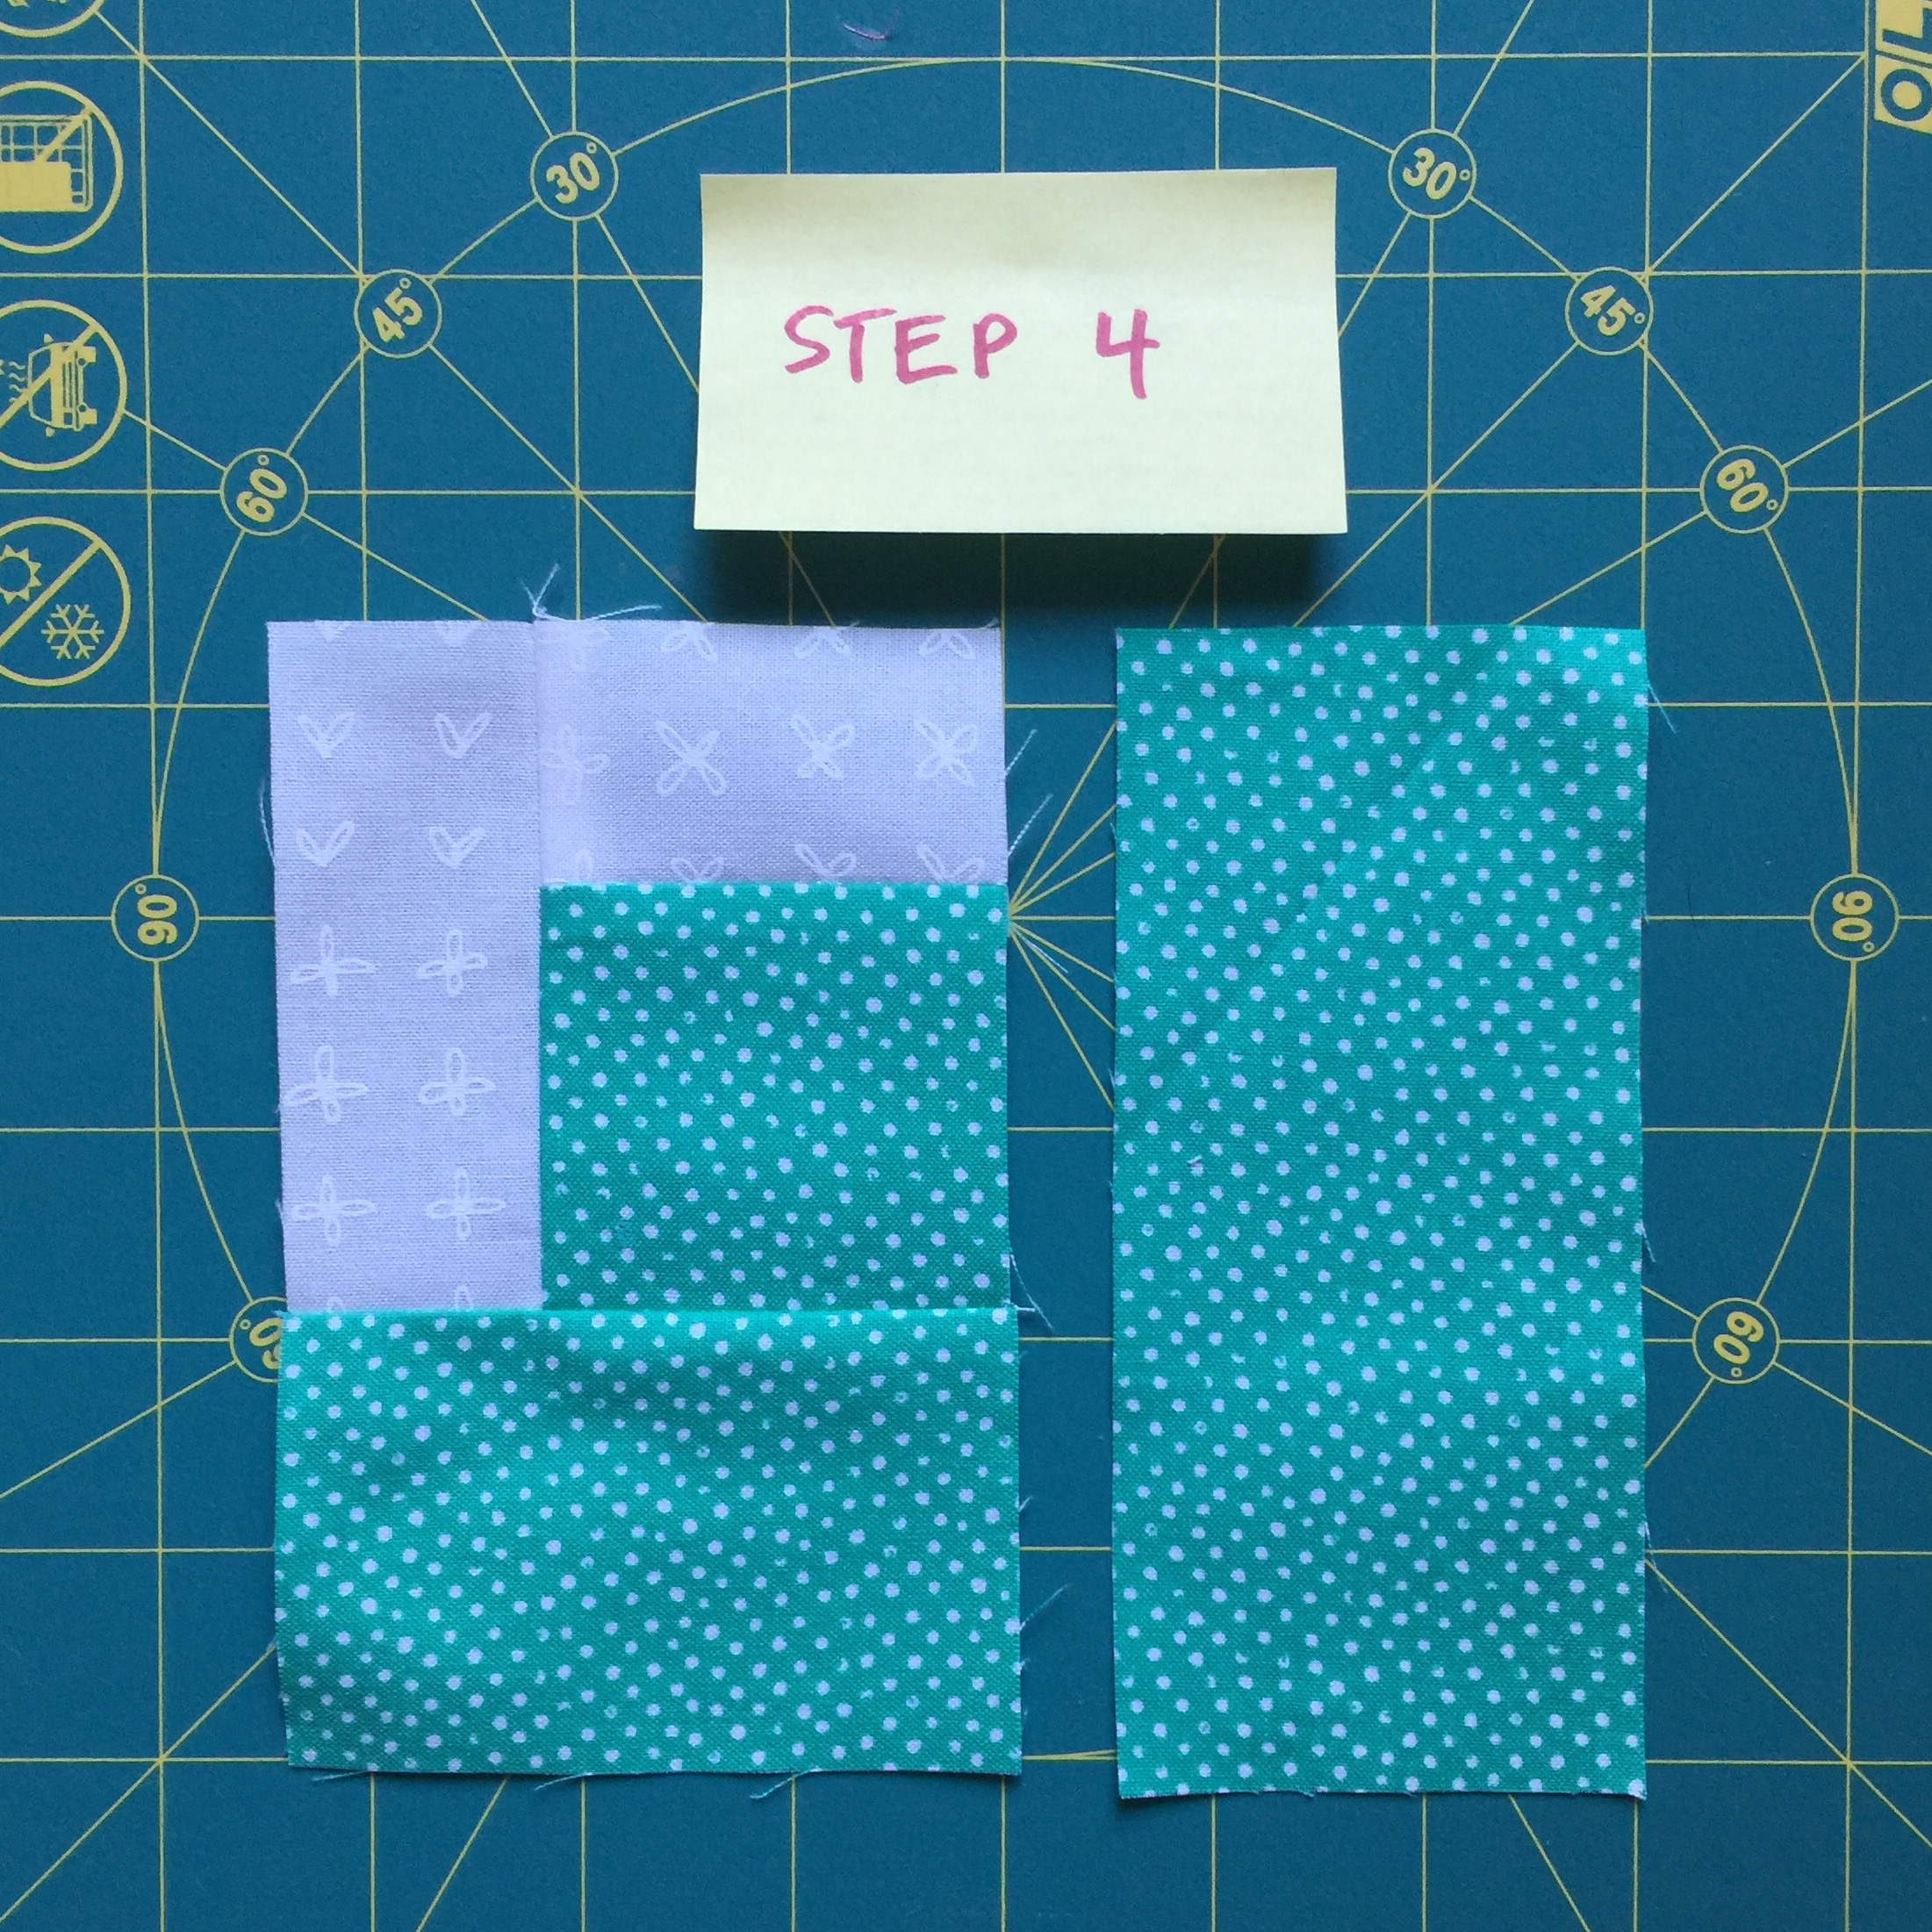
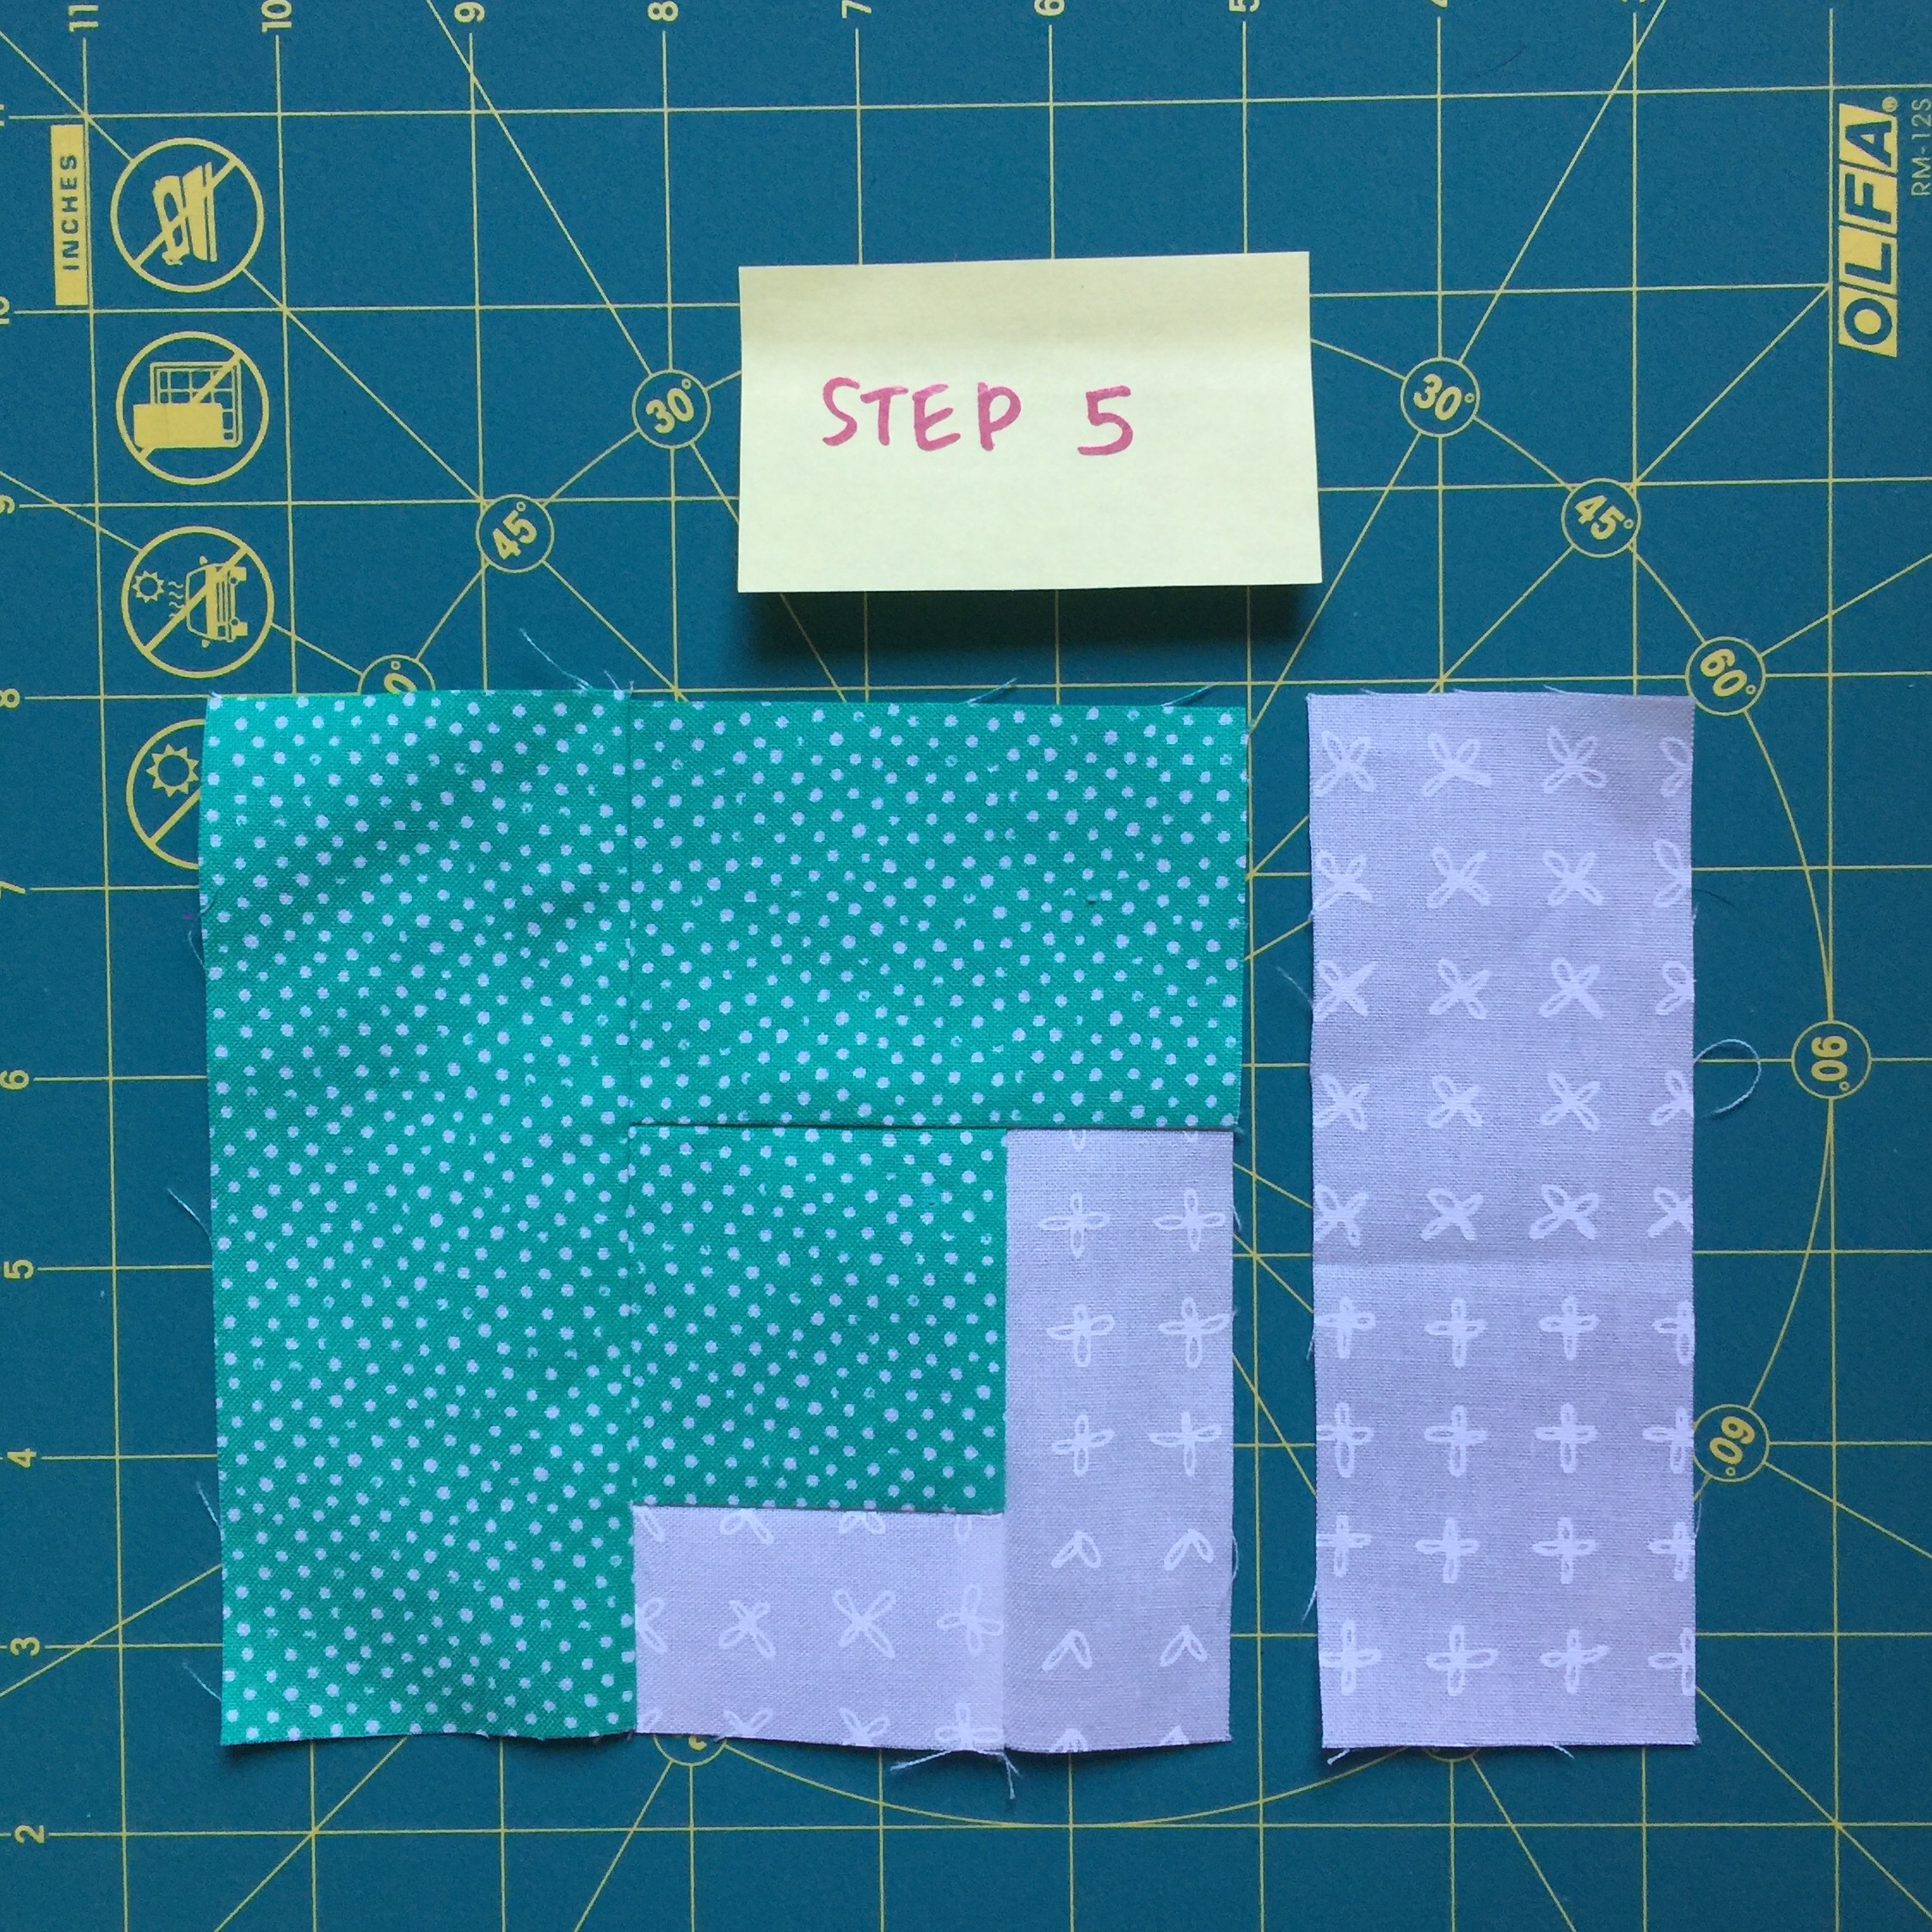
- Add the 2 ½ x 5 ½ print piece.
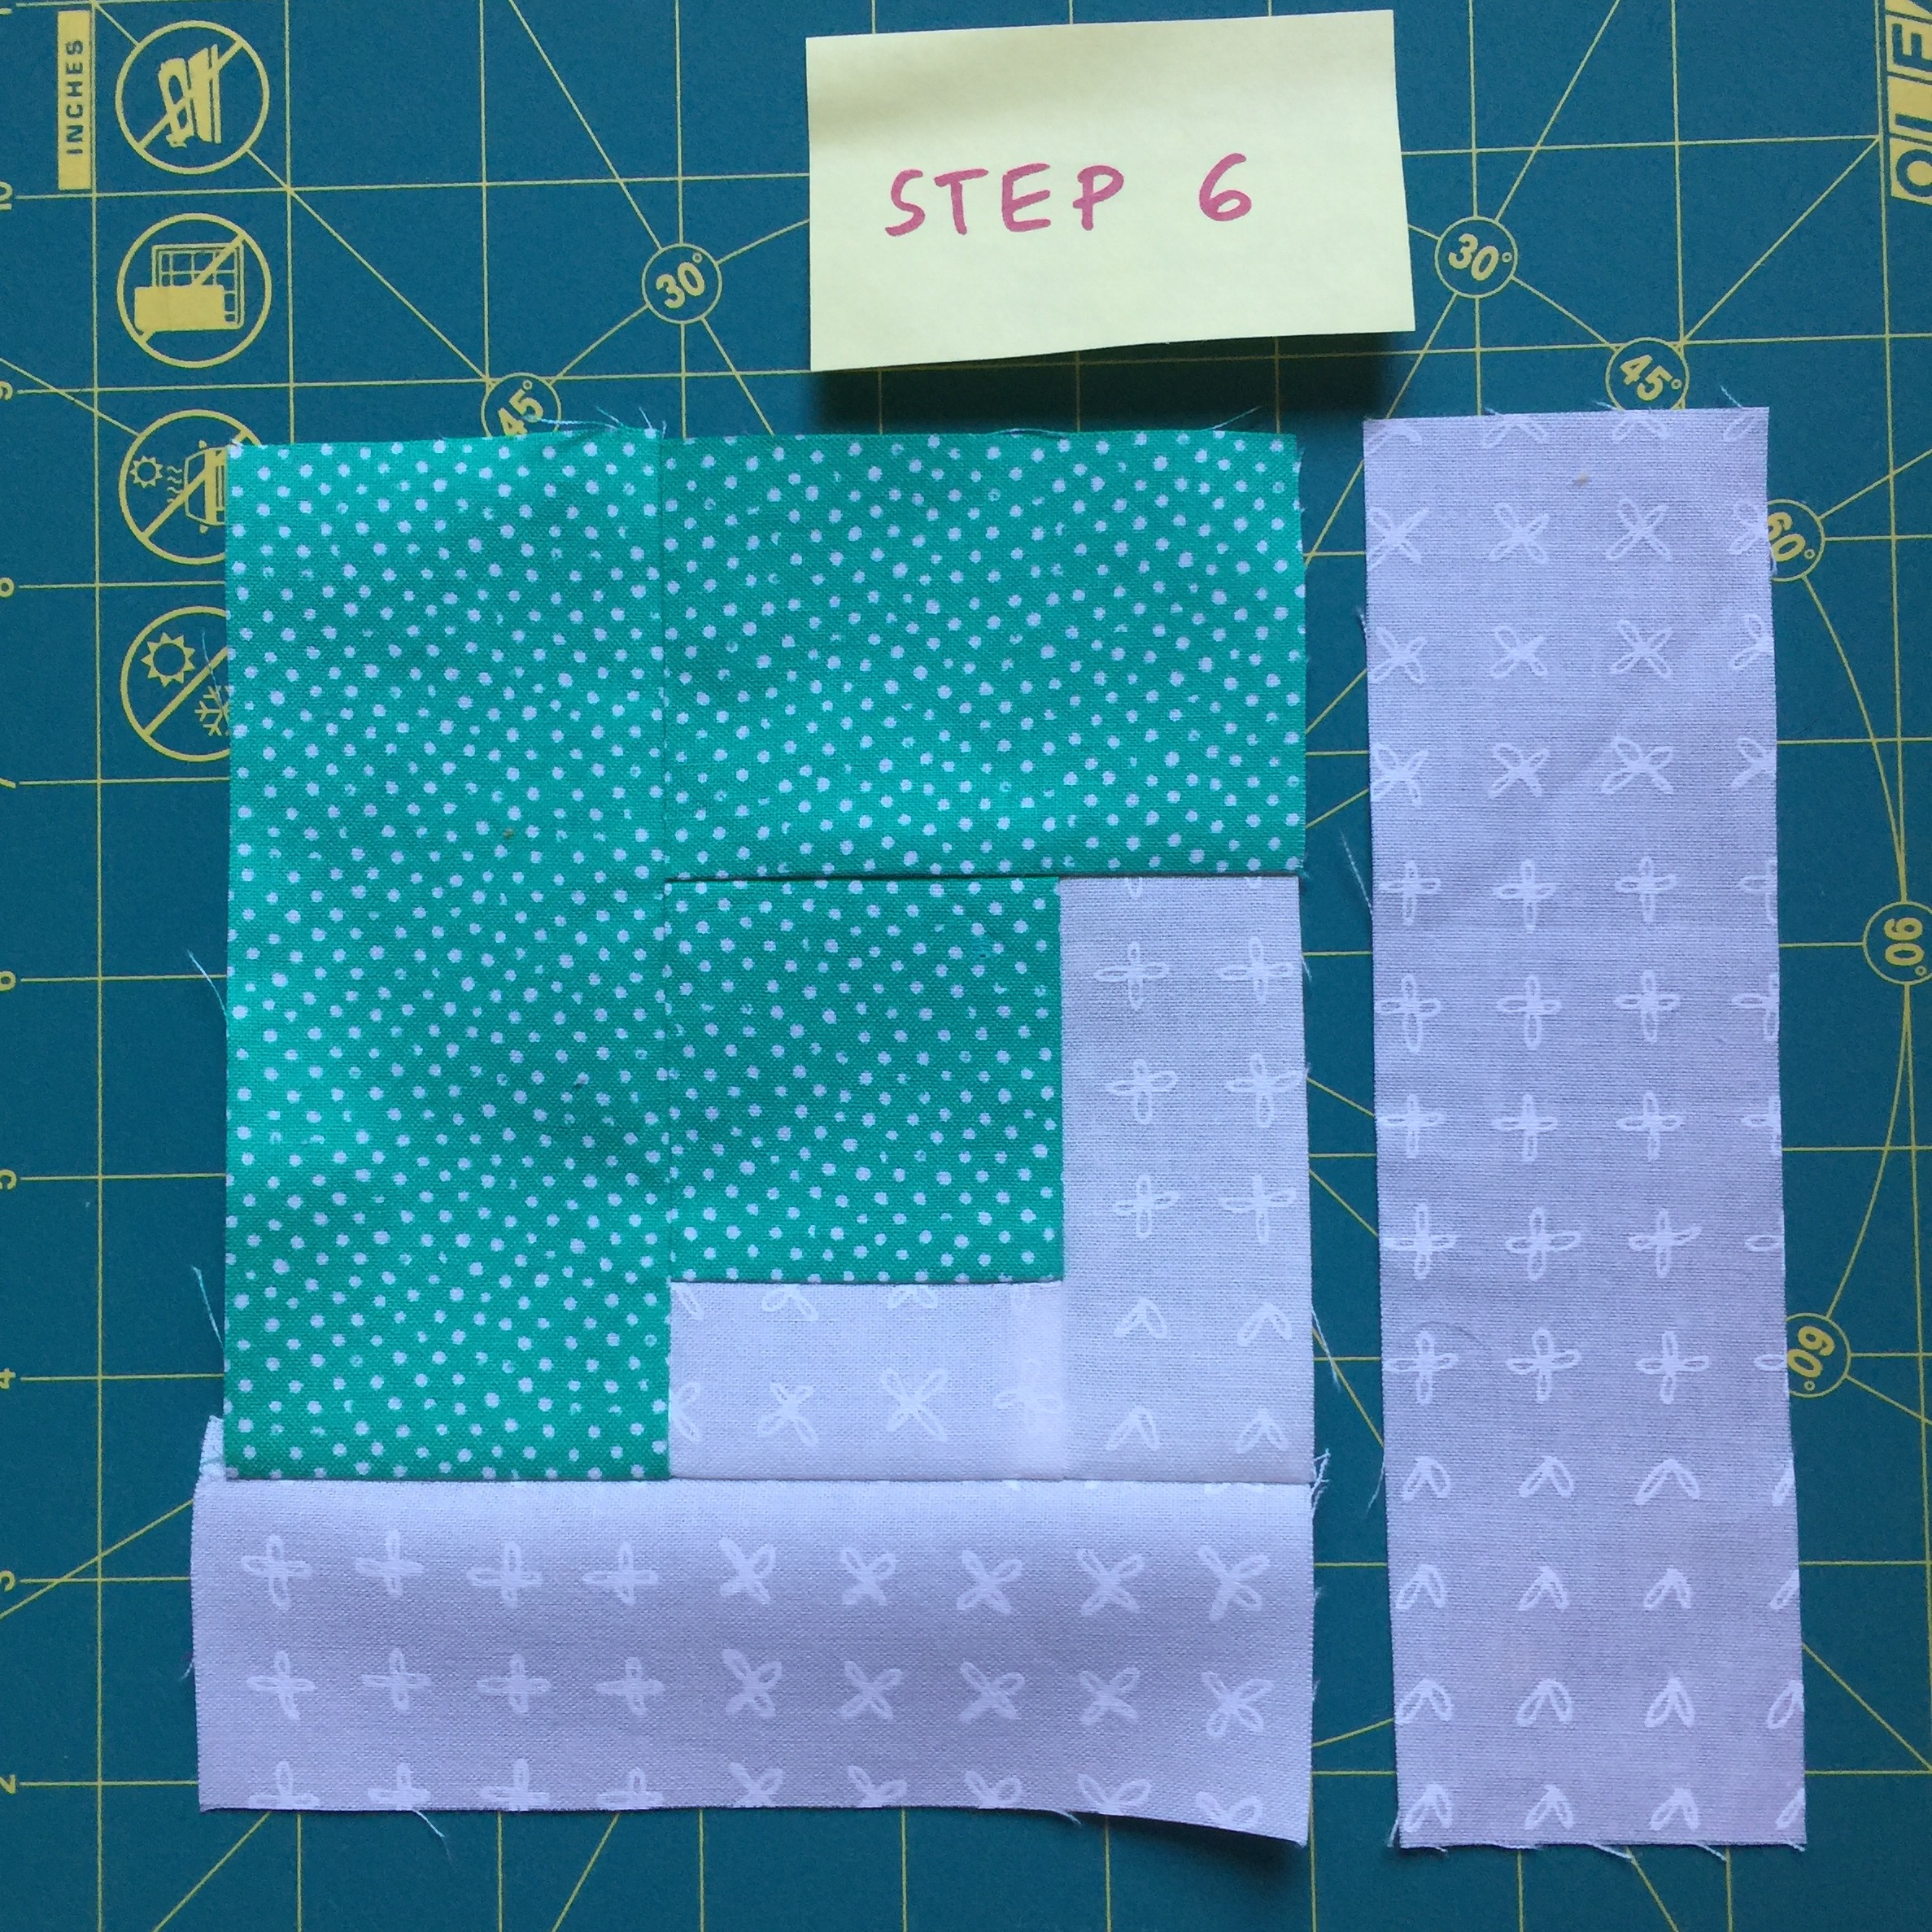
- Add the 2 x 5 ½ white piece.
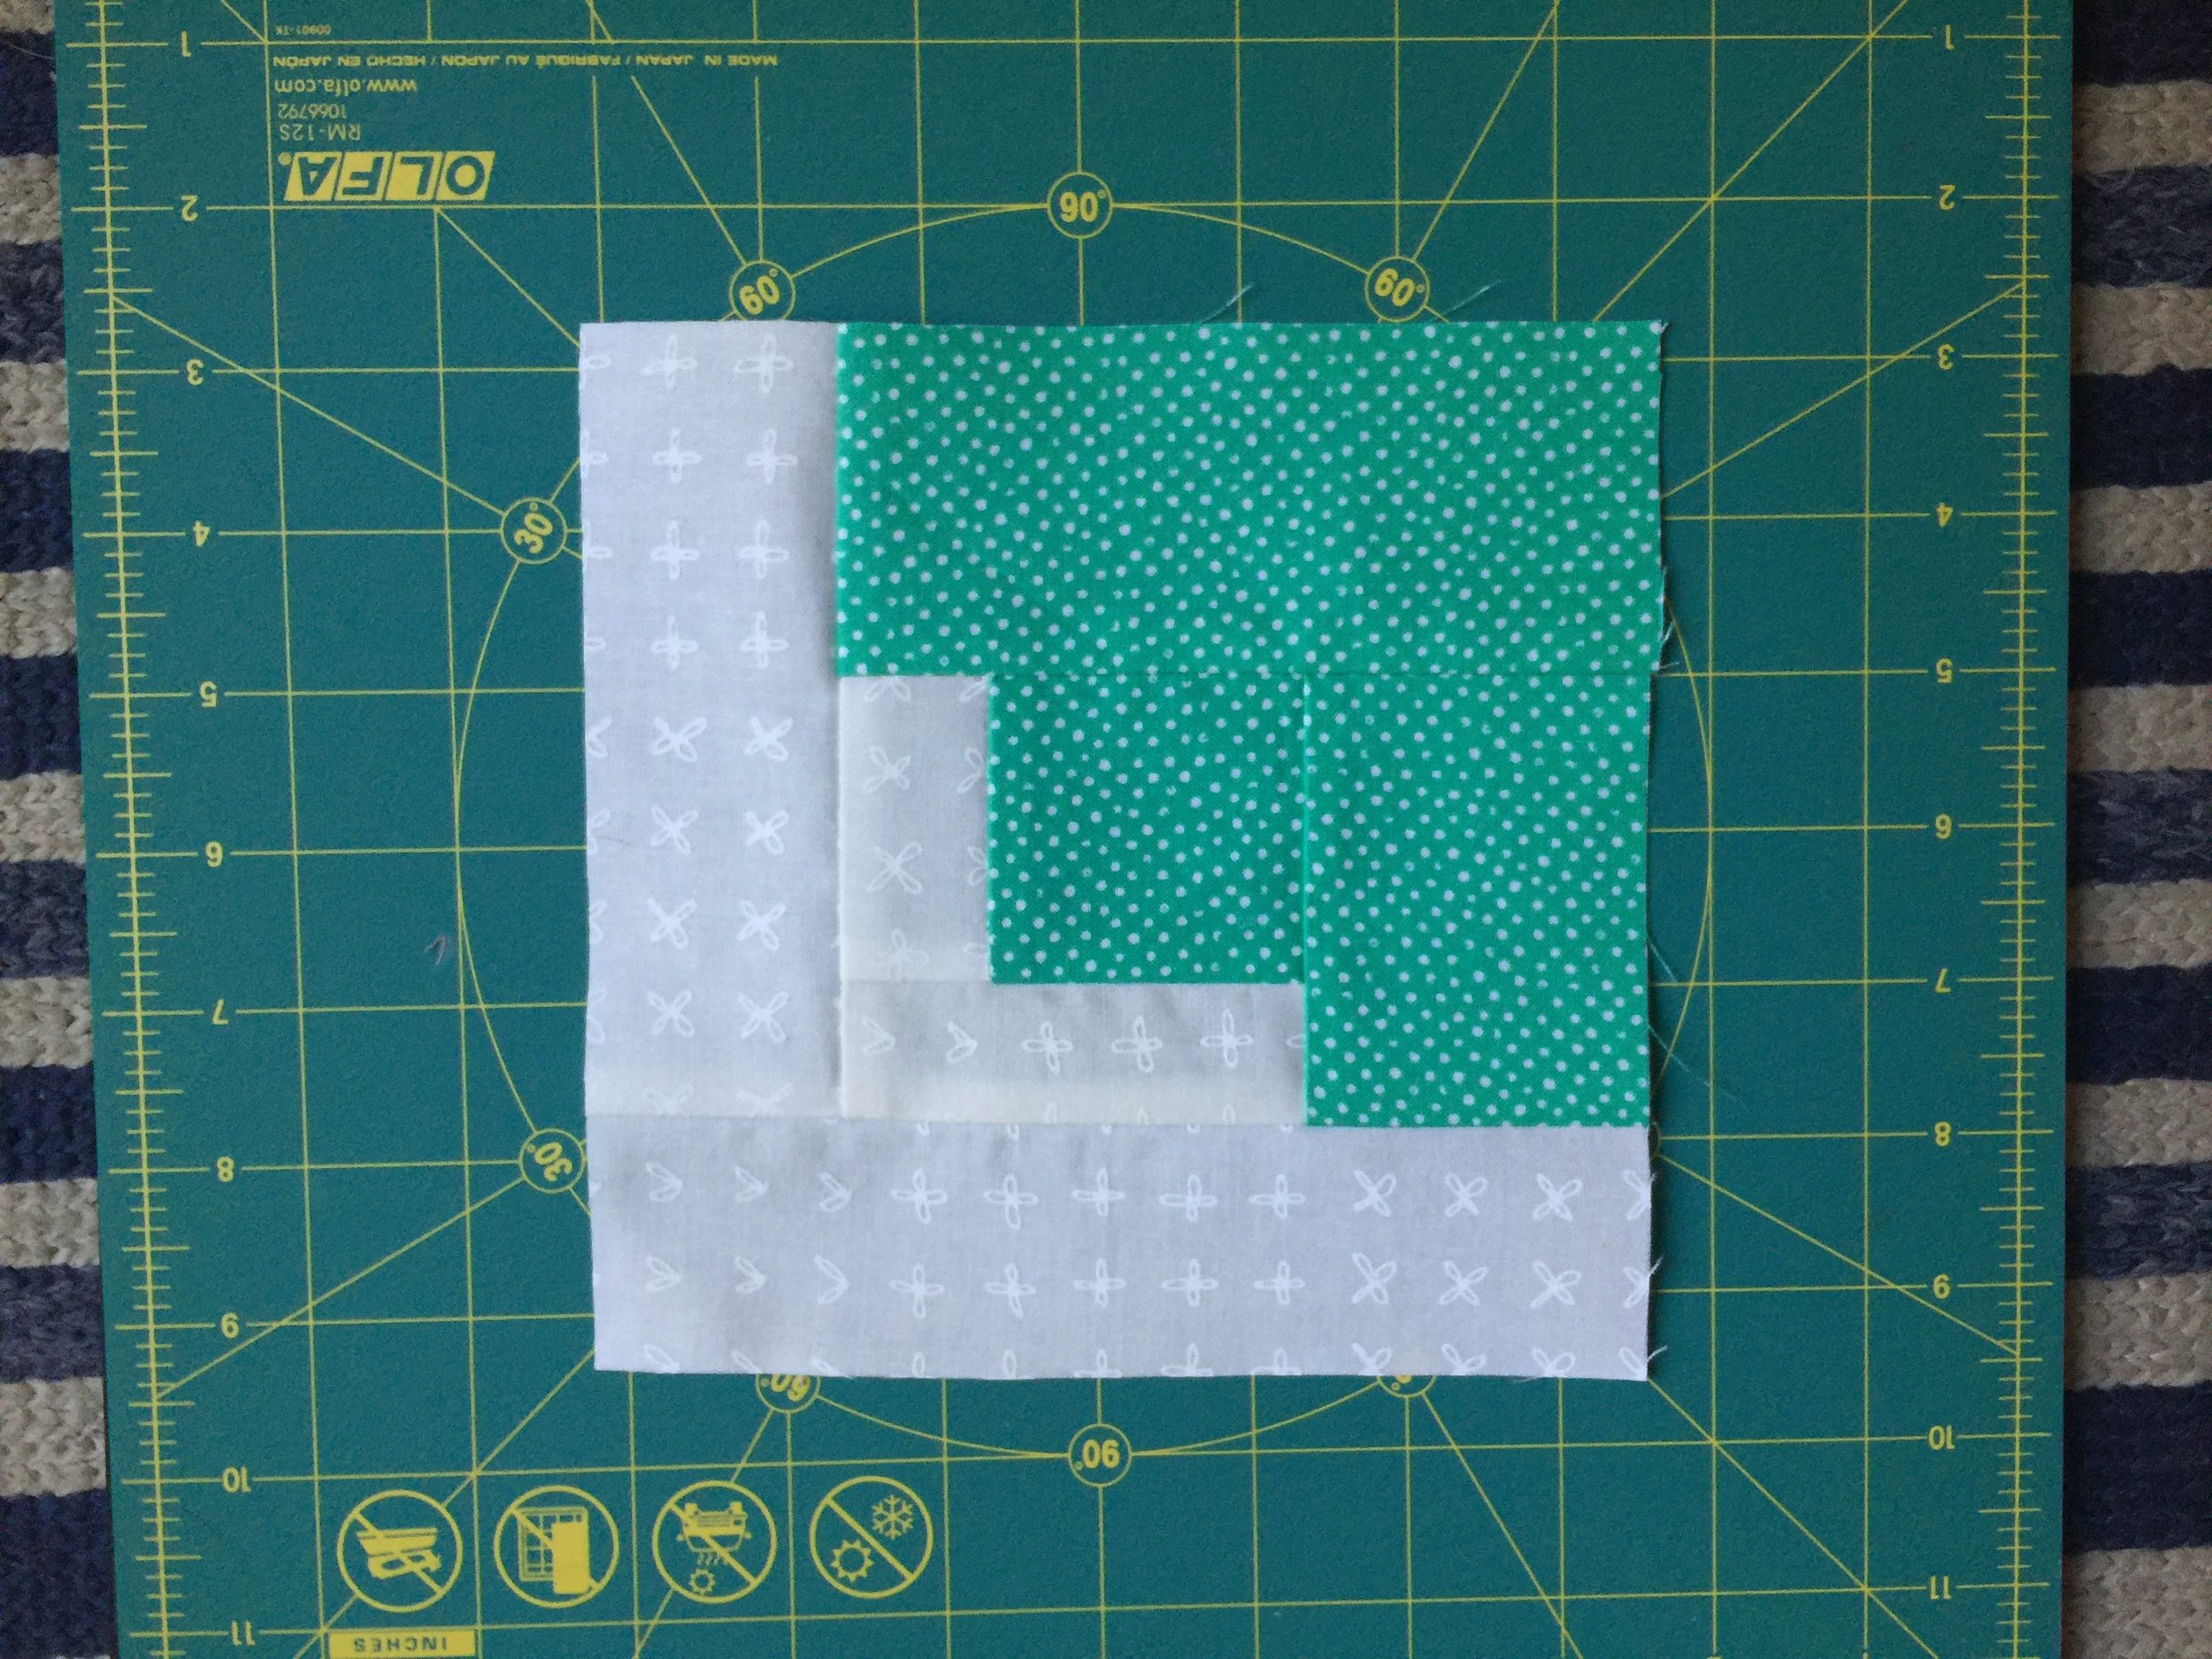
- Add the 2 x 7 white piece.
- One section done! Each section will measure around 6 ½ to 7 inches square.
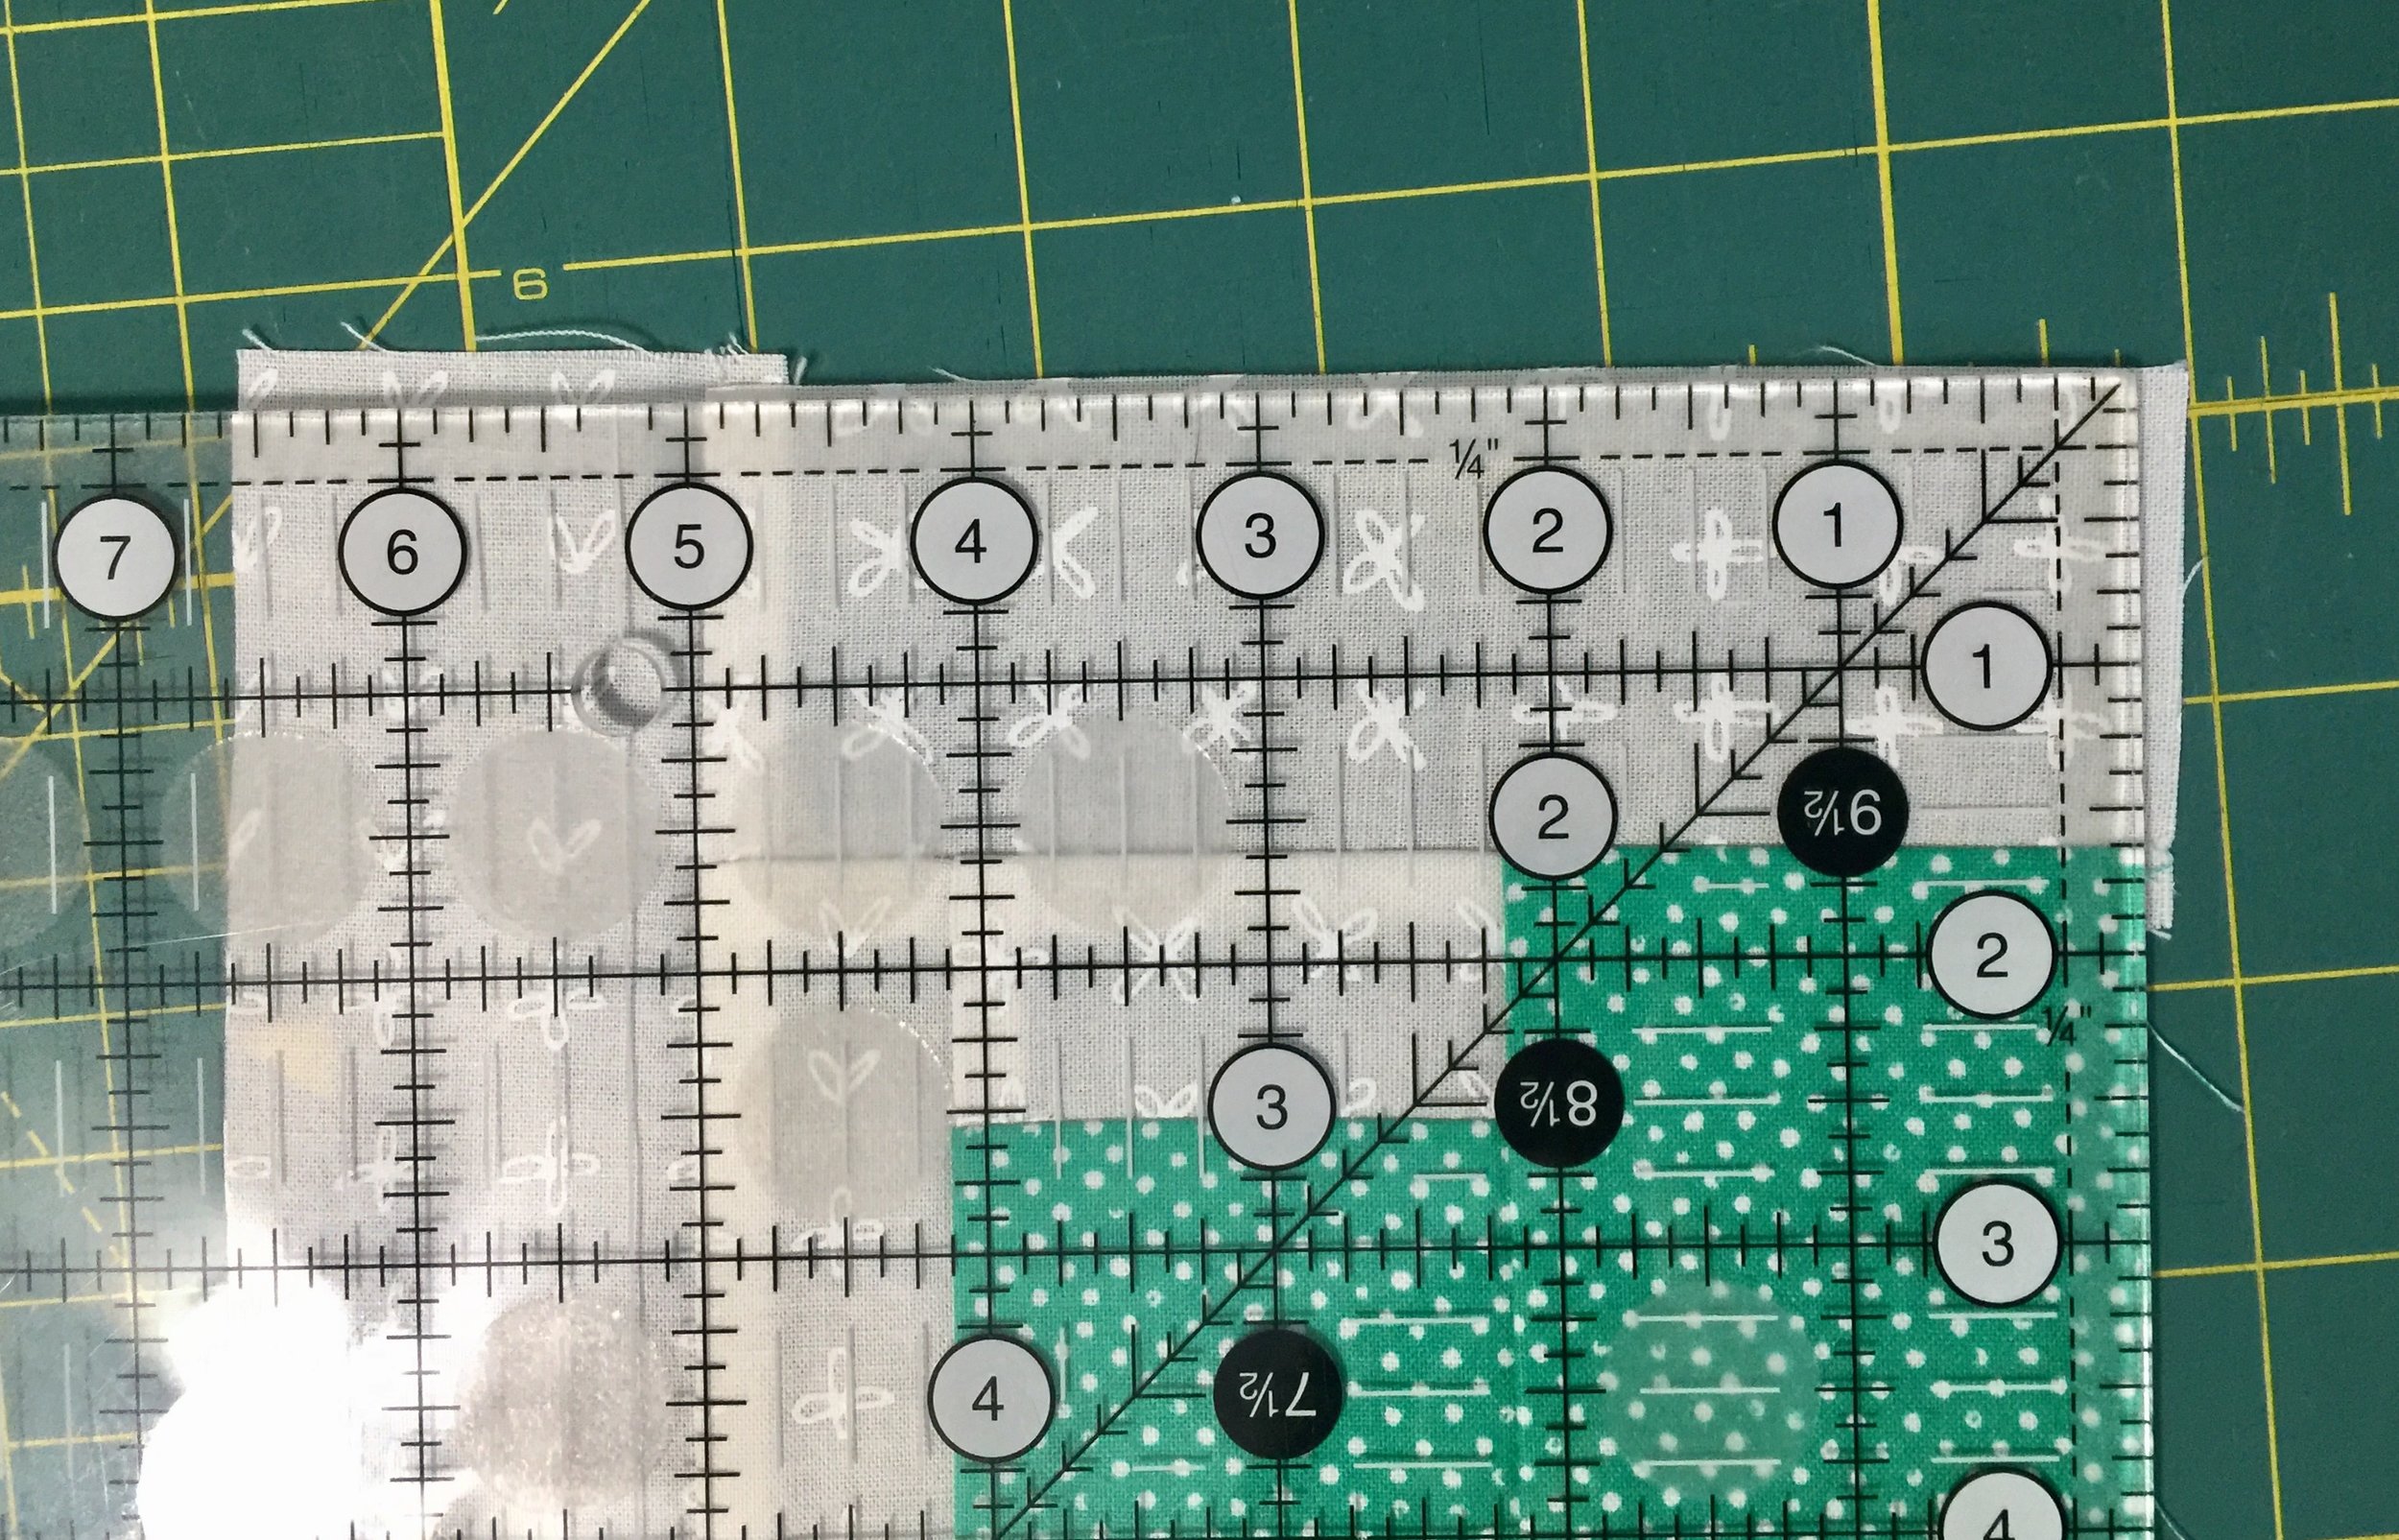
TIp: Trimming. We built some tolerance into this block, so as long as your section is at least 6 ½ inches on each side, don't worry about the exact size now -- you will be trimming at the end. If you have any uneven sides (see photo) you can chop them off now so that you have a four straight sides.
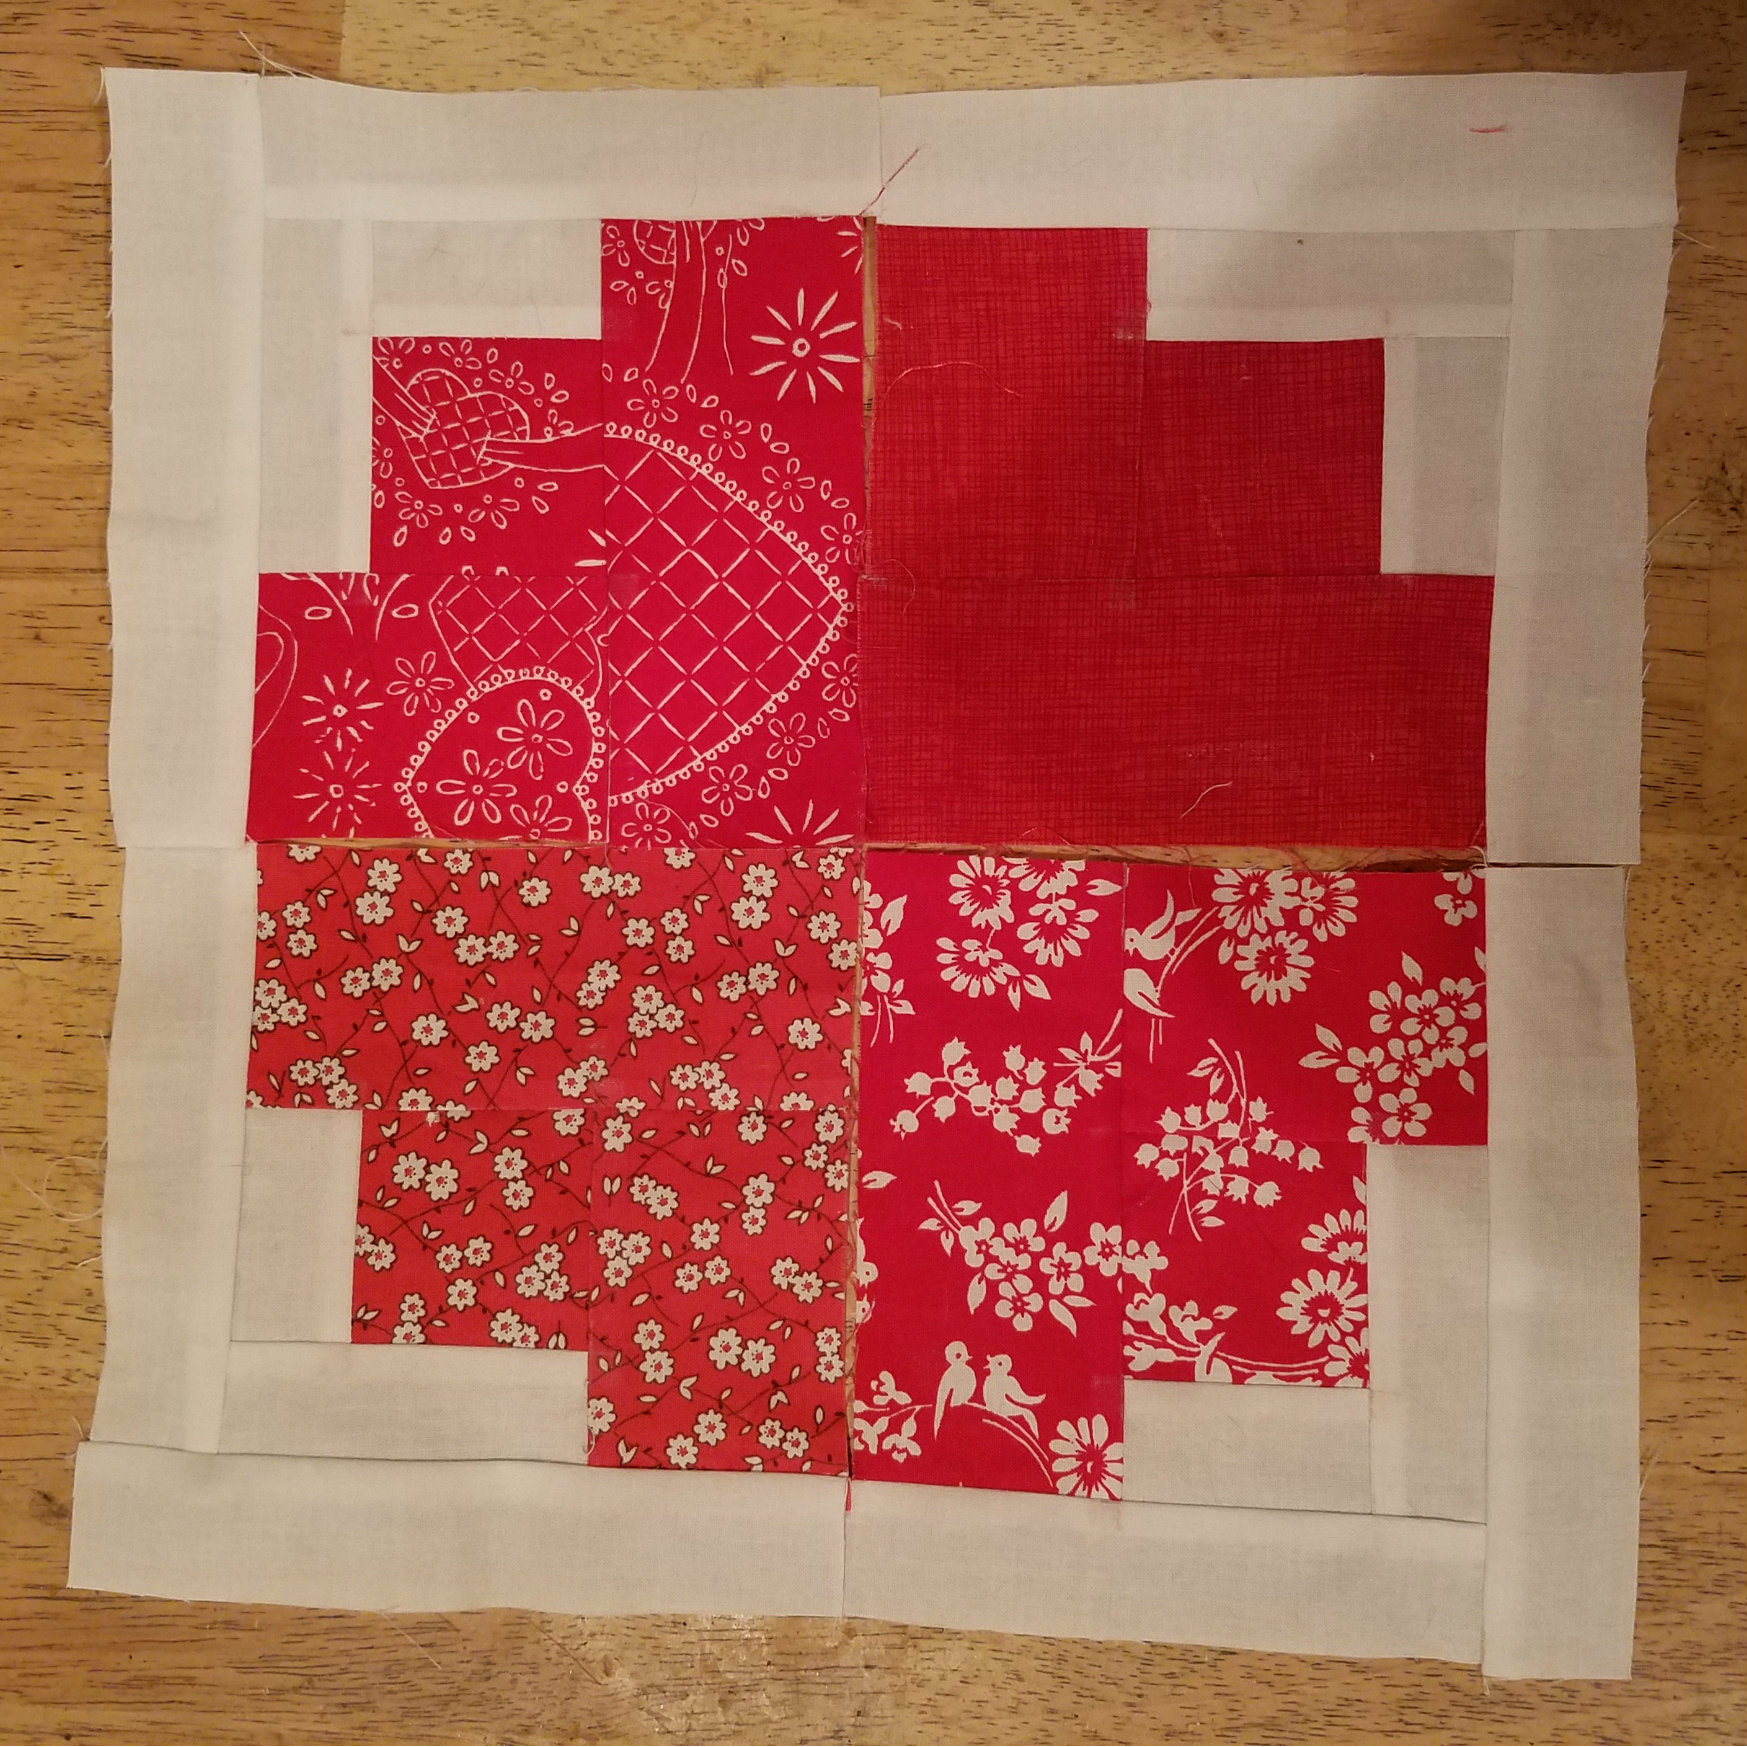
Now you are ready to put your four sections together. Arrange them in an order that pleases you, with the white border all around the outside of what will be your 12 inch block.
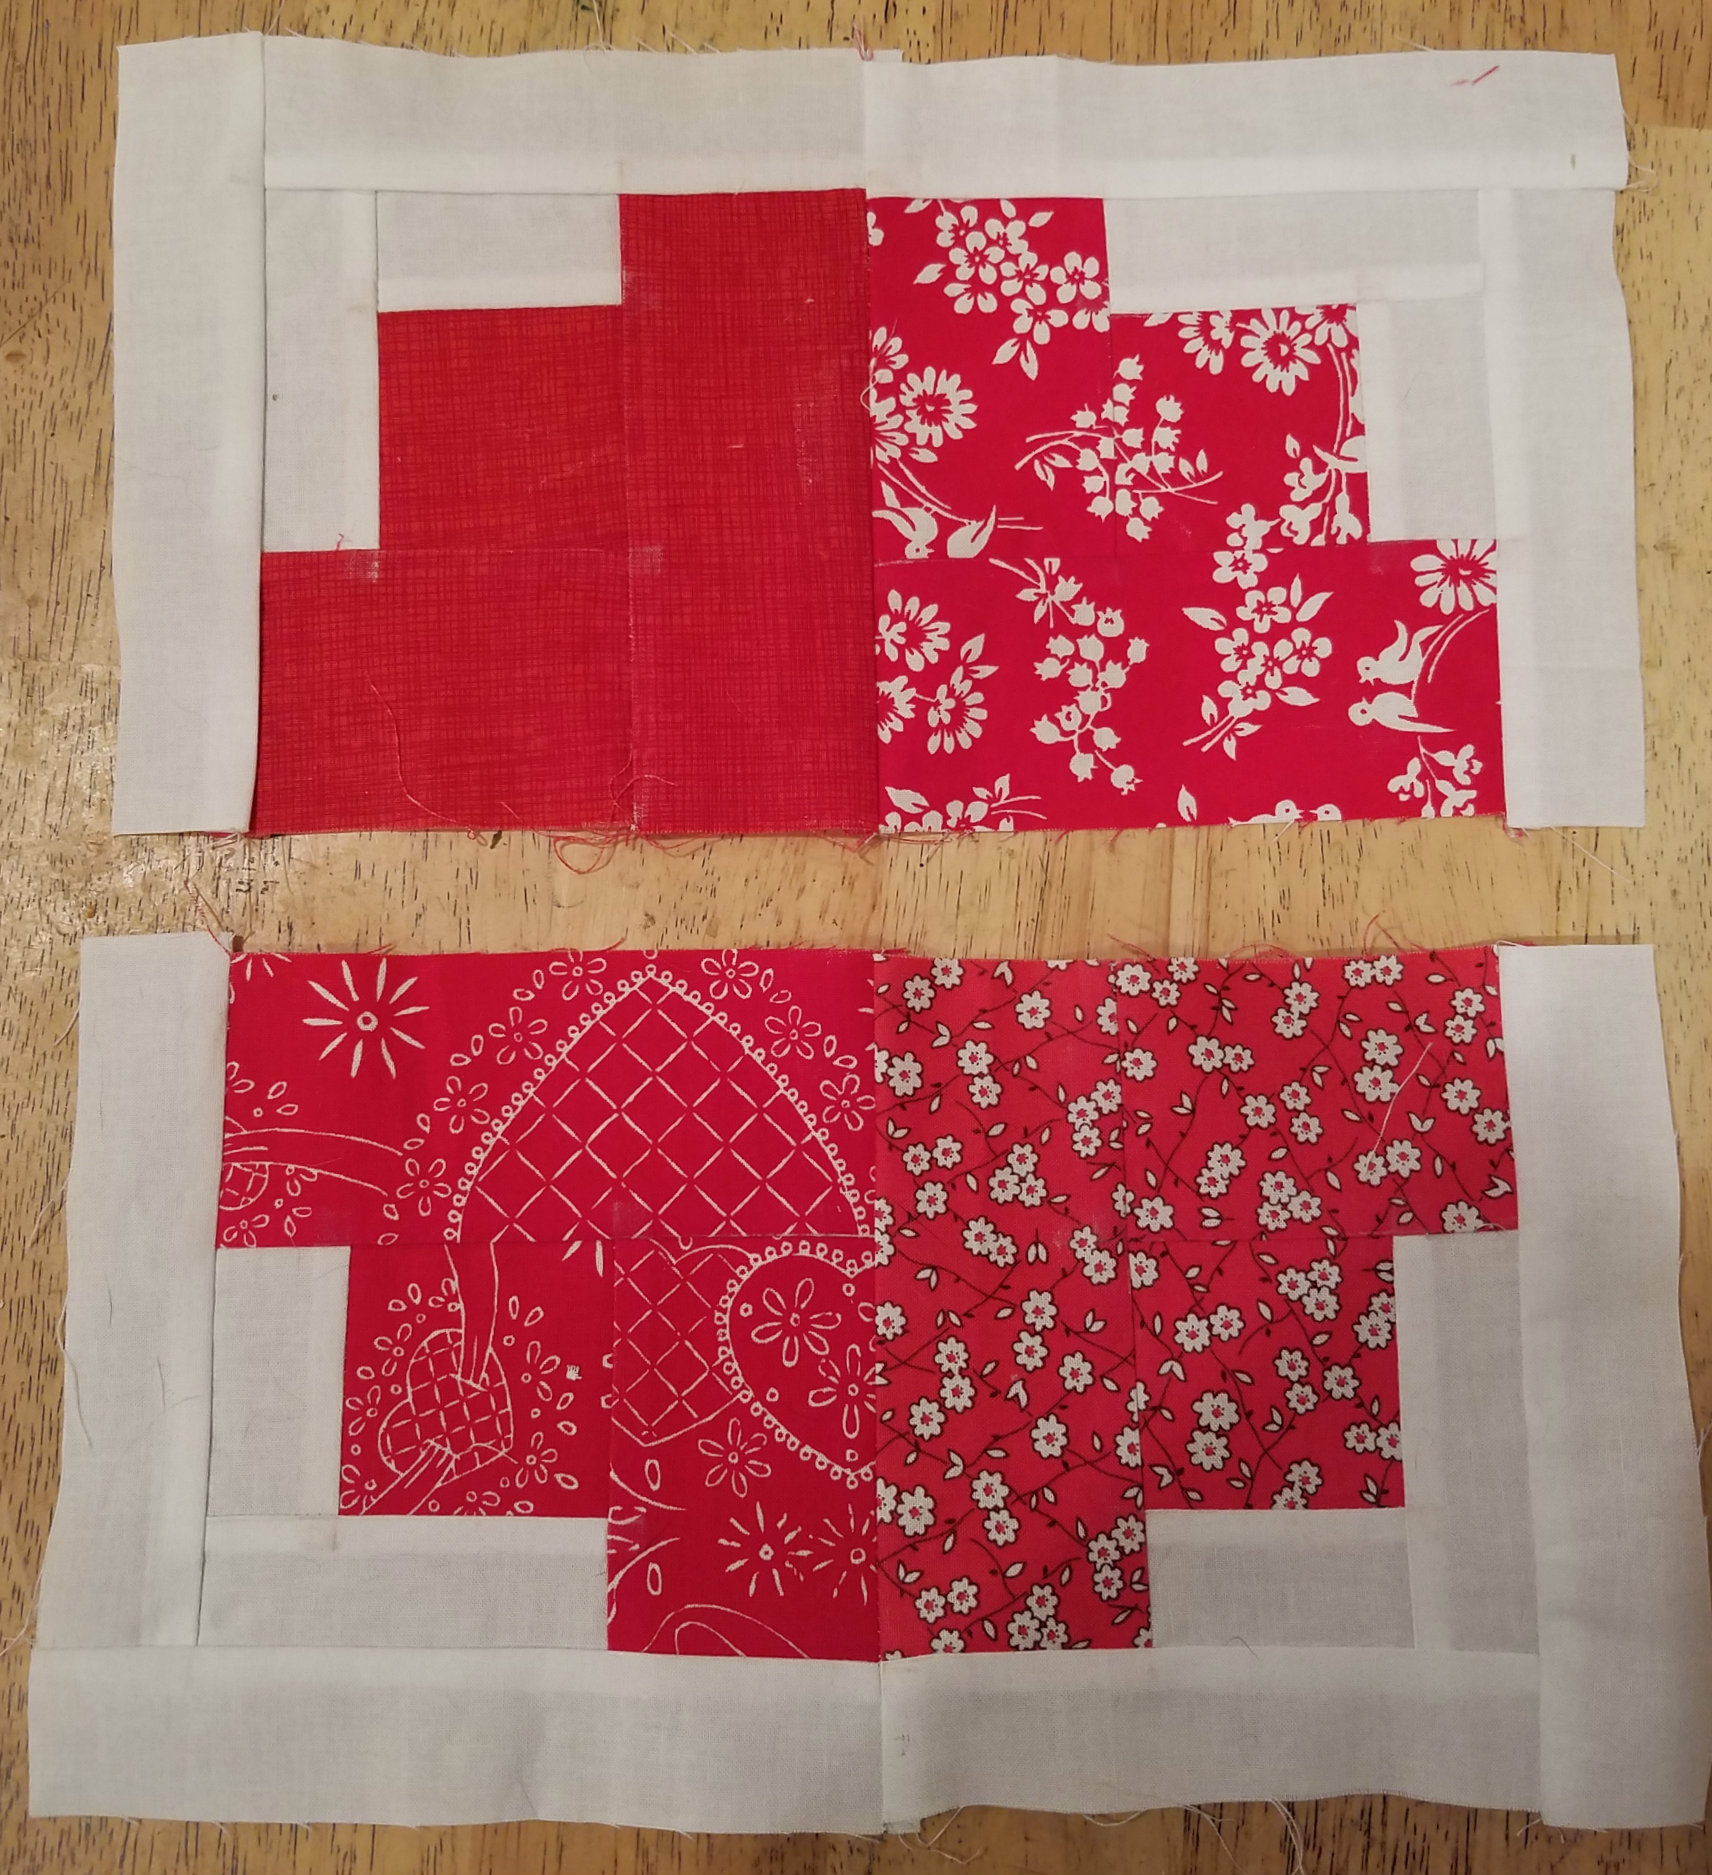
- Pin two sections together, taking care to line up the intersections of the color prints where they meet the white border. (Your block will be slightly oversized, so you will be able to trim the outside edge, which gives you some wiggle room.) Press your seams to one side.
- Repeat with the remaining two sections. Press your seams so they are the opposite of the last step.
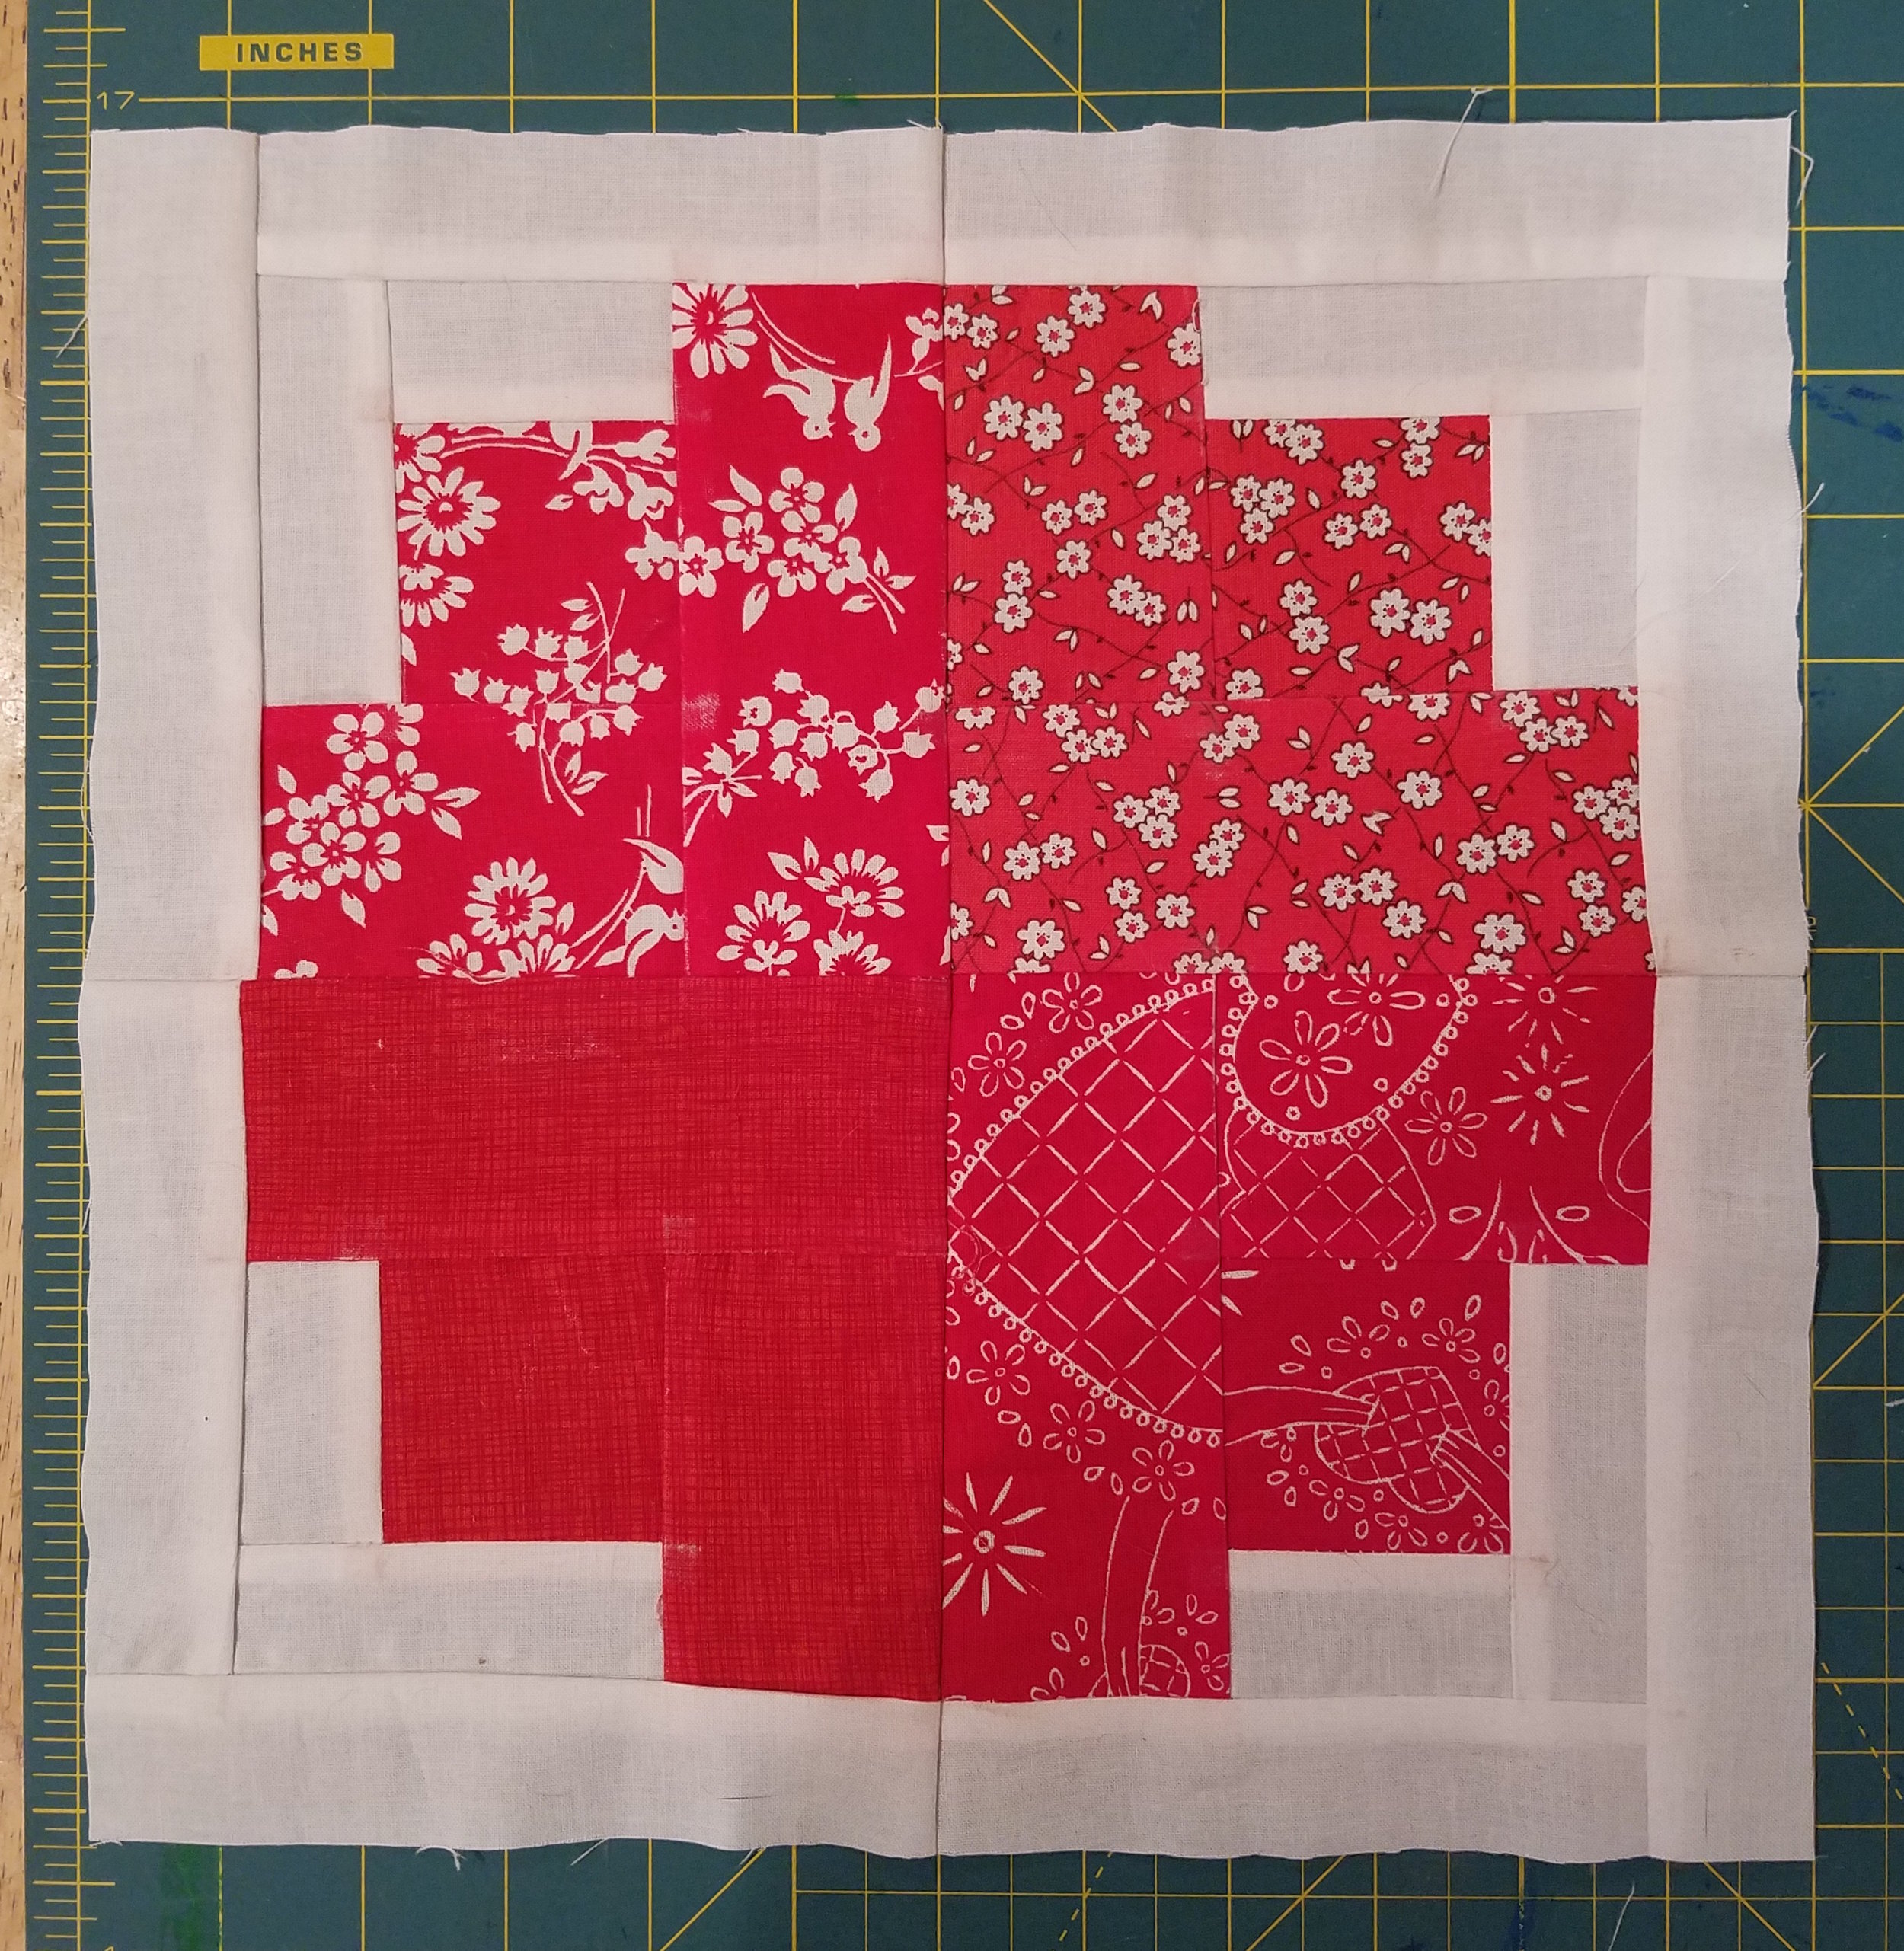
- Finally, pin the two halves together, nesting your seams so that you have a good intersection in the middle of the block, and again doing your best to match up the edges of the color prints where they meet the white border. Press your seams to one side.
- Press from the front, then trim to 12 ½ inches. Clip any stray threads, and you are done!
~ Allison Schnackenberg & Ivy Bagnall, BOM Council